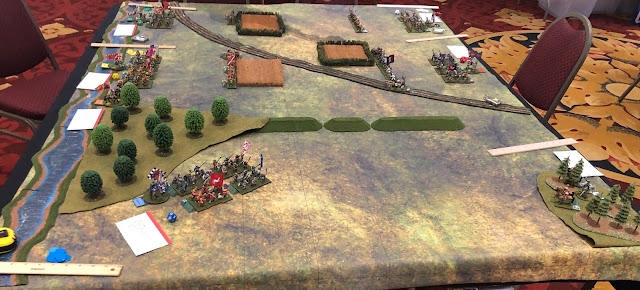
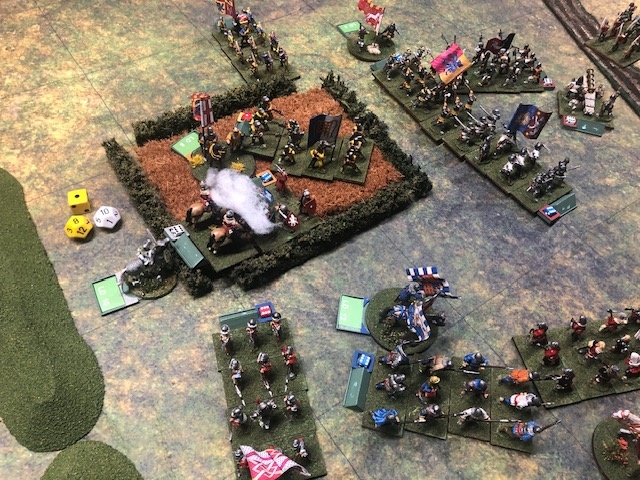
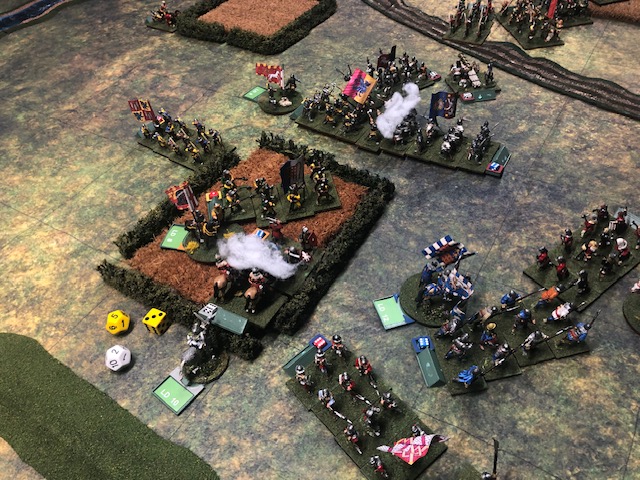
Overview of the set up - in the distance, the Lancastrians: left to right Somerset's Battle, Prince Edward (figurehead) with small company, Wenlock's Battle (cautious commander), Devon's Battle.
Yorkists, near, left to right: Scurrers (independent command/ambush, in woods), King Edward IV's Battle, off table behind him is Hasting's Battle, and finally Gloucester. The river Severn is behind the Lancastrians (in actuality, not quite this close, but good for visual effect, and I am using a slightly larger playin area than the scenario calls for. The Fields and hedges have no effect (although the ground in this area was noted to have been quite broken up.
First card is a Yorkist one (white).
That card turns out to be Flummoxed! That (bad) card makes all the subsequent cards of the same side in that run count as though they were turned by the OTHER side; Fortunately for York, there were no other Yorkist cards in the run. However, there follows a run of FIVE Lancastrian cards!
First is MOVE AND MELEE ONE BATTLE. Somerset cannot move until a Lancastrian EVENT card is turned, and Devon will not advance until Wenlock does, so Wenlock's command is the only realistic choice.
As a Cautious commander, Wenlock must roll a 7+ to Advance, and any movement is -2" until the first company of the Battle is engaged in melee.
A "4" doesn't do it!
2nd card is MOVE AND MELEE which could apply to all Battles.
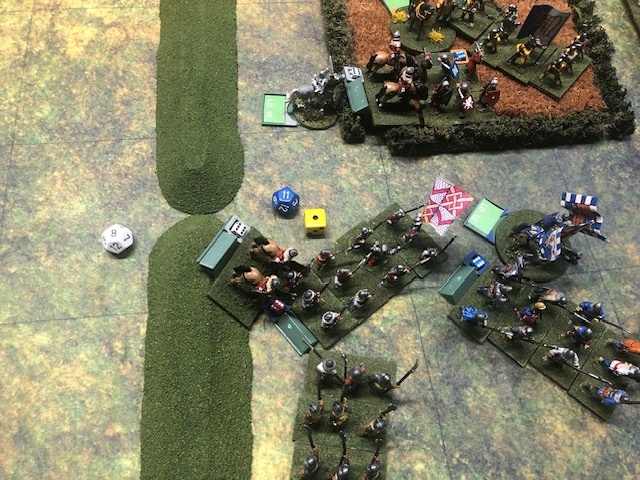
Wenlock fails to move, but Devon's archers move up to Stand Off distance.
The next card is a Lancastrian EVENT card; Somerset's command appears in the set on location, and may now start acting on subsequent cards.
The next card of the Lancastrian run is FIRE - STRENGTHEN RESOLVE
Having suffered no losses, the Lancastrian gun and Devon's archers shoot; the guns miss but the archers roll an 11, and thus hit! No Lancastrian companies have suffered hits yet, so there is no lost Resolve to strengthen.
The final card of the Lancastrian run is another MOVE AND MELEE card. This time Wenlock rolls a "7", and thus his command may advance 5".
Devon advances a bit as well.
Somerset's Battle creeps forwards; they cannot react to the hidden Scurrers until they are seen leaving the woods.
First Yorkist card of the run is MOVE AND MELEE. The Yorkists, with superior artillery and Archery, are content to hold their ground; Hastings can't move on yet anyway. The second card is MOVE AND MELEE ONE BATTLE. Ditto.
The third Yorkist card is MISSILE SUPPLY. Ugh!
Even though the Yorkist Archers have not "Shot" yet, they still must check, as it is presumed that they have been shooting all along even if the effect has not been assessed. On a D12 roll of 4 or less, their arrow supply has run low; one of Gloucester's Archers is so affected.
The company of Archers in question has moved behind its melee troops (Haven), ready to fight as secondary melee troops from here on.
Oops! One of Richard IV's Archers also finds itself low on arrows!
Righto! Move to Reserve, lads!
The next run is three cards for the Lancastrians. The first is MILLING AROUND, where nothing whatsoever happens! The second is FLABBERGASTED. This card modifies the none that follows, making it better in some way. The following card is MISSILE SUPPLY. We have just seen what that can go; but with the Flabbergasted effect, it acts like a FIRE effect instead!
Devon's pesky archers hit again; each such hit costs the enemy Battle 1 Battle Morale Point (the colored chip). Wenlock's Archers both miss, but one of them rolls a "1"; this has the same effect as failing a Missile Supply check, and the company "Seeks Safety" and is stationed in Reserve behind the melee troops of its Battle.
"Turnabout is only fair play, m' Lord!" The Yorkist 2 card run results in a FLABBERGASTED MOVE AND MELEE. By Battle, this allows the companies to ither add 3" to their movement, OR a +1 in Melee in the first round of all combats for the Battle. The decision must be made *before* the D12 is rolled for movement.
Gloucester choose the +3; he moves his Archers in the front back, uses 3" to "Pivot" the newly reserved Archers, and then move them 5". His plan is to get them on the right flank of Devon's advancing Battle.
Richard IV's Battle rolls a 1! No Move is allowed, even with the potential 3" bonus!
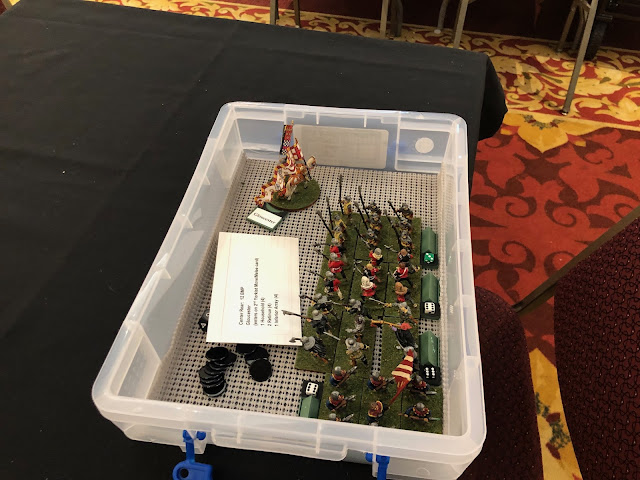
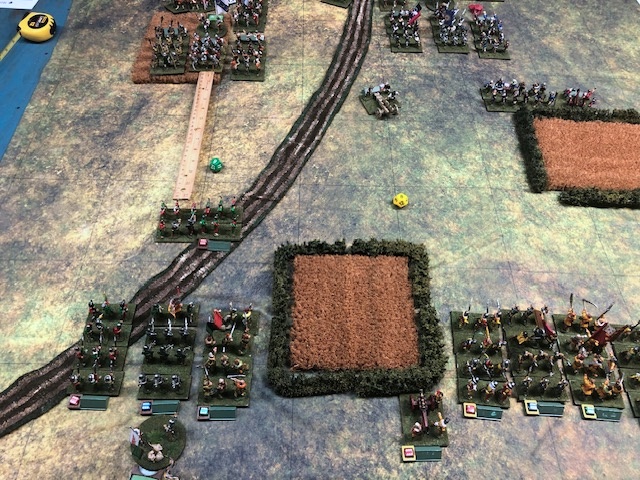
Hasting's Battle may now enter, and could move up to 13"; however, there is little room for them to deploy behind Richard's Battle. "Oi, Eddie Boy, move yer bloomin' arse!"
Position in the Center after Hasting's entry.
2 Lancastrian cards follow; the FLUMMOXED card results in the the following card(s) becoming Yorkist.
"About bloody time!", but Gloucester's Archers fail to have any discernible effect on Devon's men
Edward IV's men do somewhat better.. both artillery units and his Archers all hit!
They all strike the target, which suffers the loss of three Resolve Points; that is the maximum a company of Archers can take, so the unit is Destroyed, and removed from play. Of course, three Battle Morale Points are also lost.
Odds Bodkins! The first of 2 Yorkist cards is another FIRE - STRENGTHEN RESOLVE.
Gloucester's remaining Archer unit rolls a "1" while shooting, and moves behind its Haven into reserve, in deep formation.
King Edward IV's Archers are now too far from the enemy to fire, but his two artillery units are not; one misses, but the other hits on a natural 12 - companies hit by Artillery must test Resolve; in this case the target unit passes with a "3". Gloucester's companies that have suffered losses try to STRENGTHEN RESOLVE, but they fail to do so.
The next Yorkist card was MILLING AROUND, followed by a run of two Lancastrian cards. The first is MOVE AND MELEE.
Somerset's Battle advances. It must continue straight until either the Scurrers in the woods reveal themselves by leaving same, or they crest the ridge. The rest of the Yorkist forces may not react to Somerset's advance until his Battle crests the ridge.
Bereft of Archers, and facing superior Artillery, Wenlock's Battle moves up.
Prince Edward and his small company of bodyguards (Household) move up to maintain Proximity to Wenlock's Battle.
The rest of Devon's Battle advances as well.
The second Lancastrian card is END TURN. When the second (in this case, Yorkist) END TURN card is turned, the Turn is over and the deck is shuffled. A run of three Yorkist cards follows.
Edward IV's guns both shoot, but at this range they miss.
Gloucester's two Archer companies that have lost Resolve both test to Strengthen it. The "2" fails, but the "12" succeeds; the casualty die is reset to "6" (zero losses). However, no Battle Morale points are regained.
"Second verse, same as the first!"
Edward's artillery is making itself a General Nuisance to Wenlock's men, and scores another hit; the target passes its Resolve Test with ease this time.
The only remaining Yorkist unit with losses fails to Strengthen Resolve, however.
The second Yorkist card is EVENT; henceforth the Scurrers in ambush in the woods may exit at any subsequent time of their choosing. A Lancastrian FIRE - STRENGTHEN RESOLVE card follows.
Devon's Archers and Wenlock's Artillery both miss.
The first two Yorkist cards are MILLING AROUND, followed by MOVE AND MELEE. Edward IV's Battle moves forward to make room for Hastings; with the shooting going so well, they don't want to go too far forwards!
Hasting's Battle creeps forward. Gloucester's Battle rolls a "1" and cannot move.
The third Yorkist card is END TURN; with but a single unused Lancastrian card left. The deck is shuffled, and a new Turn will commence.
The new turn begins with a single Lancastrian MOVE AND MELEE card. Somerset inches forward.
Ditto for Wenlock and the trailing Prince Edward.
Devon's Battle advances with a bit more spring in its step.
A single Yorkist card is turned - END TURN. The Scurrers look on at Somerset's advance, biding their time.
Next is a single Lancastrian FIRE - STRENGTHEN RESOLVE card. Devon's Archers score yet again! The Lancastrian Artillery misses, rolling a "1". For Artillery, this means it may NOT fire on the next Fire/Strengthen Resolve card (the barrels are fouled and must be cleaned out, or some such).
Two Yorkist cards become one Lancastrian MOVE AND MELEE. "We've been Flummoxed, Milord!"
Somerset rolls a "1", and cannot advance. "We're just waiting for the enemy to expose his flank to us, men!"
The remaining Lancastrian Battles pick up speed, however.
Situation after the Lancastrian moves, with Prince Edward's small body of men about to play catch up!
Four Lancastrian cards follow, but the sequence means, "Turn over, man; turn over!"
Much shuffling takes place.
The new turn starts out with a single FIRE - STRENGTHEN RESOLVE card for the Yorkists.
The shooting results in 1 hit on one of Wenlock's Billmen from one of the Yorkist artillery companies.
"Don't roll a 1!" The Archer's attempt to strengthen its Resolve has backfired; instead it takes a hit and loses a Battle Morale point.
To add insult to injury, it must now test its Resolve; fortunately the Archer company passes.
Wenlock's company of Retinue Billmen company passed its Resolve test (forced by taking a hit from Artillery fire), but just barely (it needed a 3!).
The initiative returns to the Lancastrians, with a single FIRE - STRENGTHEN RESOLVE card. The Lancastrian artillery miss again, but Devon's Archers, who evidently include many descendants of Robin Hood, hit Gloucester's men yet again!
Wenlock's Battered Billmen (sounds like a Technical Challenge item on the Great British Baking Show!) attempt to Strengthen their Resolve, but... fail.
A Yorkist END TURN card is followed by a Lancastrian MILLING AROUND. Much Ago about Nothing! Three Yorkist cards follow; the first is FIRE - STRENGTHEN RESOLVE.
Edward IV's artillery pound Wenlock's poor Billmen again; at 4 hits, the company is destroyed and removed from the field. Edward's Archers rolled a "1", and thus Seek Safety behind the Battle's melee troops.
Gluttons for punishment, Gloucester's Archers attempt to Strengthen their Resolve yet again, but fail.
The remaining 2 Yorkist cards, handing an opportunity to the Lancastrians.
The card is allocated to Devon's battle; the melee companies move up past the Archers, who then automatically take up position in reserve behind them.
Another single card for the House of Lancaster... but they are poised to make good use of it!
Both Somerset's and Wenlock's Battles move up.
Devon's Battle rolls high; they crash into Gloucester's lines
The first melee combats of the game will ensue. The Active Player gets to choose the order in which the combats are resolved.
Devon chooses to fight with his Household company first. Although he is plus 3, he rolls low. A difference of 0 or 1 stops fighting for that round, denoted by the dust between the combatants.
In the next action, an Average (denoted by a red or white die, depending upon whether the unit is Lancastrian or Yorkist) company of Retinue fights against an inferior one (Green die). A difference of 2-5 pips results in one hit (and the loss of a BMP).
Gloucester's Billmen show firm Resolve, easily passing the test. Now they must decide whether to continue fighting, or "Turn Tail" out of melee. They opt to fight on!
Devon's boys are on fire; a difference of 10 or more inflicts three hits on the enemy! Having taken 4 hits in total, Gloucester's company is Destroyed and removed from play; the victors in any melee get an immediate free "Pivot".
The third and final melee is Even-Steven; the +1 for charging (Shock) in the first round is balanced by the -1 for Inferior quality. Still, Devon's men prevail, inflicting a hit on their opponents; another BMP is lost, and Gloucester's battle is running low on them now.
The Resolve test is passed, and with the melee remaining even (-1 for losses for the Yorkists now, but the bonus for charging applies to only the first round of melee), so the Yorkists elect to fight on. The net result is a difference of 1 between the sides, so the melee will continue on the next MOVE AND MELEE card (i.e. an Ongoing Melee).
Next is a single FIRE - STRENGTHEN RESOLVE card for the Yorkists. This time, despite the closer range, the Yorkist guns miss; all attempts to Strengthen Resolve fail as well. Bah, Humbug!
The Lancastrians turn 2 cards; the first is FIRE - STRENGTHEN RESOLVE. The Lancastrian guns make a valiant effort, but fall short once again. "Damp powder", sniffs Wenlock. Amazingly, there are no Lancastrian companies with losses... except the two companies of Wenlock's that were destroyed by enemy fire earlier. Note that artillery in this era can only Pivot or flee; no other battlefield movement is possible.
The second Lancastrian card turns out to be END TURN.
Time for tea!
The new turn starts out with a single Lancastrian MOVE AND MELEE card.
Somerset rolls high for Movement...
and his Battle crests the ridge, where it becomes visible to to the Yorkists; "We are not amused".
Wenlock's men move forward as well, along with Prince Edward and some laggard Archers.
'Ello 'ello, ye blackguards, we be comin' to give ye what for!" They fall just short of one of the hated artillery companies.
Last is Devon's surging Battle.
The reserve Archers move up, one joining a melee, and the other seeking to forestall intervention by Edward IVV or Hastings. Despite a sizeable advantage Devon's men roll a "1"; Devon is down, and his Household suffers 2 hits with the associated loss of Battle Morale Points! An additional BMP is lost for the loss of the commander, too. The Lancastrians pass their Resolve test, and the Melee will continue.
Enraged by the loss of their Lord, the Lancastrians prevail, inflicting 2 hits (and the loss of 2 BMP's upon Gloucester's Battle). Unfortunately, they have no remaining BMP's, and thus must take a Battle Morale Test. needing a 8+ to pass, a "4" doesn't cut it, and Gloucester's entire battle disperses! Devon's Battle regains 1 lost BMP as a result of eliminating an enemy Battle.
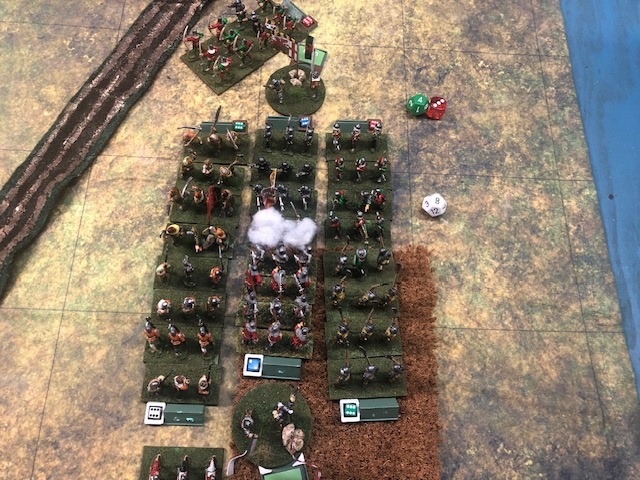
Overview of the Field after the elimination of Gloucester.
The House of York gets 2 cards; the first is MOVE AND MELEE.
Sensing their moment, the Scurrers erupt from their Ambush location in the woods, moving a D12 + 4".
King Edward IV's Battle surges forward into multiple melees with the men of Wenlock's Battle.
The Archers are told off to distract the men of Gloucetser's victorious Battle.
Hasting's Battle advances as well.
Overview of the battle at this critical juncture.
The first melee in the Center Goeth Large the Yorkist way; Wenlock's Retinue suffers three hits in a 13 to 2 dice off! Ouch!
The Resolve of Wenlock's men remains firm.
They attempt to Withdraw by "Turning Tail", but fail on a roll of 1, which means they must stay and fight on!
Round two is pretty much a repeat, and Wenlock's embattled company is Destroyed!
In the Battle of the two Households, the rolls are tied, but Edward IV is hit since he rolls a "1" in melee! A BMP is lost and the melee will continue. Technically, the game would end in a Lancastrian victory right now because of the loss of a VIP, but I decided to keep playing and decide Edward's fate at the end of the game.
York turns a second MOVE AND MELEE card!
The Scurrers fall just short of a charge into Somerset's flank!
View of the overall situation...
Hasting's Battle moves to intercept Somerset.
Edward's leaderless Battle moves as well.
All of Edward IV's Battle is now engaged in combat, save only his artillery.
The one combat between Hastings and Somerset ends in a continuing melee.
York wins the contest of the Households by a hair.
The Lancastrian Household shakes off its losses.
Round 2 results in another continuing melee.
The melee between Edward's Archers and the inferior array of Devon goes south pretty badly for York! Twisted knickers!
The second of Edward's Archers ekes out a win in round 1.
The Resolve of Devon's men is tested, and found adequate.
The second round of the Archer's battle ends in a continuing melee.
Next up is a Lancastrian FIRE - STRENGTHEN RESOLVE card. Devon's Household (blue die) flubs its roll, and takes a hit and loses a BMP.
They do pass the resultant Resolve test.
Wenlock's hard pressed Household regains a hit!
Second verse, same as the first! As it turns out, all attempts to Strengthen Resolve fail, but without any "1's" rolled.
The final Lancastrian Card is MOVE AND MELEE - ONE BATTLE; Somerset's Battle is chosen, and rolls well!
Two of Somerset's companies charge into their opponents of Hasting's Battle, while the final unit faces off against one of the Scurrers.
In the first round of melee, the Scurrers benefit from the "Surprise" modifier... as well as hot dice.
The second round goes equally badly for Somerset, and the company is destroyed!
View of the situation thereafter.
Despite having the advantage, Somerset can't catch a break in the first round of the next melee, either. His Resolve stands firm, though.
Somerset manages a win by a whisker in round 2; the Yorkist Resolve is solid as well.
Round three sees another slim margin win for Somerset's men.
Round 4 sees a win for Hastings in this see-saw melee!
Round 5 goes back to Somerset!
Amazingly, round 6 results in an Ongoing Melee. Such valor and grit!
In the next combat, the best troops of both sides are in action, lead by their respective Battle commanders. Somerset's Household score a big win against the Superior Retinue (black die) of Hastings!
Round 2 sees the Yorkist company destroyed!
Somerset wins big again in the first round of his final melee.
This time, the Yorkist Resolve falters, and the company routs... with the loss of 2 more of Hastings dwindling supply of Battle Moral points.

Next is a Yorkist FIRE - STRENGTHEN RESOLVE card; in the event, only the 2 guns can shoot, and they miss at close range, and all attempts to Strengthen Resolve by the Yorkists fail, fortunately without rolling any "1's" in the process.
Next up is a single Lancastrian MOVE AND MELEE Card.
Devon's men don't roll high enough for movement to add to any combats.
Wenlock moves up additional troops. and Prince Edward's Small Company moves up. perhaps seeking to block the Scurrers.
Battle overview after the moves by Wenlock and Devon. .
Somerset's companies fan out, but try to avoid becoming Isolated.
Although themselves Isolated, Hasting's Inferior Array give better than they get, and the wild swings of their melee continue.
They manage to win the next round as well, eliminating their opposition!
The action passes to Wenlock's Battle; his men prevail in their first melee round.
They do even better in Round 2!
The Yorkists gain the upper hand in the third round.
The scales tip back to Lancaster in Round 4; that destroys the Yorkist company.
Situation thereafter.
The Battle of the Households slogs on without significant edge to either side.
Devon prevails convincingly in the Archer action.
The Resolve of the Yorkist Archers fails, and they rout, with the loss of an additional BMP.
Situation in the center after all Lancastrian actions are completed.
The next Yorkist card is FLUMMOXED... but with no following Yorkist cards, it is a "dead Flummoxed" card, and has no effect. .
A FLABBERGASTED END TURN is still an END TURN card, and the deck is shuffled once more.
The turn commences with three Yorkist cards; the first is FIRE - STRENGTHEN RESOLVE.
Another close range miss by the previously devastating Yorkist artillery. Must be low on ammunition!
The Scurrers roll a 12, giving them up top 16" of movement!
Flankey, flankey; we loves us some flankeys!
Hastings remaining companies engage, but both are Isolated.
Without having to suffer the "Surprised" modifier, Somerset's men defeat the Scurrers.
Said Scurrers decide that they have seen enough of the Tempest, and rout from the field. As an independent command, there are no Battle Morale points to worry about.
The resultant situation.
The attack of the second unit of Scurrers seems a Comedy of Errors, and results in a continuing melee.
The opposing Household units go Measure for Measure again, with another continuing melee.
The second Yorkist card.
The Yorkists debate who should act, and wind up deciding upon the Scurrers, who after all are on the flank of Figurehead Prince Edward's small company. They are promptly destroyed by Prince Edward's retainers. "As you like it, Milord!" The threat to Somerset's flank is over!
A Lancastrian MILLING AROUND is followed by a Yorkist FIRE - STRENGTHEN RESOLVE card.
Hastings actually manages to recover a hit on a battered company!
A Yorkist MILLING AROUND is followed by three Lancastrian cards; the first is FIRE - STRENGTHEN RESOLVE.
Devon's command manages a bit of recovery himslef.
The remaining 2 Lancastrian cards come to naught.
The next run of cards sees the turn end, and the resultant Shuffle off to Scarborough.
The new turn begins with two cards without results.
York will act first with FIRE - STRENGTHEN RESOLVE.
The spirits of Hasting's men rise again.
Two useless Yorkist cards.
Another useless Lancastrian card is followed by a Yorkist MOVE AND MELEE.
The Yorkist Household taps its opposite number for a hit.
Lancaster stands unbowed.
Wenlock Turns Tail, deciding that perhaps the Merry Wives of Windsor might make for better entertainment!
Situation in the Center thereafter.
Hastings come up short in the next combat.
Hastings loses round two as well. Oops; he is out of Battle Morale Points!
Hastings fails his Battle Resolve Test, and his Battle disperses; Somerset regains 1 Battle Morale Point.
Only King Edward's Battle remains, albeit with the fate of the King himself as yet unknown. His artillery finally finds the mark again!
Edward's remaining companies seek to defeat Devon, hoping to seize victory form the jaws of defeat!
An Ongoing Melee is not a big help to the cause of the severely outnumbered Yorkists!
Initiative to York again.
This time, Devon's men are prepared, and strike hard! Edward's Battle is out of BMP's.
The Battle Resolve test is failed, and the remaining Yorkist troops flee the field. The Lancastrians are overjoyed, if exhausted by the long struggle. "Well, I suppose all's well that ends well", observes Queen Margaret.
EPILOGUE:
Test of Resolve provides for determining the fate of the key leaders after a battle (anyone remember the killed nobles in Kingmaker combats?).
Winning side:
Devon - a D12 roll is made because he was eliminated during the game. The roll indicated that he died on the Battlefield. In many ways the hero of the day for Lancaster, a monument is erected to him in Tewkesbury.
Winning commanders otherwise only need test if their Battle dispersed. This did not happen for any of the Lancastrian commands (although Somerset and Wenlock were close!)
Losing side:
Gloucester: was captured; a second die roll determined that he was executed shortly thereafter (a common fate for losing nobles in the Wars of the Roses!).
Hastings: was captured as well; a second die roll revealed that he switched sides to the Lancastrian cause!
King Edward IV was also captured on the field; a second die roll revealed that he was imprisoned. .. at least for the time being.
In a stunning reversal of history, Queen Margaret and her retinue now must decide whether to gather their strength in Wales, or march directly upon London!


