For any of you not familiar with it, the original story (Lord Kalvan of Otherwhen) was by the late H. Beam Piper, and is a great yarn. The basic premise of the series is that Calvin Morrison, a Pennsylvania State Trooper, is accidentally caught up in a paratemporal transport device, and deposited in a Pennsylvania contemporaneous but parallel to ours, radically different than here-and-now, because of the impact of events that went differently than in our own time-line, chief among them being that the great Aryan migrations went East across the Pacific land bridge rather than West into Europe and the Middle East. The technological level of the timeline is roughly equal to that of the late 1500’s. In the particular sub sector that Calvin finds himself thrown into, a theocracy has developed based upon the closely held secret of Gunpowder composition and manufacture. The House of Styphon has ruthlessly used it’s stranglehold on Gunpowder, as well as its resultant great wealth, to manipulate kings and kingdoms for their benefit and profit. Calvin arrives in the beleaguered
Kingdom of Hostigos, under attack by the allies of Styphon. Dubbed “Lord Kalvan” by the Hostigi, he brings his 20
th century knowledge to bear, and sets up manufacture of superior gunpowder (which is called “fireseed” in this setting), as well as introducing other innovations. In addition to frustrating the machinations of Styphon’s House, he makes an undying enemy of the priesthood by revealing the Fireseed secret to all the nations, free, as well as confiscating the vast wealth of the temples of Styphon in the territories of the kingdoms he defeats.
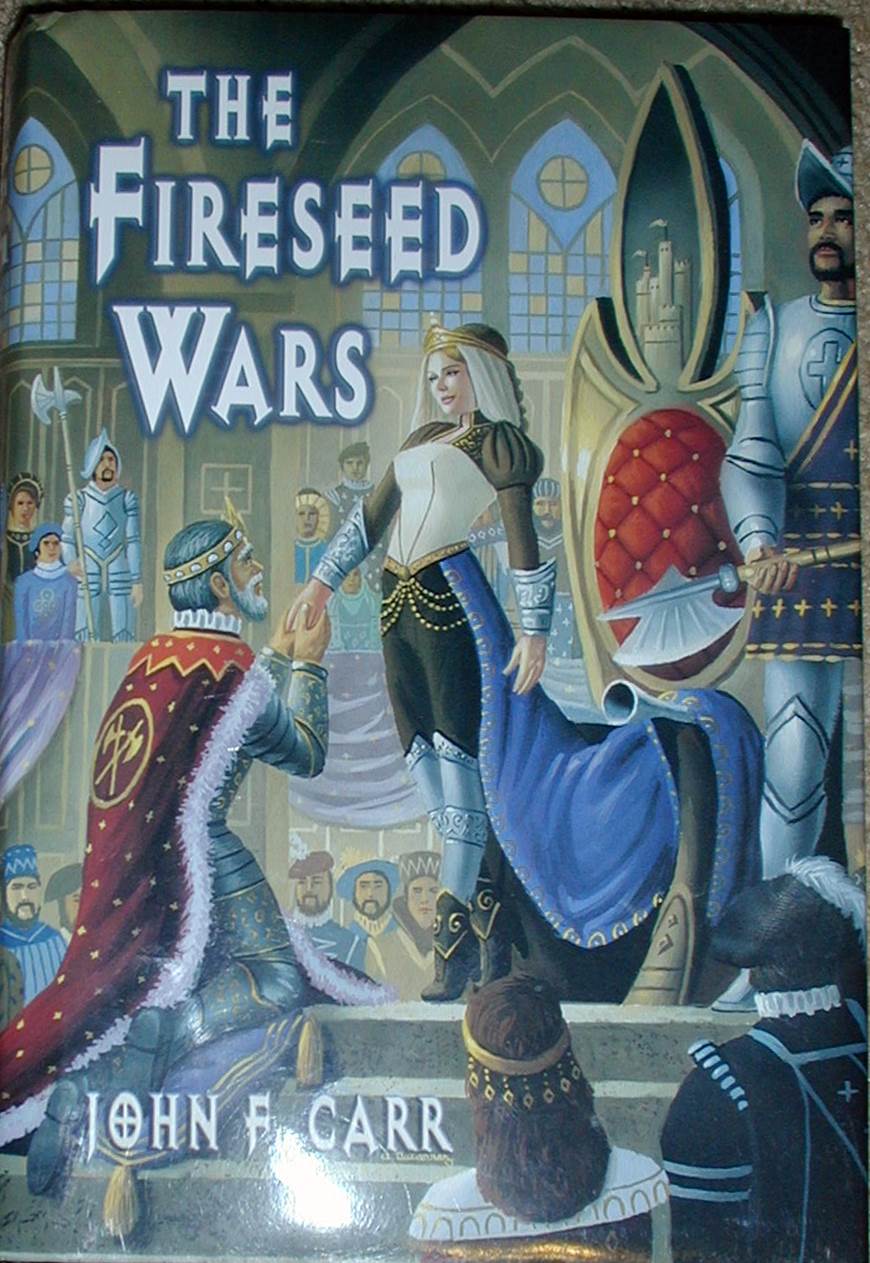
John Carr, himself a wargamer as well as an established author, has written a number of excellent sequels to the original story: “Great King’s War”, “Kalvan King Maker”, and “Siege of Tarr-Hostigos”, "Fireseed War", and "Gunpowder God". The battle to be fought on the tabletop, The Battle of Ardros Field, is taken from the third book. A lot more information about the books, Kalvan’s world, and H. Beam Piper himself, along with ordering information is available at John’s Website,
hostigos.com. Here are some images of the new books, in order (I hope!):
and the original paperback, still in my collection:
After suffering a series of stunning reverses, Styphon’s House has pulled out all the stops. They have recruited, bribed, and otherwise assembled the biggest army ever seen in Otherwhen North America, the “Grand Host of Styphon”, in order to defeat the “usurper” Kalvan once and for all. Composed of troops using a great variety of combat styles, and driven by Roxthar, Chief Investigator (think the Spanish Inquisition, only worse) and High Priest of Styphon, the stage is set for a battle of epic proportions. (A slightly different version of this report is posted at John's Hostigos.com site under "Wargaming").
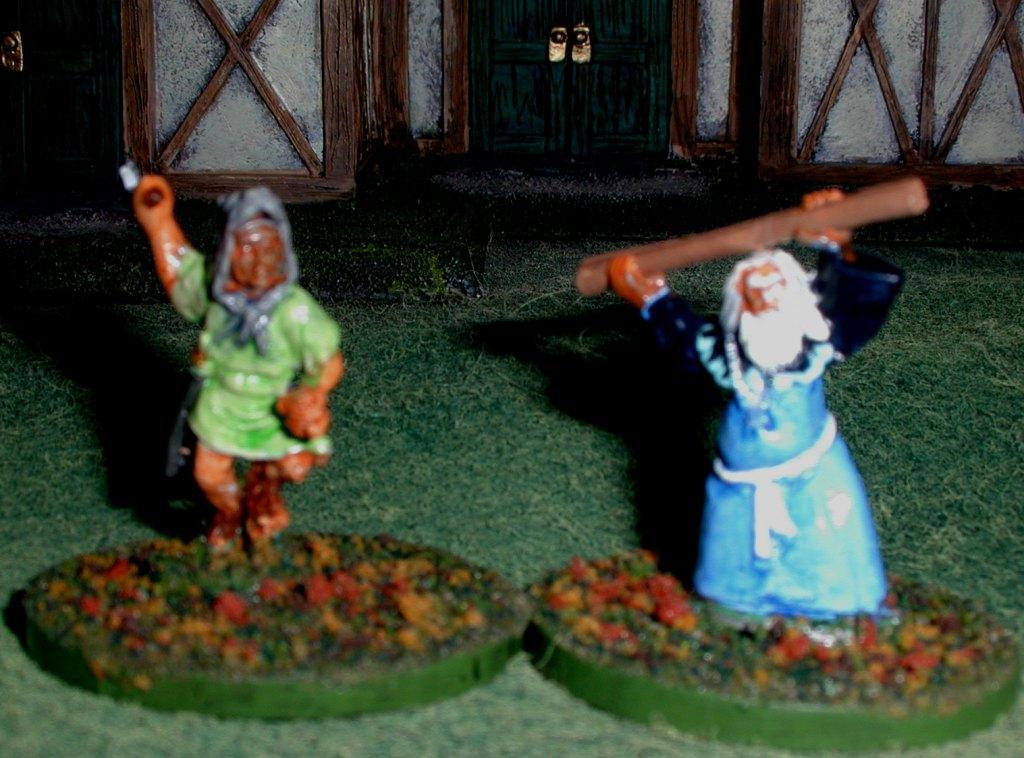
Roxthar bearing a burning brand to assist in motivating the subjects of his “investigation”, and a typical High Priest of Stytphon, living off the fat of the land!
The Battle of Ardros Field
We had a great turnout for the game, run at Historicon in Lancaster, PA, in 2008. I think we had about 10 players.Here my Band of Brothers 2nd edition co-author, Ken Baggaley considers his deployment.
He and his son, Brian, had the Styphoni right wing. This consisted of Ros Zarthani mercenaries (think Late Romans or Byzantines) and the very tough Ros Zarthani Knights (think Teutonic Knights, in this case a Military Order that is part of the military arm of Styphon, the other part being the
Temple Guards). Joe and Barry can be seen re-hydrating after the intense work of setting up the game whilst looking on as the Sacred Squares of Hos Ketmos (think Spanish Tercios) complete their deployment, supported by the Halberd armed
Temple Guards on the ridgeline.
View of the Right wing of the Grand Host of Styphon!
Here is a long view of the table, with the Styphoni Left flank also completing final deployment. The walled Villa to the front of Kalvan’s line is fortified and crammed with heavy guns, destined to take a heavy toll from the enormous but densely packed Sacred Squares opposite them, which advanced upon the Villa with ponderous slowness.
The Left wing of Kalvan’s army, including half of his Royal army (represented by English Civil War type troops) as well as the Pricely army of old Hostigos and the relatively primitively armed Uthori infantry (mostly crossbows and halberds). The generals of the Left wing appear confident in their deployment, designed to maximize their considerable advantage in firepower, don’t they?
An earlier playtest suggested that Kalvan's forces needed fewer numbers but better firepower, so I tweaked the stats a bit for this game.
Here is Kalvan’s Center, Reserves, and right wing, with their Generals. These guys don’t look nearly as confident of their situation, do they? More Royal Infantry, the afore mentioned guns, and assorted mercenaries comprise the Center, while Queen Rylla and Sarask of Sask hold their forces in reserve on the ridge. On the far right is the Uthori Cavalry “Iron hats” plus the princely infantry and cavalry of Nostor and Kyblos. The numerous small cards seen on the table have the statistics for each unit and leader. The color of the base is the same for all units of a command group, as well as the leaders. While a bit less scenic, these cards greatly facilitated play.
Hostile Realms, by yours truly, was published in 2009 and uses (essentially) the Initiative system of Brent Oman’s
Field of Battle. That is, the opposing Commanders in Chief (in this case Great King Kalvan and Captain General Phidestros, commander of the Grand Host) dice off against each other using their Leadership Die (LD). Kalvan was rated the best possible, D12+1, while Phidestros merited a competent D10. The difference in scores is the number of cards that each side will be allowed to turn and act on for that phase, with the high scorer choosing to go first or second.
As a rule, the Hostigos forces tended to have better Command Group and Wing Leaders, although this was not universally true. Again like FoB, each time a MOVE card is turned, ALL the Command group leaders for that side roll their individual Leadership Die against an opposing six sided die. A LD roll of 1 means no movement for that Command Group on that card. Otherwise, a difference of up to 3 means one Move segment for that command, a difference of 4, 5, 6, or 7 results in 2 move segments, and a difference of 8 or more grants 3 segments. If a Command Group wins 2 or more segments, they can use one of them to change facing or formation, and some types (like Pike Blocks and most Cavalry) can use such a segment to resolve Melee (hand to hand combat) immediately. The Wing Leaders were permitted to re-roll for ONE of their command Groups on each card at the discretion of the player.

The battle opened with Kalvan winning the first die roll (actually, I think he won almost all of the rolls the entire game). With his main strength being firepower, and the enemy being mostly out of range, he opted to let the Grand Host of Styphon (GHS) go first, rather than risk turning RELOAD cards that would be wasted with the enemy out of range. The right wing, under the command of Brian and Ken Baggaley, had very good leaders and excellent LD rolls. It stepped off to the attack with alacrity, while the Sacred Squares in the center lumbered slowly forward. On the left of the GHS, the leaders were rather poor and rolled many “1’s”, and were thus unable to take effective action. When the initiative passed on to Kalvan’s forces, they were fortunate to turn a number of RELOAD cards, both artillery and small arms, and, the enemy now coming in range, their fire caused devastation among the serried ranks of the Sacred squares, as well as the perhaps over boldly handled Ros Zathani cavalry.

Insult was heaped upon injury when the forces of Hos Hostigos turned the one BRILLIANT LEADER card in their deck, declaring it another Infantry Relaod card, thus allowing the Royal foot of their Left to mow down more of the Ros Zarthani cavalry, their bows proving a poor response to the highly accurate Musket fire of the enemy. A MOVE card followed, and the infantry of the Left formed a salient to enfilade the hapless Ros Zarthani. Seizing the moment, the Kalvan’s elite Royal Cavalry galloped forth in a hell for leather charge upon the weakened Zarthani Kataphractoi, firing their pistols as they closed. Although their ranks had been thinned by the earlier musketry, the Kataphractoi seemed delighted to finally have an enemy that they could actually fight. Their heavier armor (and superior die rolling) promptly routed the Royal Horse, and they went streaming for the rear. Indeed, in this game each time an (on paper, excellent) Royal cavalry regiment charged enemy horse, it was soundly defeated. Maybe the Lance isn’t obsolete yet after all! Despite the failure of their Cavalry, the continued deadly firepower (and hot dice for firing) lead to the Left Wing of the Hostigos army soundly defeating the forces of Styphon, the entire wing eventually retreating off the boardcafter it ran out of Morale chips and then flubbed an Army (wing) morale check by a large margin.
Meanwhile, the Hostigi Right wing got off to an initial fast start, winning a number of cavalry melees against the princely forces of Ketemos and its supporting troops. Kalvan’s right wing actually advanced rather aggressively, in part because the quality of the Leaders on the Styphoni left left almost as much to be desired as there poor die rolls! Then, realizing that the friendly troops were getting awfully close to the Enemy, the high priest of Priest of Dralm cast the powerful Level 4 spell, “Lightening Storm” upon the opposition. It did a moderate amount of damage to the troops within its 12 inch radius, but was not decisive. This spell represents a stratagem used by Kalvan in the book. He had selected the battlefield carefully, and dammed up a substantial stream, the water of the resultant lake being hidden behind the ridge line he occupied. At the right moment, the dam was to be blown, releasing a torrent of water, trees, rocks, and mud upon the enemy.
Not a great photo, but to the left is a priest of Galzar, the War god, in his wolf headdress. To the right is a Priest of Dralm, the All-father.
Despite this artifice (and a few lesser “Hailstorm” spells subsequently, which had very little effect upon the minions of the Gunpowder God), the forces of Styphon gradually rose to the occasion. Their own Priest of Galzar “Blessed” several of their remaining cavalry units, and this seemed to have a most salutary effect, gaining the upper hand in a series of hotly contested melees.
Before long, they had soundly trounced the troops of Hos Hostigos, there being none of the crack Royal Infantry to hold it all together. That left the center…
The nearly unstoppable Sacred Squares of Hos Ketemos (Tercios) took a a heavy pounding as they slowly advanced across the field, one Tercio suffering 14 stands loss and STILL passing a Morale Challenge!
Fortunately for the forces of King Kalvan, the Center command ran out of Morale chips just before the Sacred Squares came within range of Kalvan's battle line (the commanding general couldn't manage to win more than 1 move segment on a Move card). With the victorious Hostigos left flank sweeping down upon them (after the Styphoni right wing failed their Army (Wing) Morale check big time, the game was declared a victory for the forces of the former uptime
Pennsylvania State trooper. All hail Great King Kalvan… and Down Styphon!
If you've never read this classic H. Beam Piper story, I would highly recommend it to you, as well as the excellent and much lengthier sequels by John Carr, himself a wargamer (see Hostigos.com for information).
I thought the Hostile Realms rules worked very well, especially for a game with about 70 units a side (and about 1500 figures total). Huge thanks once again to Joe and Barry for all their hard work setting up and taking down the game, as well as assisting the players with the rules. Both of you were indispensable! Thanks alos to the members of the Hartford (CT) Area Historical Gaming Society (HAHGS) for their earlier playtest of this massive Battle back home! In fact, here's a few more pics from the first playtest of the game with the HAHGS guys...
Barry, who was my chief local playtester, looks up some modifiers.
Broad view of the filed. This battle had so many units and leaders that the labels on the table, while not the most attractive thing in the world, were necessary to both identify the units and give their stats and command structure (all leaders and units in the same command have the same color label holders).
The action is general, and... here are the Generals!
Hostile Realms Combat Tables, etc
For reference and those interested in the rules, here are all the key tables from the rules. Yes, there are quite a few of them, but they are quite easy to use once you play for a short while!
Movement Distances (in inches)
|
| Unit Type: |
Road Column
|
Skirmish, Whirling Mass
|
Battle Order
| Pike Block |
Battle Line
|
Hedgehog
|
| Light Cavalry, Fliers |
18
|
14
|
--
|
--
|
10
|
--
|
| Extra Heavy Cavalry |
12
|
--
|
8
|
--
|
6
|
--
|
| Other Cavalry |
16
|
--
|
10
|
--
|
8
|
--
|
| All Infantry |
12
|
10
|
8
|
8
|
6
|
None
|
| Elephants and similar |
12
|
--
|
--
|
--
|
6
|
--
|
| Lt. Chariots (Heavy) |
14
|
--
|
--
|
--
|
8 (6)
|
--
|
| Heavy War Engine |
8
|
--
|
--
|
--
|
--
|
--
|
| Light War Engine |
12
|
--
|
--
|
--
|
3
|
--
|
| Heavy Guns |
8
|
--
|
--
|
--
|
--
|
--
|
| Medium Guns |
10
|
--
|
--
|
--
|
2
|
--
|
| Light and Organ Guns |
12
|
--
|
--
|
--
|
3
|
--
|
| Camelry |
14
|
12
|
--
|
10
|
8
|
--
|
| Beasts |
14
|
varies
|
varies
|
--
|
varies
|
--
|
| Character (Foot, EHC) |
12
|
--
|
--
|
--
|
10
|
--
|
| Character (other Mtd.) |
16
|
--
|
--
|
--
|
14
|
--
|
Shield Wall reduces movement 50%. Boots of Speed increase move distances 50% Routers move at Road Column rate.
Movement in Class IV terrain – Modified Difficulty Die vs D8
|
Modifier
|
Down 3
|
Down 2
|
Down 1
|
NC
|
Up 1
|
Up 2
|
Up 3
|
Troop
Type |
War Eng.,
XHvy Cav.
|
Cavalry, Mounted Characters
|
Dense Shock Infantry
|
Infantry
|
Skirmish
Infantry
|
Characters on Foot
|
|
| Formation |
Hedgehog
|
Pike Block
|
Battle Line
|
Whirling Mass
|
Battle Order
|
Skirmish,
Town
|
Road Column
|
Terrain
Type |
|
City Wall: man-made
|
Water,
Swamp, Hill
|
Wood/
Hedge
|
|
|
|
| Activity |
|
|
Entering
|
Crossing
|
Exiting
|
|
|
TERRAIN EFFECTS ON MOVEMENT AND COMBAT
|
Class
|
Description
|
Order Effect
|
Move Effect
|
Fire Effect
|
Melee Effect
|
I
| Open | None | None | None | Up one die type if opposing unit only is in Class I. |
II
| Broken ground, hill, low wall, creek, light woods | None |
Stop at contact
Chariots only: ½ speed | Down one die type for firer. | None |
III
| Forrest, steep hill, high wall, house, hedgerow, stream, breach in fortifications |
All except Skirmish Order and Characters lose Command;
PB, MC, HC, EHC: Disordered on entry
Others: no effect. |
Stop at contact, then ½ speed (Skirmish Order, Characters full speed).
EHC, War Wagons, Engines of War treat as Class IV.
Chariots may not enter or melee into Class III. | Down two die types for firer. | Down one die type for Attacker. |
IV
| Dense wood, villas, shallow river, rough hill, trenches |
All lose Command;
Characters, Skirmish: no effect
MC, HC: Disordered.
Others: Unformed. |
Stop at contact.
Roll Terrain Difficulty Die
Half speed for all.
PB, EHC, War Wagons, Engines of War, and Chariots may not enter or melee. | Down three die types for firer. | Down two die types for Attacker. |
V
| Uncrossable mountain, Fort, Impassable water or cliff, bridge, etc. | Impassable to all. | No move, other than by road. | As above. | No melee. |
MISSILE FIRE TABLE: Adjusted DV for Fire vs. Target D6
|
|
Down 3
|
Down 2
|
Down 1
|
NC
|
Up 1
|
Up 2
|
| Firer’s Angle |
|
|
Inferior Position
|
Frontal
|
Rear
|
Flank
|
| Firer's Status |
Hero Firing
|
Champion Firing
|
Disordered,
Unformed
|
|
Fliers firing from above
|
|
| Firer’s Formation |
Road Column
|
Battle Order
|
Skirmish,
Whirling Mass
|
Battle Line,
Town
|
|
|
| Firer's Total Wounds |
3+
|
2
|
1
|
None
|
|
|
| Range |
|
Long
|
Medium
|
Short
|
Point Blank
|
Point Blank - Guns
|
| Cover of Target |
IV or V
|
III
|
II
|
I (open)
|
Inferior Pos. #
|
|
| Target Formation |
Character
(If not attached) |
Shield Wall (frontal only)
|
Skirmish,
Town
|
Battle Line,
Whirling Mass
|
Battle Order
|
Road Column, Pike Block, Hedgehog
|
| Dexterity of Attached Character |
|
|
|
Impaired, Basic
|
Advanced
|
Expert
|
| Relics |
|
Shield of Might
|
Magic Shield
|
|
Magic Arrows
|
Arrows of True Flight
|
| Armor Quality* |
|
Extra Hvy.
|
Heavy
|
Medium
|
Light
|
None
|
*Note that gunpowder weapons treat all targets as having No Armor!
# Inferior Position = in a stream or ditch against units behind same; Downhill; Enemy charged downhill.
Nominal
Losses
|
Skirmish Fire Effect Upon Target Unit
|
Challenge
Die Type
|
|
Unformed
|
Disordered
|
Wounds
|
Morale Chip
|
1 Wound
|
|
Yes
|
No
|
None
|
No
|
D4
|
2 Wounds
|
|
N/A
|
Yes
|
None
|
No
|
D4
|
3+ Wounds
|
|
N/A
|
Yes
|
1 Wound
|
1 lost
|
D6
|
Missile Ranges (increase 50% for Bow of Strength)
| Weapon |
Point Blank
|
Short
|
Medium
|
Long
|
| Simple Bow |
0 - 1"
|
1 - 2"
|
2 - 3"
|
3 - 6"
|
| Advanced Bow |
0 - 2"
|
2 - 4"
|
4 - 6"
|
6 - 8"
|
| Long Bow |
0 - 2"
|
2 - 4"
|
4 - 8"
|
8 - 12"
|
| Repeating Crossbow |
0 - 1"
|
1 - 2"
|
2 - 3"
|
3 - 6"
|
| Light Crossbow |
0 - 1"
|
1 - 2"
|
2 - 3"
|
3 - 6"
|
| Heavy Crossbow |
0 - 1"
|
1 - 2"
|
2 - 4"
|
4 - 8"
|
| Pistols |
0 - 1"
|
1 - 2"
|
2 - 4"
|
|
| Handgun |
0 - 1"
|
1 - 2"
|
2 - 4"
|
4 - 6"
|
| Arquebus |
0 - 2"
|
2 - 4"
|
4 - 6"
|
6 - 8"
|
| Javelins |
0 - 1"
|
1 - 2"
|
-
|
-
|
| Darts and Spear-throwers |
0 - 1"
|
1 - 2"
|
2 - 3"
|
-
|
| Grenades, Hand Bombs |
0 - 1"
|
1 - 2"
|
2 - 3"
|
-
|
| Pilums, Throwing Axes, etc. |
0 - 1"
|
-
|
-
|
-
|
| Sling |
0 - 1"
|
1 - 2"
|
2 - 4"
|
4 - 8"
|
| Light War Engine |
0 - 2"
|
2 - 4"
|
4 - 8"
|
8 - 12"
|
| Heavy War Engine |
0 - 2"
|
2 - 4"
|
4 - 8"
|
8 - 16"
|
| Ribaldequin (Organ Gun) |
0 - 6"
|
6 -12"
|
-
|
-
|
| Sakers (Light Guns) |
0 - 6"
|
6 - 12"
|
12 - 18"
|
18 - 24"
|
| Culverins (Medium Guns) |
0 - 9"
|
9 - 18"
|
18 - 24"
|
24 - 32"
|
| Bombards (Heavy Guns) |
0 - 10"
|
10 - 21"
|
21 - 28"
|
28 - 36"
|
Units firing while mounted are restricted to Point Blank, Short, and Medium ranges.
** For Kalvan Games:
Musket range bands are PB 0-3", Short 3-6", Medium 6-9", and Long 9-12"
Rifled Musket Range Bands are PB 0 - 4.5", Short 4.5 - 9", Medium 9 - 13.5", Long 13.5 - 18"
Kalvan's troops are Up 1 for firing small arms and artillery for his superior gunpowder
Reloading Organ Guns
Should an Organ Gun roll a natural die score of "1" when firing and the target D6 roll is a 4, 5 or 6, the guns explode and are removed from play!
Counter Battery Fire by War Engines & Guns
1 – 2 Hits = War engine/Gun is unformed.
3 – 5 Hits = War engine/Gun is disordered.
6 – 8 Hits = War engine/Gun is disordered and suffers a wound.
9+ Hits = War engine/Gun is destroyed. Remove the unit from the table.
Melee Resolution – Both sides roll Modified Melee dice
|
Modifier
|
Down 3
|
Down 2
|
Down 1
|
NC
|
Up 1
|
Up 2
|
Up 3
|
| Situation |
-3 wound difference
|
-2 wound difference
|
-1 wound difference
|
Equal Force
|
Initiate Melee, Superior #s
|
|
|
Terrain or
Position |
|
vs. IV
|
vs. III
|
Equal/ vs II
|
vs I;
Favored Terrain
|
Flank
|
Rear
|
Unit
Formation |
Road Column
|
|
Skirmish
|
Bat Line,
Town
|
Battle Order
|
Pike Block
|
Hedge hog
|
Unit
Condition |
|
Disordered
|
Unformed
|
|
Superior
Position
|
Berserkers
|
|
Interaction & Deployment
|
Beasts, Mtd.
vs. Pike
(frontal only)
|
|
Cavalry vs. Elephants, Beasts or Hedgehog
|
|
Polearms or Spear vs. Mounted or Beasts;
Superior Weapon
|
Cavalry vs. Chariots
|
|
| Strength Attached Character |
|
|
|
Impaired, Basic
|
Advanced
|
Expert
|
|
Enemy
Armor |
|
Extra Heavy
|
Heavy,
Shield Wall
|
Medium
|
Light
|
None
|
|
| Relics |
|
Shield of Might
|
Magic Shield
|
|
Magic Sword
|
Sword of Might
|
|
Note that Artillery/War Engines and unwounded Champions (having only 2 Wounds), and Heroes (having only 1 Wound), will count the modifier for -2 wound difference or -3 wound difference respectively, when fighting an unwounded (4 Wound) unit. Pike Blocks ignore the first wound for this purpose.
Pike Blocks count as two units for the purpose of the Superior Numbers modifier, and resolve melee differently.
Pikes and Polearms always get the Up 1 for initiating Melee against Cavalry, never the other way around.
Superior Weapon: For infantry vs. infantry and cavalry vs. cavalry melees - Weaker weapons are to the left:
For infantry: 1.Improvised 2.Sword 3 Spear 4 .Polearm 5. Pike
For cavalry: 1. Improvised 2. Sword 3. Spear 4. Light lance 5. Heavy lance
A few situations do not require a Melee card, including flank and rear attacks, attacks upon Disordered enemy units, cavalry attacking Skirmish Infantry. Otherwise, a Melee card is required to initiate Melee combat. Cavalry, Pike Blocks and some infantry in Battle Order can use a Move segment as a Melee card when winning two or more segments.
Pursuit ChecK – Morale die (UP 1 if attached Character) vs. D6
|
Exceptions to Pursuit Checks: The following circumstances will cause a unit not to make a pursuit check.
1) Another unrouted enemy unit is in contact with the unit 2) Another unrouted enemy unit is within 1/2 move distance of the checking unit. This is half the movement distance of the checking unit, not the enemy unit. This can be in any direction. 3) Unit is a Character, War Engine, Gun or in Hedgehog formation. 4) Unit is behind CLASS II or higher linear defensive position. (i.e. walls, earthworks, etc) 5) Defeated unit is a Character. 6) Unit is immune to Morale Checks. Such units do not check for Pursuit, unless otherwise specified.
Leadership Test – Modified Leadership Die vs. D6
|
|
Down 2
|
Down 1
|
NC
|
Up 1
|
Up 2
|
| Unit Condition |
Routed
|
Disordered
|
Out of Command
|
|
|
| Attempting to ... |
|
|
Assert Command, Rally*
|
Supersede or Relinquish Cmd.
|
|
| Nearest Threat |
|
In contact
|
<1 move
|
<2 moves
|
> 2 moves
|
* Attached Commander gives Up 1 to all Rally attempts. Leader has Helm of Leadership: Up 1
Morale – Modified Morale die vs Wounds, “Other” DD, or Challenge die type
|
|
Down 3
|
Down 2
|
Down 1
|
NC
|
Up 1
|
Up 2
|
| Formation |
|
Road Column
|
Skirmish
|
Battle Line
|
Battle Order,
Town
|
Hedgehog, Pike Block
|
| Status or Deployment |
|
Disordered
|
Out of Command
|
|
Shield Wall
|
|
| Flank Protection |
|
|
None
|
1 Flank
|
Both
|
|
| Losses this Initiative |
-3+ wounds
|
-2 wounds
|
-1 wounds
|
None
|
|
|
| Initial Strength |
|
-3 wounds
|
-2 wounds
|
-1 wound
|
Full
|
|
| Charisma of Attached Character |
|
|
|
Impaired, Basic
|
Advanced
|
Expert
|
| Nearest Threat |
| Invol. Inter-penetration |
In contact,
routers close
|
<1 move
|
<2 moves
|
>2 moves
|
| Relics |
|
|
Enemy Helm of Fear w/in 12”
|
|
Friendly Helm of Blessing w/in 12”
|
|
Roll vs. Wounds scored (none D4, one D6, two D8, three D12) for Tactical Moral Check, vs. enemy “Other” Difficulty die for Courage Checks, and vs. Challenger’s die type for a Morale Challenge:
Character w/ Advanced Renown D4 Medium Cavalry, Camelry D6
Character w/ Expert Renown, Light Chariots D6 Heavy Cavalry, Extra Heavy Cavalry D8
Elephants, Heavy Chariots, Beasts D8 Scythe Chariots, Large Creatures D10
* See section 13.1and 13.2 for details of the Tactical Morale Check and Morale Challenge, and 8.1 for Courage!
SPELL CASTING TABLE: Modified CDV vs. D6 or counterspeller’s Modified CDV
|
| Modifier |
Down 3
|
Down 2
|
Down 1
|
NC
|
Up 1
|
Up 2
|
Spell level
|
|
Level 4
|
Level 3
|
Level 2
|
Level 1
|
|
Caster Level
|
|
|
Level 1
|
Level 2
|
Level 3
|
Level 4
|
Range to point of Impact
|
|
24 to 48”
|
12 to 24”
|
6 to 12”
|
Up to 6”
|
Self or Contact
|
Base Target Magical Resistance*
|
Extreme
|
High
|
Medium
|
Low
|
None
|
|
Aid
|
|
Target w/ Ring of Might
|
Being Counter spelled;
Target w/ Magic Ring |
|
Caster w/ Ring of Power
|
Caster aided by friendly Wizard
|
When characters are attached to units, use which ever is higher of character or unit base resistance. Spells that affect all units/characters within an area use the resistance of the most resistant effected character/unit.
For summoning spells, spells that target terrain and counterspelling consider the magical resistance to be as follows:
| Low | Level 1 Summoning Spell | Level I Terrain | Counterspelling |
| Medium | Level 2 Summoning Spell | Level II Terrain |
|
| High | Level 3 Summoning Spell | Level III Terrain | Whole Board |
| Extreme | Level 4 Summoning Spell | Level IV/V Terrain |
|
MAGICAL ATTACK TABLE: Modified Damage Die vs. D6
|
Modifier
|
Down 3
|
Down 2
|
Down 1
|
No Change
|
Up 1
|
Up 2
|
Cover of Target
|
IV or V
|
III
|
II
|
I
|
|
|
Target Formation
|
|
Shield Wall
(Frontal only);
Unattached Character
|
Skirmish,
Town
|
Battle Line,
Whirling Mass
|
Battle Order
|
Road Column
Pike block,
Hedgehog
|
Target Armor
|
|
Extra Heavy
|
|
Medium
|
Light
|
None
|
Caster Dexterity
|
|
|
Impaired
|
Basic
|
Advanced
|
Expert
|
Unattached Characters suffer the full effects of a Magical Attack. Attached Characters are affected as set out in 7.43. Armor is ignored for Spell Seeker, Spell Seeker 2, Vortex, Earthquake and attacks caused by Wizard death (15.6). Casting catastrophe attacks (15.6) ignore armor but consider constitution: Expert down 2; Advanced down 1; Basic no change; Impaired up 1.
Here is a partial Hostile Realms style "Army List" for the forces of Hos-Hostigos:
Hos hostigos
A well organized army with full time Household (Royal) troops. Calvin Morrison, former Pennsylvania Sate Trooper, was unintentionally translated to a parallel time line. Arriving just in time to save the Princedom of Hostigos from its enemies, especially the forces of the “Gunpowder God”, Styphon, he has risen to become Kalvan I, Great King of the new Greater Hostigos. He is anathema to the priests of Styphon’s house for revealing the secret of the Fireseed Mystery to the world, thus breaking Styphon’s monopoly on "fireseed". They will stop at nothing to wipe him and his kingdom from the face of the earth!
Hos hostigos
|
Army Characteristics
|
|
Difficulty Dice
|
|
Magic Characteristics
|
|
Relic Divisor
|
3
|
Move in Class III/IV
|
D6
|
Wizard Aptitude Modifier
|
+1
|
|
|
Engineering
|
D8
|
Maximum Wizard Level
|
IV
|
Leadership Roll
|
Add 2
|
Other
|
D8
|
Magic Resistance
|
Low
|
Sequence Deck Cards for hos hostigos
|
Basic Deck Cards
|
|
Recommended Optional cards
|
|
Army Morale
|
1
|
Berserker Action
|
1*
|
Courage!
|
1
|
Confused Withdrawal
|
1
|
Engines of War Reload
|
2
|
Crushing Missilery
|
1
|
Favor of the Gods
|
2
|
Engineering Phase
|
0
|
Fliers and Light Cavalry Move
|
1
|
Heroic Challenge
|
1
|
Heroic Moment
|
2
|
Ineffective Missilery
|
0
|
Leadership Check
|
3
|
Levy Apprehensive
|
0
|
Lull
|
1
|
Look to the King
|
1
|
Manna Recharge
|
1
|
Naval Phase
|
0
|
Maneuver
|
1
|
Pillage & Loot!
|
1
|
Melee
|
3
|
Rally Back
|
1
|
Move
|
3
|
Stratagem
|
0
|
Move 1 Command Group
|
2
|
Sneaky Criters
|
0-1
|
Missile Reload
|
3
|
Superstitions and Omens!
|
0
|
Crushing Missilery
|
1
|
Uncontrolled Charge!
|
1
|
|
|
Undisciplined Advance
|
0
|
|
|
Undisciplined Missilery
|
0
|
|
|
|
|
Basic Deck Total
|
28
|
|
|
Required Optional Cards: Add the Look to the King Card if the Kalvan is commanding the Army
Obligatory Optional Cards: Add Brilliant Commander card if Kalvan commands.
Variable Optional Cards: Take all of the Recommended Optional Cards and randomly draw up to 3 cards depending upon the number of Obligatory and Required Optional cards used. Add the 3 cards to the Basic Deck, making a total of 31.
Note: One less Courage! card and one less Army Morale card reflects the effects of Raxthar’s “Interogation” on the resolve of the troops. Berserker action only if Urgothi troops in army.
Army Rating table for ROYAL ARMY OF hos-hoStigos
|
Unit
|
Training Level [Unit Type]
|
Formations &
[Deployments]
|
Points
|
% Army Composition
|
Royal Foot #1
|
Elite [Infantry]
|
BL, BM, HH
|
Fearsome
|
|
Royal Foot #2
|
Elite [Infantry]
|
BL, BM, HH
|
Fearsome
|
|
Hostigos Rifles
|
Elite [Skirmish Infantry]
|
SK
|
Fearsome
|
|
Mounted Rifles
|
Guard [Dragoons}
|
BL
|
Fearsome
|
|
Mobile Force Pikes
|
Guard [Dragoons}
|
BL, BM
|
Fearsome
|
Mobile Force Shot
|
Guard [Dragoons]
|
BL, BM
|
Fearsome
|
|
|
|
|
|
|
Royal Cavalry
|
Elite [Heavy Cavalry]
|
BL, BM, CC
|
Fearsome
|
|
Hostigos Carabiniers
|
Elite [Heavy Cavalry]
|
BL, BM
|
Fearsome
|
Queen’s Beefeaters
|
Elite [Extra Heavy Cavalry]
|
BL, BM
|
Fearsome
|
|
|
|
|
|
|
Royal Light Gun
|
Elite [Light Gun]
|
|
|
|
Royal Medium Gun
|
Elite [Medium Gun]
|
|
|
|
Royal Heavy Gun
|
Elite [Heavy Gun]
|
|
|
|
|
|
|
|
|
King Kalvan
|
|
|
|
|
Queen Rylla
|
|
|
|
|
King Kalvan
|
|
|
|
|
Queen Rylla
|
|
|
|
|
Harmakros
|
|
|
|
|
Phrames
|
|
|
|
|
|
|
|
|
|
Unit
|
Weapons
|
Hits
|
AQ
|
Fire
|
Melee
|
Morale
|
Royal Foot #1
|
Musket, Bayonet
|
3
|
Medium
|
D12
|
D10
|
D8
|
Royal Foot #2
|
Pike
|
3
|
Medium
|
NA
|
D10
|
D8
|
Hostigos Rifles
|
Rifles
|
2
|
Light
|
D12+1
|
D4
|
D8
|
Mounted Rifles
|
Rifles, Sword
|
3
|
Medium
|
D12+1
|
D12
|
D10
|
Mobile Force Pikes
|
Pike
|
3
|
Medium
|
NA
|
D12
|
D10
|
Mobile Force Shot
|
Musket, Imp Weapons
|
3
|
Light
|
D12
|
D10
|
D10
|
|
|
|
|
|
|
|
Royal Cavalry
|
Pistols, Sword (2nd for Caracole)
|
3
|
Heavy
|
D6/D10
|
D12/D8
|
D8
|
Hostigos Carabiniers
|
Musketoon, Sword
|
3
|
Heavy
|
D8
|
D12
|
D8
|
Queen’s Beefeaters
|
Lance
|
3
|
Extra Heavy
|
NA
|
D12+1
|
D8
|
|
|
|
|
|
|
|
Royal Light Gun
|
Light Gun, improvised weapons
|
3
|
Light
|
D8
|
D6
|
D8
|
Royal Medium Gun
|
Medium Gun, imp weapons
|
3
|
Light
|
D10
|
D6
|
D8
|
Royal Heavy Gun
|
Heavy Gun, improvised weapons
|
3
|
Light
|
D12
|
D6
|
D8
|
|
|
|
|
|
|
|
King Kalvan
|
|
|
|
|
|
|
Queen Rylla
|
|
|
|
|
|
|
Harmakros
|
|
|
|
|
|
|
Phrames
|
|
|
|
|
|
|
Tharses
|
|
|
|
|
|
|
Verrkan Vall
|
|
|
|
|
|
|
|
|
|
|
|
|
|
| | | | | | | | |
* = hits vary, see Character rules. Points are calculated as 3 hits to wound (average).
Fire, Melee, and Morale die types for Characters will be further modified by the results of the Character Generation process (section 7.4).
Peter Anderson