Sunday, January 29, 2023

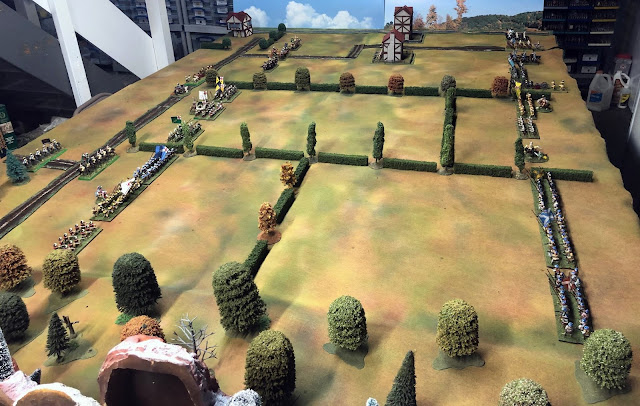
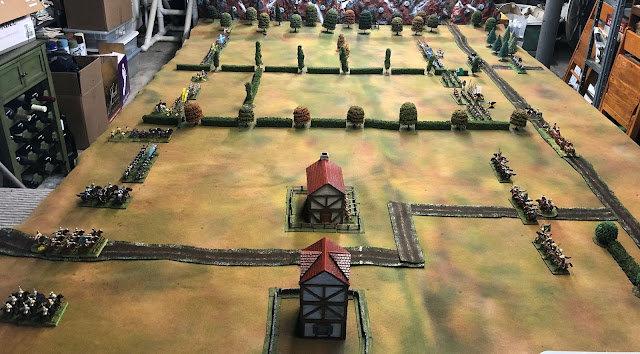
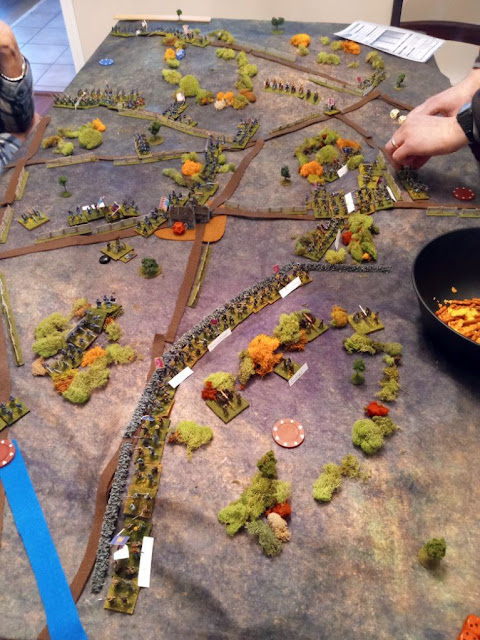
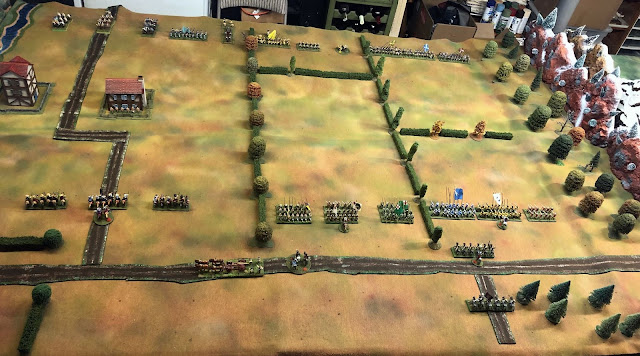
Set up for the Battle of Bisham Abbey


On the wargames table is the 5th  "For King and Parliament"  scenario from the fictional ECW Scenario book , "Bisham Abbey."


This battle sees the first of the Scots troops (left foreground).

I started painting my Scots about a year ago, with this and several forthcoming scenarios in mind. 

We were scheduled to play this game this past Thursday, but one by one something came up with the rest of the guys, so it will have to stay decorating my table until we can reschedule for another date. Meanwhile, I have a moor full of Scots units on the painting table, some of which will be needed for the future scenarios in the Marlowe to Maidenhythe scenario book.

Thursday, January 26, 2023

Hessen-Darmstadt High Command


Among the many attractive things about the digitally sculpted figures being produced by Lucas Luber of Piano Wargames in Germany, is the inclusion of special figures for the high command of the nations he is covering. In the case of Hessen-Darmstadt, there were 3 such figures. From the right of the photo, a Hessian field officer, painted wearing the blue facings of the Leib regiment, Prince Emil of Hessen-Darmstatdt, and Prince Georg of Hessen-Darmstadt. 


Prince Émile von Hesse-Darmstadt (1790 -1856) was appointed colonel of the Hessian Chevau-leger regiment by Grand Duke Ludwig I, his father, immediately after the conclusion of the 1809 campaign in Austria. He was the 5th child and 3rd son of the Grand Duke. 


    In 1812, Prince Emil commanded the Hessian contingent that participated in Napoleon's invasion of Russia. The different elements of the Hessian contingent, were, contrary to stated plans, dispersed, and thus Prince Emil no longer had an effective command: he was called to the great Imperial Staff, followed the Emperor and assisted him at all the major affairs of the campaign: at the capture of Smolensk, at the battle of Moskowa, at the entry into Moscow, at the combat of Maloyaroslavets. The Prince, who was only twenty-two years old, was greatly appreciated by Napoleon’s staff for his enthusiasm and his real military qualities. During the retreat from Moscow, the remnants of the Hessian contingent were reunited, and fought in several actions, most notably the passage of the Berezina, where the Chevau-Legers, along with the Baden Hussars, were all but annihilated but successfully covered the retreat of as many men as possible across the bridge, heroically constructed by the French engineers, working in the freezing waters. 


From The Napoleon Series (as translated from the original French): 

"In 1812, Prince Émile of Hesse, the most brilliant of the Grand Duke’s sons, was at the head of the Hessian contingent: his regiments were at Smolensk, Moskowa, Krasnoi, Berezina; they shared all the woes of the army and deserved to be reunited with the Imperial Guard. In this campaign, Prince Émile gained genuine popularity; he inspired one of the most beautiful songs dedicated to German veterans of the Grand Army:

“General! General! Your image shines in our hearts, as in a hurricane of battles it dazzled, terribly, the eyes of the enemy, great image always luminous! — Napoleon understood you, and he understood how to choose men! — His eagle gaze went to the bottom of his heart; of what price you were for him, your exploits showed it. — Hello, our general! You live in our hearts, you are the pride of veterans, the golden mirror of heroes, great immortal image!”


    Prince Emil commended the Hessian contingent once again during the 1813 campaign. The Hessians soon saw action at the Battle of Lutzen. The following count is taken, in lightly edited form from the Napoleon Series: 

"The Badeners were engaged against Flößgraben filled with enemy skirmishers, while the 2 Hessian regiments, to their right, were launched on Klein-Görschen. The Leibgarde regiment disturbed in its deployment by a wound received by its colonel, wavered and retreated… but Prince Emile ran up, formed the regiment in square and continued the march forward: he inspired the Badeners; the Leib Regiment followed in the second line on the left; and the fusiliers, on the extreme left, formed in a column, covered the movement. The artillery redoubled its fire, the skirmishers were deployed, the battalion columns rushed forward … The Flößgraben was crossed and the division approached Klein-Görschen at the same time as the left of Macdonald’s corps: the village was captured and the enemy retreated to Groß-Görschen.

Prince Emile and Colonel Schönberg themselves led this attack, during which the Hessians drove many enemies from the houses and gardens of the village, and captured 150 men.

The Leib Regiment pursued the enemy on Groß-Görschen, supported by the division’s artillery. On another part of the battlefield, the village of Kaja, lost by the French, was recaptured and lost again … Finally, Marmont decisively makes himself master with 16 battalions of the Young Guard: it was victory; an attempted night attack carried out by the Prussian cavalry on the bivouacs of the victorious army was immediately stopped by a regiment of the Young Guard.

The Hessians, engaged during the whole day, suffered significant losses: the fusiliers had a third of their officers and 324 men hors-de-combat;[2] the brigade had 1 officer and 78 soldiers killed, 12 officers (including Colonel von Follénius) and 421 wounded men; finally, 846 missing men… The Hessian battery which accompanied the infantry in the attack on Klein-Görschen on difficult terrain, cut off by numerous ditches, fired 111 rounds of 6 and 80 rounds per howitzer: it was so clearly distinguished that it received 5 stars of the Legion of Honor, 2 for officers and 3 for gunners; however, during the battle itself, 8 artillerymen deserted; 9 others desert on 5 May… Eleven knight’s crosses (4 for officers, 7 for soldiers) rewarded the valor of the battalions of the Hessian fusiliers at Lützen." The Hessians were lightly engaged at Bautzen, forming part of Ney's Corps, which did not arrive on the battlefield until late in the day. 


The Hessians fought at the Battle of Leipzig  "Around nine o’clock, the allies carried out a concentric attack on the city of Leipzig in large masses: the shells rained on the Hessians, whom Prince Emil led to a more sheltered position on the promenade which separated the city from the suburbs; the 1st Battalion of Fusiliers and the 1st Battalion of the Leibgarde pushed back for a moment the enemy who forced the gate of Kohlgarten: but the Swedes took these battalions from behind… The  Leib Regiment fortunately released them.

At noon, we abandoned the suburbs; two grape shots fired by the Hessian pieces made the assailants retreat further; meanwhile the Swedish artillery arrived, so that the attack was resumed by the allies on the gate of Grimma, where Baden and Hessian competed in courage and devotion. The two pieces of Hessian cannon that remained with the brigade were heading towards the Elster bridge, from which they were only a few meters away, when the latter blew up… The Hessian artillerymen then spiked their two pieces, crossed Elster swimming and rejoined their battery in Lützen the next day.

Finally yielding to numbers, the Hessians retreated while fighting in the streets of the city; the Austrians had already entered through the Saint Peter Gate and had reached the market place… the Prussians were also emerging from all sides… Prince Emile could no longer continue a fight that had become useless: he ordered a cease fire, stopped and assembled what remained of soldiers, had their arms piled: 45 officers and 200 men were thus taken prisoner; in the three days of the battle the contingent of Darmstadt lost 3 officers and 22 men killed, 12 officers and 169 soldiers wounded, without counting more than 150 missing men; the 1st Fusilier Batallion had only two-thirds of its strength; the Leib Regiment numbered on the morning of 16 October, 20 officers and 440 men; of this number 16 officers and 81 soldiers were prisoners, all the rest were killed, wounded or disappeared… the two flags of the regiment, torn and buried in Leipzig, did not fall into the hands of the enemy."

Prince Emil again commanded the Hessian contingent under the Allies in 1814, when Hessen-Darmstadt finally abandoned Napoleon's cause. 


I have been able to find little about Prince Georg of Hessen Darmstadt (foreground). He was the second son of Grossherzog Ludwig I, born 10 years before Emil, in 1780, and died in 1856, the same year as Emil. Interestingly, neither ever married. The oldest brother, Ludwig (1777 -1848), became Grossherzog Ludwig II upon the death of his father in 1830. He was unpopular, and during the March Revolution of 1848, abdicated in favor of his first son, who became Grossherzog Ludwig III. He died only a few months after his abdication. 

Sunday, January 22, 2023

2nd Manassas

On Saturday, Thomas, Nick and I got together for a game at Jared's home on short notice; he already had another game set up in the basement, and his wife was out for the day, so we played on the dining room table!

The scenario was 2nd Manassas (Bull Run), and the rules were Big Bloody Battles by Chris Pringle. Jared had run games with the rules, and I had a copy which I had skimmed a bit, but none of us had ever actually played the rules before! 


We diced for sides, and that left Jared and me with the boys in blue, and Thomas and Nick with the Rebs. The Confederates started with just Stonewall Jackson's command on the table, but well situated on hill with rifle pits at its base. 

Thomas and Jared deployed well, with their 3 batteries being exceptionally well positioned on the hilltop. 

Close up of the troops on Jackson's right. The figures are from Jared's excellent  15mm ACW collection; he says they hadn't been out on the gaming table for at least 10 years

J.E.B Stuart's cavalry were the only troops protecting one of the three Confederate objectives... at least to start. We both knew the other side had reinforcements coming on, but not when or where! The game is wonby taking at ,least 2 of the three enemy positions while holding at least 2 of your own. 


Part of the Union deployment.

The rest of the Union deployment.

Situation after the first Union move; one of our Divisions is moving to seize control of the Bridge over Bull Run and its associated Objective; unfortunately, much of these troops are Raw and thus rather brittle. 


Although we had troops that could have entered on Turn 1, they flubbed their roll and failed to appear. Longstreet's boys showed up nice and promptly for the Secessionists!

On Union Move 2, the bridge is taken with no losses...

because the men in grey have focused all their fire on two of the Union batteries, silencing one; it will have to withdraw to the rear next move, then move up on the following move, before it will be able to fire offensively again! In these rules, "opportunity" fire can be taken during your opponents move at any troops that moved or changed formation. With most of the infantry armed with rifled muskets (range 9"), and the artillery having an 18" range, this can be a real nuisance!


Fire by Johnny Reb's guns have silenced a second Union battery on turn 2!

Still, we Yanks control one Rebel objective; unfortunately, taking a second is not seeming very likely!

Longstreet's men deploy in preparation for an attack on our not very strong center, and our own reinforcement finally arrive! Stuarts cavalry use the swift road movement (troops move TWICE as far on roads, something the author conveniently left off the QRS; what is it about authors and their rules summary sheets? You'd think such a huge factor belongs on it, wouldn't you?!)

Another view of the overall situation at this point. 

Another view of the same. 

Our reinforcements advance, much faster than their first attempt, now that we know about the huge road move bonus! Not the blue chip denoting an objective way out here!


One of Longstreet's Brigades advances boldly upon our center. Our defensive fire? "They couldn't hit an Elephant!"
 
The consequences of their ineffectual fire was an assault by the aggressive Rebs, whose own closing fire disrupted our brave boys. 


In the event, the assault was narrowly repulsed. 

Our reinforcements move up, while Stuart's cavalry attempt an outflanking move!

Overview of the action, Stuart's cavalry having redeployed to their right. 

Stuart's cavalry charge, the boys in blue once again failing to have any impact with their defensive fire. Grr! At least the Confederate infantry behind them, which was planning to support the attack, rolled a half move and lacked sufficient legs to join the fight!

First and ten, do it again; Rebs from the Palmetto state, having shaken off their disruption, charge again.  Had I realized it, if the unit behind them been in contact with the unit to their front, this would have given positive melee modifiers for depth and numbers. This time the Yanks are pushed back, and both units are disrupted. 

Quite mess on the Union far left; bringing our superior numbers to bear has proved very challenging!

Judging the time right, Jackson's infantry move of their defensive positions, and move to the attack!

Close up of Jackson's advance - veteran troops supported by artillery, and facing off against Raw; this will go well... not!

Their supports, our sole Veteran brigade, get shot up by rifle and artillery fire, losing a base and becoming disrupted. Ugh!

Longstreet (played by Nick) continues his aggressive push up the center; this time the attacking unit is supported by a second unit in Depth behind them; this gives positive modifiers for  Depth and 2:1 outnumbering. Yuck! Not surprisingly, this time my Yanks are forced back 9" with disruption and the loss of a base. 

This allows the victorious Rebels to make a breakthrough move and continue to attack!  Now worries, 2 batteries of artillery firing at cannister range should rip them to shreds! Eh, what's that? NO defensive fire at breakthrough charges? Hellfire and damnation! Who wrote these rules?  :-)

My batteries rolled very well to escape with "retreat 3 inches, silenced! At least only ONE breakthrough assault is allowed per unit per turn. Phew!

Final charge of the game, Confederate infantry supported by their cavalry, charge Jared's infantry. Once again, they fail to hit anything, while the Rebs fire achieves a disruption. Yeah, they're gonna win that one - NOT! At this point, it was the end of Turn 5; mercifully, for the Union cause, night fell and the fighting died off. 


The photos are a combination of mine and those by Thomas. He had a number of funny quips following the game:

"Thomas just about polished off all the chips. Thank God he missed the poker ships on the table!"

"Gotta prep for Church tomorrow, Nick!"

Jared says "Let's see... if I order pizza I bet I can get Peter to start liking this period. I'm gonna try!"

Peter says "Nice try, Jared (though the pizza was delish), but  no, that's not for me! Not enough color on these troopers, and where is combined arms warfare? dragoons who can't even follow through on a decent saber attack?!"

In truth I had a great time, with great guys! Learning a new set of rules is always an experience. I prefer Field of Battle/Battle Command, but I'd play these rules again, too! 
Tuesday, January 17, 2023

Spanish Napoleonic Limber

I finally got around to painting this mule drawn Spanish limber.


I was hoping to have it ready for the Ocaña game on 12/31, but couldn't quite get it ready by then.


Attaching the cast "ropes" was a nuisance, but worth it in the end!


Model is by Perry.