Wednesday, February 11, 2015

"Close Action" Age of Sail Naval rules at The Portal

    Andrew, Greg and I had a go at a first game  with these rules by Clash of Arms games (not to be confused with "Signal Close Action" by Rod Langton) a few months back at The Portal gaming center of The Time Machine hobby store in Manchester, CT. Technically, this is a boardgame (2 paper map sheets and cardboard ship counters are included), but it works at least as well as a miniatures game. On the surface, it is similar to the old "Wooden Ships and Iron Men" boardgame, and the related "Ship 'o the Line" Miniatures rules . 


Close Action rules, by Mark A. Campbell, and published by Clash of Arms Games. 


Andrew set up the CA introductory scenario, playing the British (4 frigates), while Greg and I had the French - 3 Frigates and a sloop. I don't have a lot of Frigates in my collection, so we had to borrow some Spanish Ships to augment my British Frigates, and some Dutch ships to augment my French ones. The goal of the scenario was for the French to escape from the British. Andrew mistakenly played for closing to action, while Greg and I shuffled off to, well somewhere far from the RN. All but one of our 4 ships would clearly make it away, losing only the smallest to the British pursuit. A good review of writing orders and sailing with no real shooting!


Greg had to leave, so Andrew and I re-used the same ship sheets/stats (like SotL, these are rather a pain to set up), and agreed to have at it so that we could learn the rules. I again took the French knowing that in a straight up fight victory would be all but impossible against a stronger, better force.  Here, the first of the "Jolly Tars" close upon my line. 


Continued maneuvering to effective range by the British Squadron. 


I kept my line as tight as possible, hoping to rake one of more of the British ships as they closed. 


I did fairly well with the opening shots, but the range was still too long for any decisive effect, especially with my inferior crews. 


The action becomes general!


Rakes, collisions, musketry from the marines in the tops - all sorts of action!  Boarding however, although allowed in the rules, is usually fairly futile. 


The tidy lines disintegrate, and the fight  becomes more a series of duels. 


After some earlier success, the heavier weight of the British broadsides, along with their superior crews began to tell.


As my ships lost rigging and hull sections, French morale began to nosedive... and with it, their combat performance!


A sandwich, perhaps Monsieur?


We made many msitakes alopng the way, as is to be expected playing a new rules set. 


The Collision rules, which are very important, were easily the most troublesome aspect to get down; this is typical for Age of Sail games, in my experience. 


Top down view of the later stages of the action
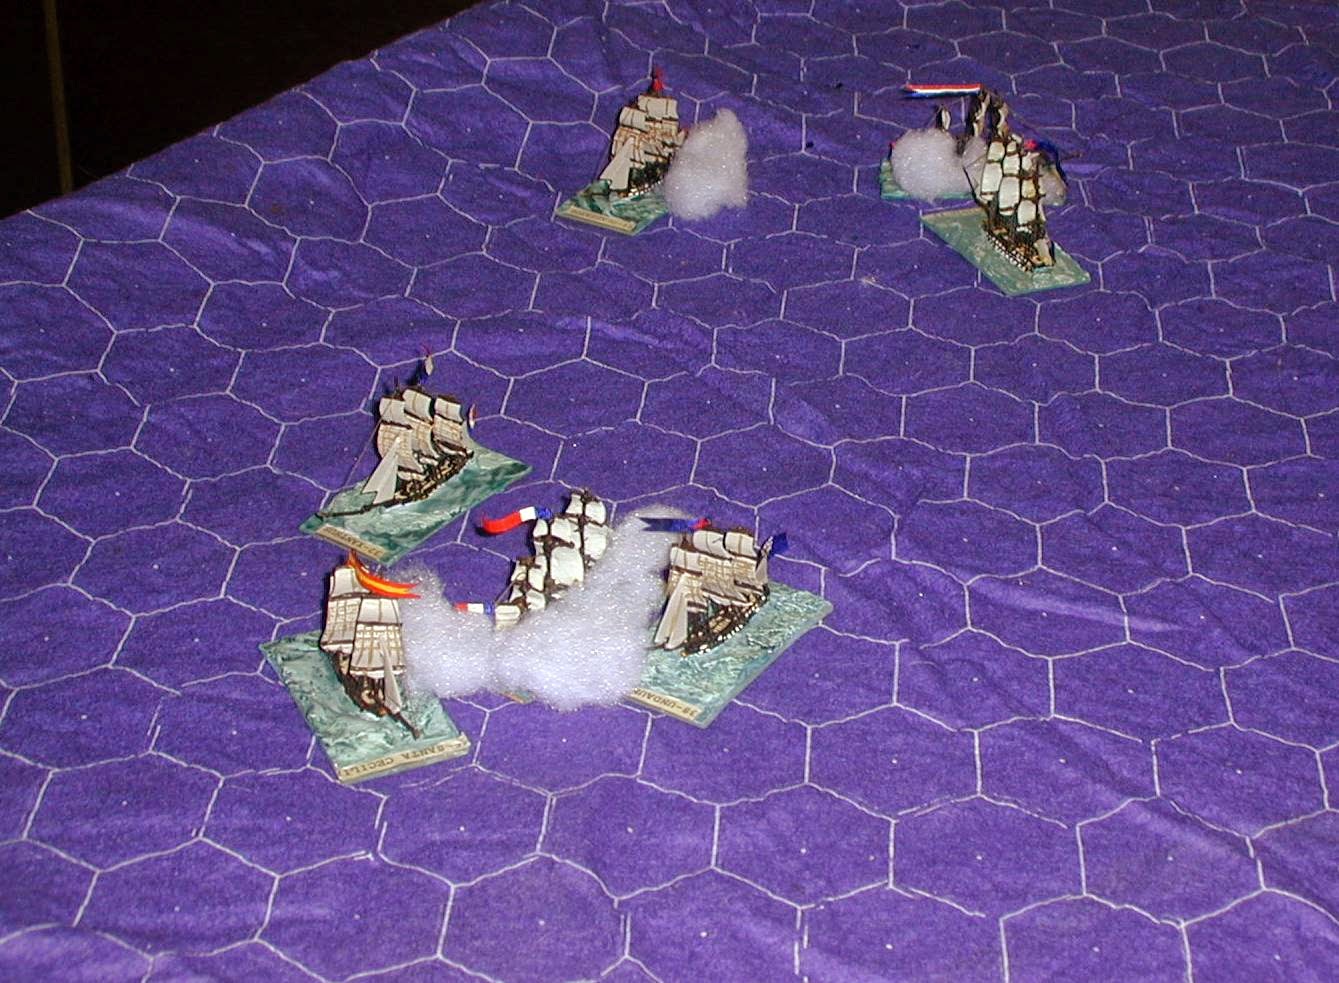

In CA, orders are written for each ships movement and crew tasks, and then the orders are carried out. The author suggest the rule are at their best when one player command a single ship, or failing that ships from diverse squadrons, to model the limited communication and coordination possible in fleet actions once the battle was underway. 


I'd disagree - first of all there are few settings where that many players can be assembled, and second, for any thing but veteran players, the chaos of writing orders, the effect of your enemy's orders, the varying capabilities of the different ships (all 74's are definitely NOT the same in these rules!), and the degradation caused by combat damage combine to make close coordination far more difficult than it might seem!


Approaching the "Far side of the World" (title of one of the excellent Patrick O'Brian Auibrey/Maturin novels of the RN ijn the Napoleonic Wars). 


Down to just two French ships vs all four British remaining, the rest of my ships strike and call it a day... Rule Britannia!


    We learned a lot from this game and enjoyed it enough that a follow up game was planned for the inaugural running of Portal Con in Manchester, CT for mid January. Unfortunately, that day saw an ice storm strike the state. I ventured a mile down the road from my home before deciding the roads were too unsafe and had to phone in a cancellation. Andrew ran the game himself using the mapboad and counters, which went OK, if not as visually satisfying as the 1:1200 models! Hopefully we will get to play again before too long!

    Based upon this certainly inadequate trial of the rules, they seem a quite good simulation of naval combat in the Age of sail. The rules are fairly complex, with a lot of detail and chrome. The combat mechanics are probably the simplest part of the entire game!  The set up time for the ship sheets is a significant negative; the large number of scenarios included in the rules (with two more expansions available - "Monsoon Seas" and "Rebel Seas"), on the other hand, is a big plus. 

    There is an independent commercial  product available to automate the generation and print out of ship sheets for these scenarios -The Naval Register. This costs $22 plus $3 shipping, and an extra $7 for each of the add ons - thus  $39 for the whole package. I'd say if you plan on playing these rules more than twice, the savings in time and the improved format of the ship shapes would seem to make this purchase a pretty obvious choice. A pdf of the manual for this product is available for review on line as well. 


"Hearts of Oak", the official March (?!) of the British Navy
(originally from an Opera written in the the 18th century - Capt Maturin in the O'Brian books complains that he detests the lyrics!)

Saturday, February 7, 2015

British Generals part 2

My second group of British Napoleonic generals are from a set by Wargames Foundry, focusing on British commanders at Waterloo.


Here's the whole set of 10 figures. They are clearly heavily inspired by the 1978 Osprey men at Arms "Wellington's General;s" by Michael Barthorp.


Here is the "Iron Duke" himself, with an ADC and an officer of Dragoons.  


Wellington was known as a rather dapper dresser, and the understated style of his dress as seen above became quite famous.


He held an amazing number of titles, being made a Knight of the Bath (thus Sir Arthur Wellesey) in 1804, Viscount Wellington in 1809, Earl of Wellington and then later Marquess of Wellington in 1812, and Duke of Wellington in 1814. 


Wellington held still more foreign titles, as well as honorary appointments as Field Marshal of the armies of Austria, Hanover, the Netherlands, Portugal, Prussia, Russia, and Spain!
l

Here is Henry Paget, Earl of Uxbridge (1812), in the ornate uniform he wore at Waterloo. 


He served  as a Lt. Colonel of Infantry (80th Regiment) in the Duke of York's ill fated campaign in Flanders in 1794, before transferring to the cavalry, where he commanded the 7th Light Dragoons. He commanded a brigade of light cavalry and served, with distinction in the otherwise disastrous campaign of 1799 in the low countries, and was promoted to major General in 1802.


Promoted to Lieutenant General in 1808, he commanded a Division of cavalry under Sir Thomas Moore, and once again served with distinction during the difficult retreat to Corunna. After his return to England, he left his wife and eloped with Wellington's sister in law. Not surprisingly, he was not welcome in the Peninsular army under Wellington's command, and never returned there.


Despite the above family issues, he was appointed command all of the Cavalry in the Anglo-Allied army for the Hundred Days campaign. Very late in the Battle of Waterloo, a cannon ball stuck him in the leg, which was amputated shortly thereafter. According to tradition, he was not far from Wellington at the time of his injury, and exclaimed to him "By God sir, I've lost my leg", to which Wellington replied, "By God sir, so you have!" Said leg was later buried in Waterloo, and a shrine erected, becoming quite a tourist attraction, and later the cause of a diplomatic incident - it's macabre history is told here on Wikipedia.


Sir Roland Hill, seen above, was perhaps the most trusted and best liked of Wellington's subordinates.


He joined the army at age 18, and came to notice serving as an ADC at the same siege of Toulon in 1793 where a certain Corsican general of Artillery first came to prominence! He served in Egypt in 1801 at the head of his own 90th regiment of foot. Rising to Major general, he commanded a brigade in Hanover in 1805 and then in the Peninsula under Wellesey, then Moore, and then Wellington again. 


Promoted to Lieutenant General in 1812, he was one of the few officers Wellington trusted with independent command. He commanded the 2nd Division and later a Corps in both the Peninsula and again during the 100 Days campaign. Reliable and energetic, he was also a kind man who was beloved by the soldiers under his command. 


Sir Thomas Picton joined the army, on paper at least, as an ensign at age 13. He first saw active service in the West Indies, where he remained until 1803. He was promoted to major General in 1808.


Picton commanded the 3rd Division throughput the Peninsular War, playing important roles at the battles of  Busaco and the sieges of Badajoz and Cuidad Rodrigo. He was promoted to Lieutenant General in 1812. Hmm, I need to paint the edges of this base, don't I?  I was running low on my Litko bases and so used some very old tan masonite for this, and the unpainted light color really shows!


Picton was called to command the 5th Division during the Waterloo campaign, and was badly wounded in the fierce fighting at Quatre Bras. He concealed his injuries and led his Division again at Waterloo, where he was killed by a bullet to the head.


Picton was famous for his disdain for uniform regulations, and fought the Waterloo campaign entirely in civilian dress, including his famous top hat, which is preserved in the British national Army museum. I have chosen to give him a dark green coat here to help this unique character stand out more on the tabletop!


Finally we have this un-named British General officer, reading a map, and perhaps seeing the English sounding village of Waterloo near Brussels. He wears his lapels fully buttoned up, and thus all but invisible. 


He wears a regulation British General's uniform, although the white feathers on his hat are supposed to be reserved for higher ranking general officers.


The rear view shows the crimson sash worn by all British officers, and some of the gold lace detailing on the tail of his jacket. 


With the change in plans to running Ligny at Historicon, after this post there will a hiatus in posts about red coats and regimental histories, while I switch to a 5 month span of Prusso-mania!

Peter

Wednesday, February 4, 2015

Battle on the Katzbach, 1813: Scenario for Snappy Nappy

    I have been planning to run a Napoleonic game at HAVOC this year (March 2015). My original; idea was to use Die Fighting 2, which I think would still have worked well. However, on considering it,. it seemed like running a game with Snappy Nappy made more sense, as it would feed into the big "Waterloo Campaign in a Day" with those same rules that we'll be running here in Connecticut a month later. In considering possible actions, I thought it would be good to do another 1813 battle. So I chose one that I haven't done before - the Battle on the Katzbach, August 26, 2013 - perhaps the finest day of Blucher's career, if no so for his opponent, Marshal MacDonald. The forces involved were considerable close to 100,000 men on both sides, and divided among four or more Corps. In addition, the OOB has a nice variety of troops and nationalities for real Napoleonic color... although with the abysmal weather that day, my table will be far more colorful than the soggy overcoats that were doubtless the reality of the day for most!

    The game should fit well on one of  the roughly 8 x 5 foot tables available for that convention, as well as the four hour length game slots. I developed the scenario from several sources, including Nafziger's  invaluable "Napoleon at Dresden: the battles of August, 1813", and the scenarios for the battle for Napoleon's Battles (by Rafael Pardo) and Sam Mustafa's Grand Armee:

http://www.rafaelpardoalmudi.com/nbkatzbach.html

http://www.deepfriedhappymice.com/GA_Scen_Katzbach.pdf


    It actually "warmed up" to 32 degrees this past weekend, so with that, heat leak from the attached house, some direct sunlight, and the heat from the car engines after being driven, the garage was warm enough for priming... and it doesn't appear like it will be again for weeks! So I primed the entire Lancashire Games order -over 120 figures worth of Prussians. I then painted the Prussian Blue on all of their coats 2 days ago. They should keep me busy painting until Spring!


A romanticized version of Blucher at the Katzbach, his famous pipe in hand.  At least *he* had the sense to have his overcoat on before the rain starts!


French Army of the Bober, Marshal MacDonald: Reliable


III Corps, GD Souham: Reliable
6 stands Provisional Light  Conscript
4 stands Provisional Line   Conscript
10 Stands Line                   Seasoned
2 stands Light                    Veteran
2 stands Baden Line          Veteran
4 stands Hessian Line        Elite
2 stands Hussars                Elite
4 stands 6# Foot Artillery (1 Baden/Hessian)   Seasoned
1 stand 12# Foot Artillery    Seasoned
1 stand 6#  Horse Artillery   Seasoned

V Corps GD Lauriston: Weak
20 stands French Line             Seasoned
2 stands Chasseurs a Cheval   Seasoned
2 stands 6# Foot Artillery       Veteran
1 stand 12# Foot Artillery       Veteran
1 stand 6# Horse Artillery      Veteran

XI Corps, GD Gerard: Weak
6 stands French Line             Seasoned
4 stands Italian Line              Seasoned
4 stands French light             Veteran
2 stands Italian Chasseurs a Cheval    Seasoned
2 stands 6# Foot Artillery                    Veteran
2 stands 12# Foot Artillery                  Veteran
1 stand Italian Horse Artillery.             Veteran

II Cavalry Corps, GD Sebastiani: Dashing
4 stands Hussars                            Elite
4 stands Chevau-Leger Lanciers   Veteran
2 stands Chasseurs a Cheval         Elite
2 stands Carabiniers                      Elite
2 stands Cuirassiers                       Elite
2 stands 6# Horse Artillery           Elite


Allied Army of Silesia, General Blucher: Charismatic


11th (Russian) Corps, Sacken:  Reliable
6 stands Russian Line             Seasoned
4 Stands Russian Jager           Veteran
2 stands 6# Foot Artuillery    Seasoned
2 stands 12# Foot Artillery    Seasoned

3rd (Russian) Cavalry Corps, Tschaplitz:  Weak
2 stands Russian Dragoons    Seasoned
2 stands Russian Hussars       Elite
6 stands Russian Cossacks     Militia
2 stands 6# Horse Artillery    Seasoned

1st (Prussian) Korps, Yorck:  Dashing
2 stands Prussian Grenadiers    Elite
2 stands Prussian Jagers           Elite
12 stands Landwehr                 Conscript
10 stands Prussian Line           Veteran
2 stands Prussian Hussars        Elite
2 stands Prussian Dragoons     Seasoned
2 stands Prussian Uhlans         Veteran
4 stands Landwehr cavalry      Conscript
3 stands 6# Foot Artillery        Veteran
1 stand 12# Foot Artillery       Veteran
2 stands 6# Horse Artillery      Veteran

8th (Russian) Corps, St Priest:  Reliable
6 stands Russian Line             Seasoned
4 Stands Russian Jager           Veteran
2 stands 6# Foot Artillery       Seasoned
1 stands 12# Foot Artillery     Seasoned
4 stands Russian Dragoons    Seasoned
2 stands Cossacks                   Militia

Left Wing (Russian) Langeron:  Dashing
14 stands Russian Line Infantry      Seasoned
8 stands Russian Jagers                   Veteran
6 stands Russian 6# foot Artillery   Seasoned
2 stands 12# Foot Artillery              Serasoned

1st (Russian) Cavalry Corps, Korff:  Reliable
2 stands Russian Dragoons              Seasoned
4 stands Russian Mounted Jagers    Veteran
2 6# Horse Batteries                        Seasoned


Map for Katzbach game, taken from the Grand Armee scenario by Sam Mustafa

All buildings represent Towns (hard cover). All towns can hold up to 2 bases,
The Katzbach river can be forded from the north edge of the map, to the town of Schlaupe. From Schlaupe west, it is crossable only at the two bridges, counting as Rough Terrain. After 2 turns of Deluge, it will become impassable everywhere except at bridges (see below). . 
The swampy ground counts as Broken Terrain, the woods as Rough Terrain.

At the end of each turn, the Allied player rolls a D10; if the score is less than or equal to the number of the turn just completed, then Sacken's 11th Corps may enter on the next turn. Sacken may start on the North edge of the table, anywhere East of Eicholtz, but his troops must be over 12" from any French stands.

At the end of each turn, the French player rolls a D10:
1,2,3        Weather improves one level (Rain stops if raining)
4,5,6,7     Weather is unchanged
8, 9, 10    Weather worsens one level - if raining, now at Deluge

Rain - per Snappy Nappy Rules
Deluge  - NO infantry fire except from buildings, Artillery fire is at -2 (same as Rain), Infantry in melee with cavalry is -1 per stand additional. All command distances reduced 50%.. After 2 successive turns of Deluge, the ground is soaked, and all terrain counts as one level worse for movement (Open -1/3 Move, Broken - 1/2 Move, Rough - 2/3 Move).

** having played the scenario out, I'd use a 6 foot wide table, and decrease all the forces by 1/3 for more maneuvering room.

Friday, January 30, 2015

British Napoleonic Generals, Part 1

I have had almost 2-0 British high command figures on my painting desk for over 6 months; they have been getting a little attention here and there as I had the time, and I took advantage of some recent New England "snow days" to finally finish them!


This is a group of seven 28mm command figures from Old Glory; their British General;s set plus one of the officers from their RHA set, who will serve as a British Artillery commander if needed. 


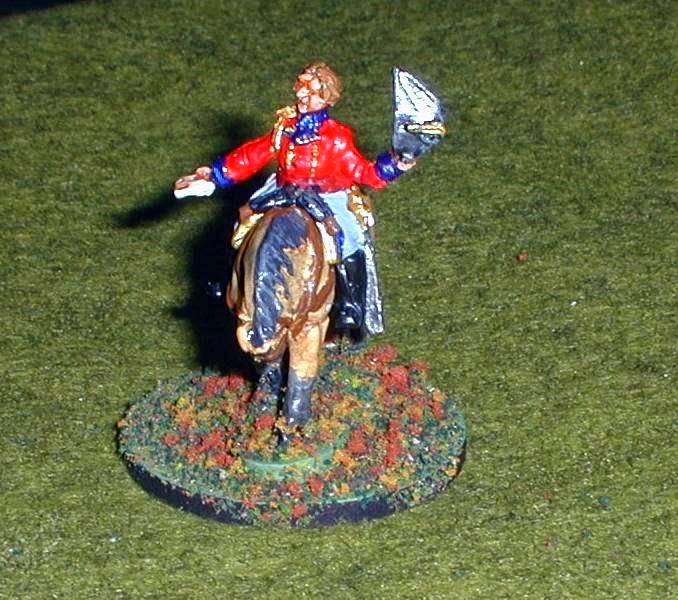
Here's the first one - "are those Prussian or French I see coming?"


He is wearing a pretty standard British generals's uniform with white pants.


Some of the dark red shading on the jacket doesn't show up too well here. I might consider black lining the crimson sash - the universal mark of a British army officer. 


Our next chap doffs his chapeau...


as he prepares to hand off some orders to an unseen ADC .


The gold cords on the right shoulder became a mark of a British General in the later part of the Napoleonic Wars.


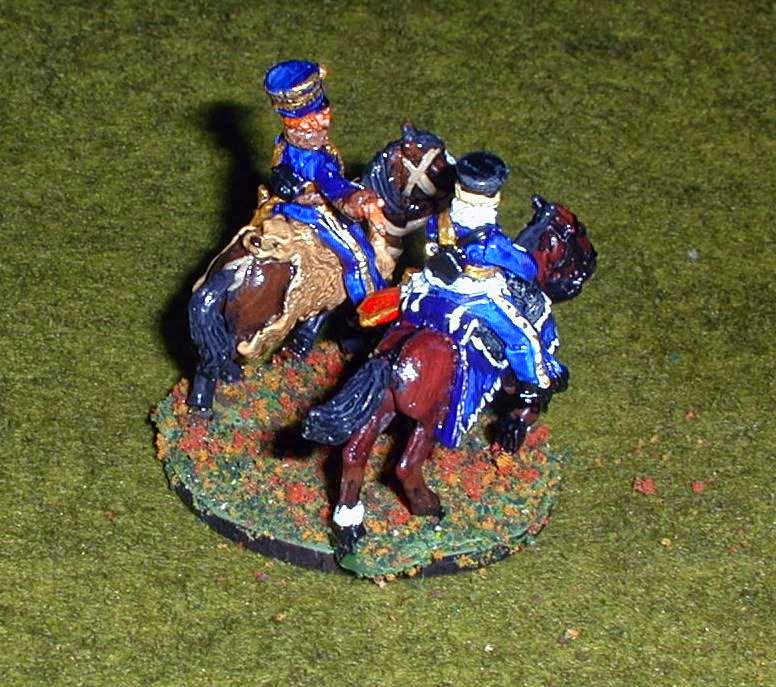
Here's the lone Cavalry general of the set.


His dress is clearly inspired by that worn by Uxbridge at Waterloo.


- right down to the leopard skin saddle blanket!


"Orders?! My Lord Soggybottom should presume to send ME  Orders? Harrumph!"


The dark blue saddle blanket with gold trim was standard issue for higher officers, apparently without any royal monograms or similar frippery!


The General's horses were painted en masse about 6 months ago, using staining and washing techniques. 

The standard British officer's coat was bright red with dark blue cuffs, collars, and lapels, with gold ornamentation. 


Turnbacks on the coat were white.


The short plume was UK standard white over red. No gold lace on the bicorn, though!


Classic "General with telescope" pose for this fellow - I should add a spot of light blue to the end of the scope for the lens!


He again wears the regulation uniform for a British General. 


"I say, Smithers, is that the Gin wagon approaching?"


This RHA officer was a spare from the Old Glory 20 figure RHA bag; I saved him for use as a Commander


The pelisse was worn by some RHA officers with a higher fashion sense!


Quite a dapper looking officer, especially for the Artillery!


The second part of this series will be some Foundy command figures form their last big sale a year or so ago!