Litko Aerosystems is one of my favorite hobby companies. and they had a nice Labor Day discount offer - $5 off for orders of $50 or more, $15 off for orders of $100 or more, and $40 of for orders of $200 or more. This was good timing as I found myself unexpectedly in need of some new bases. Allow me to illustrate...
I have these great Blue Moon 28mm Wagons (from Old Glory), and I started to assemble them. I have in mind to use them for a Klagenfurt scenario (there is one in my 1809 scenario book), and they'd work at least as well for a Peninsular Guerilla raid scenario. I had ordered about the biggest MDF bases Litko makes (60mm x 120mm), but as you can see, they still fall short of the length needed.
After considering various solutions, I decided that I needed some 60mm by 50mm bases, a size I don't generally use.
I could then add the 50mm bases to accommodate the wagon teams. By the way, my freind, Michael, aka Wargamer Rabbit, coincidentally happened to be working on his own Klagenfurt scenario, and has a great background piece on this unusual action on his blog.
It occurred to me that I might also have the same basing issue with the 2 new Sash and Saber Limbers I bought at Historicon, so the purchase made even more sense. Of course, I'd seed to do something additional to give the base sufficient strength. I have plenty of 50mm balsa wood sheets left over from my Windmills project, If I glue that on top, that should do it. I plan to terrain the base to look liker a road section anyway, so it should look fine when it's done.
So, of course I had quite a way to go top get up to the discount territory. I am getting down on my supply of these 1.75 x 1 inch bases, which I use for Napoleonic infantry and some single mounted commanders, and with my Spanish Napoleonic project on the horizon for 2016, I'll be needing plenty more infantry bases. so I added a bag of 100 to the shopping cart.
I have some 28mm Assyrian 4 horse chariots to add to beef up that army, so some bases fopr them went in the cart, too.
I needed some more of these really nice Arrow markers, which I already use with my usual Ancient and Renaissance rules, and come in even handier for To the Strongest! 2 bags added to the cart!
The battle with the Romans and their pila pointed out the need for some of these "Spears Thrown" markers to use with To the Strongest!, which can also be used to indicate Lance armed and/or Elephant units that have used their one time free card in melee. 2 bags of 10 each added to the cart!
A Pin Drill is one hobby essential I have long been without, so now's a good time to buy, right?
Added to the cart!
I am just about out of the supply of Tufts I got from Scenic express several years ago, so a pack each of Jungle, Winter, and Highland Tufts was added to the cart.
I want that $15 off, darn it - still a ways to go.
Litko makes a huge variety of really cool markers - I have these in fluorescent red, but the blue ones should prove useful for my Space Ship Battles, too. Into the cart you go!
Say, these markers are nice - oooooh, shiny! They'll work for shields down or engine damage.
I'l take a pack!
I really like these mini blast markers; I got 20 of them 2 years ago, but more would be handy for my space fleet battles, and they could also work with my Galley Warfare rules to show Hull hits. Sold!
Hey, that put me over the $100 mark; we can stop there, take the $15 (and apply it mostly against the postage charges),. Looks like the sale worked pretty well to get me to buy stuff, LOL!
"Caesar" Barry was over this past weekend for a trial go at Simon Miller's new Ancient wargame rules, To the Strongest! I decided to use a classic match up between Hannibal and the forces of the Roman Republic. I set up the forces for both sides using the (entirely free) basic army lists for the rules. I chose armies of 130 points each, a bit more than the 100 points that Simon recommends for a first game. The rules have optional rules for generating terrain and army deployment. I planned to use them, but it became clear that we would be best to "Keep it Simple, Stupid" for out first trial, so I went with a boring open plain and fairly typical deployments.
Republican Roman (Polybian)
Unit Type
Description
Points
General
Save 2+
4
Velites
Light infantry javelin; Save 7+
4
Hastati
Legionaries, small unit; Save 6+
5
Principes
Legionaries, small unit; Save 6+
5
Triarii
Hoplites, veteran, small unit Save 5+
5
Cretans
Light infantry bow, veteran; save 7+
5
Rhodians
Light infantry sling, veteran; Save 7+
5
Archers/Slingers
Light infantry bow/sling; Save 8+
4
Equites
Cavalry, javelin; Save 7+
9
Allied Lt Cavalry
Light cavalry, javelin; Save 7+
5
Ballistarii
Artillery; Save 7+
7
Camp
Camp
1
Fortifications
per side
1
3 Generals 12
Detached x 3 3
Heroic x 1
Mount a general 1
2 Heroes 2
4 Velites 20
4 Hastati 20
4 Principes 20
2 Triarii 10
3 HC 27
1 LC 5
1 Camp 1
3 Fort 3
1 Cretan Archers 5
TOTAL 130 points
Later Carthage
Unit Type
Description
Points
General
4
Javelinmen
Light infantry javelin; Save 7+
4
African Spear
Hoplites, Veteran; Save 5+
10
Sacred Band
Hoplites Save 6+
8
Iberian Scutari
Javelinmen, shock missile; Save 7+
7
Gauls
Warriors, deep; Save 7+
10
Balearic Slingers
Light infantry sling, veteran; Save 7+
5
Carthagenian Cav
Cavalry, javelin, veteran; Save 6+
11
Spanish Cav
Cavalry, javelin; Save 7+
9
Gallic Cav
Cavalry, javelin; Save 7+
9
Iberian Lt Cav
Light cavalry, javelin; Save 7+
5
Numidian Lt Cav
Cavalry, javelin, veteran; Save 6+
6
African Elephants
African Elephants, escorted; Save 7+
6
War Engines
Artillery; Save 7+
7
Camp
Camp
1
Fortifications
per side
1
3 Generals 12
Mount 2 generals 2
2 detached 2
1 Senior 1
1 Brilliant 4
1 Heroic 1
2 Javelinmen 8
2 Heroes 2
2 Libyan Spearmen 16
1 Veteran Spearmen 10
1 Gallic Warriors 10
2 Iberian Scutari 14
1 African Elephants 6
1 Carthagenian Cav 11
1 Gallic Cav 9
1 Iberian Cav 9
2 Numidian Light Cav 12
Camp 1
TOTAL 130 points
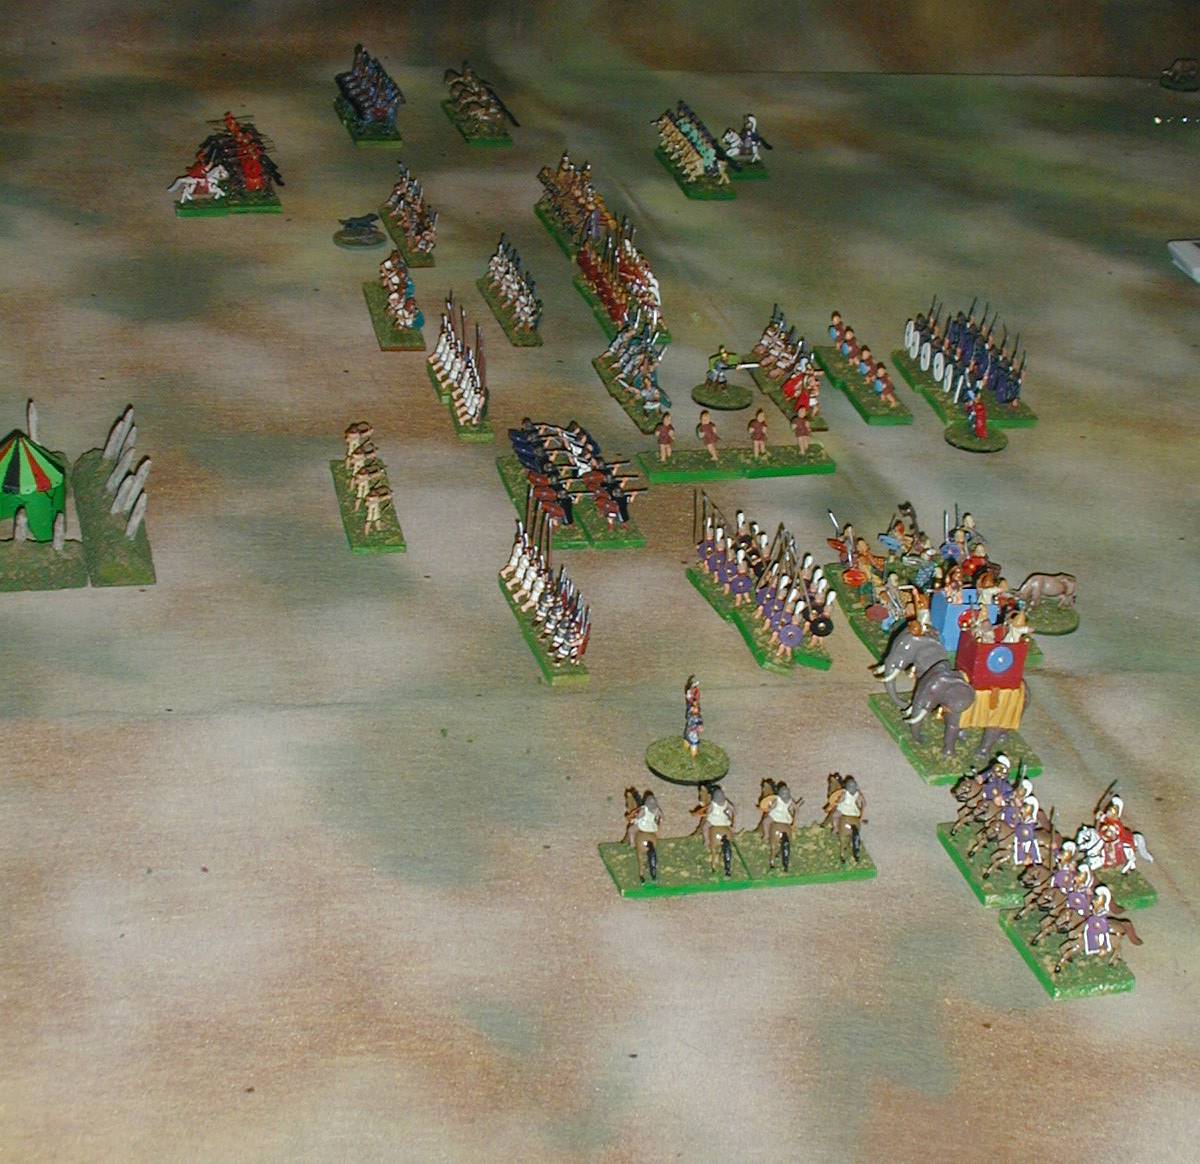
The armies "square" off - I had the forces Carthage (to the Left), whilst Barry chose to captain the army of the Republican Rome to the right. The Romans always win, right? Both armies have three commands - for Carthage, Hasdrubal has the right flank cavalry, Hannibal has all of the infantry in the center, and Gisgo has the two left flank Cavalry units plus an Elephant contingent. For Rome, Lefticus has the left flank cavalry, Centricus has most of the infantry, and Righticus has the right flank cavalry and a few supporting infantry units.
Backtracking a bit, I had to first prepare my "desert: table cover for the game. To the Strongest uses a gridded table. Those of you who have been following this blog for a while will know that I am rather fond of rules using such a system, especially in the Ancient period, where maneuver was usually rather limited. See the Charlie Sweet Ancient Rules and my own Legio Quaternarius rules, as well as my own Pikette Squared for other examples. Simon suggests making the grid very subtle but readily identifiable when you want to see it, by marking just the corners of the squares. he suggests 6" squares for 28mm troops, and some informal tests with my own figures supported his advice.
Using a dark brown "Sharpie" type marker ( I actually used a Bic "Mark It" permanent marker - my local CVS had a sale of 12 of them in rainbow colors for under $10), a made a solid dot of dark brown in a 6" grid. Using 3 tape measures it took about 40 minutes to mark the "invisible grid" on my 9 foot by 6 foot cloth ( 18 x 12 "boxes", as the rules refer to a square). You can see the grid if you look for it above without much difficulty, but it doesn't hit you between the eyes at all. Neat!
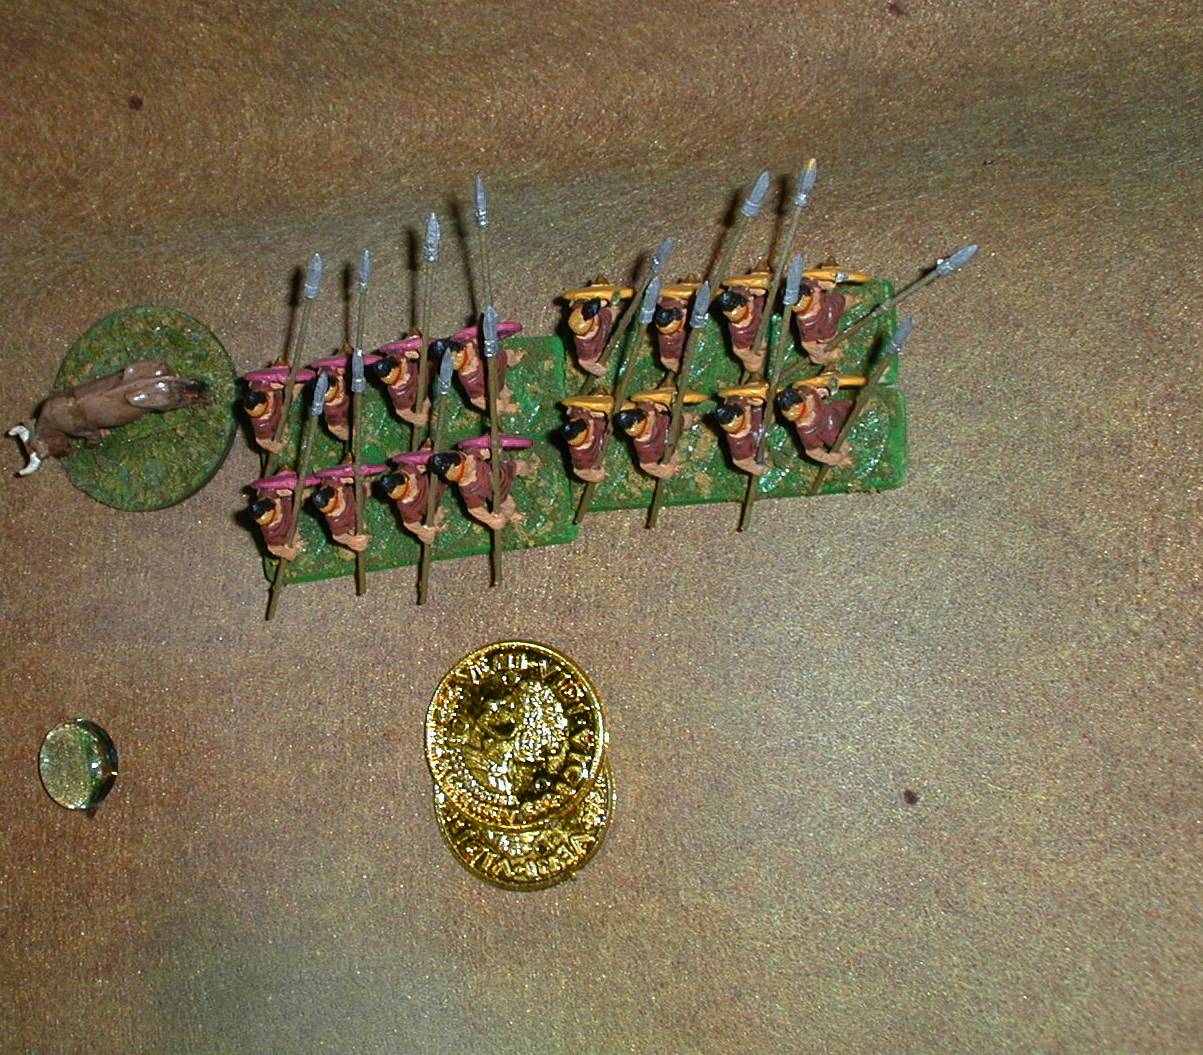
View from behind the Carthagenian camp. The Gold coins are "Victory medals"; when you lose the last one, your army has lost and the battle is over. The other markers are Ammunition reloads. They are lost if the Camp is lost. Once again, the grid is barely perceptible unless you want to be made aware of it.
Carthage moved first. I turned an Ace (1) for the first unit of my right flank command, ending their move right away, but my other two command moved forward. Now it is time for the Roman Move. In To the Strongest, you turn cards to activate your units, one unit (or sometimes for two units if they share the same square). The deck has 80 cards, 1 - 10 x 8. A unit may attempt to activate multiple times in a turn, but once one unit fails to activate, that command is done and you cannot attempt any more Activations, and must move on to the next command. Commanders can replay an Activation card once per turn, so it matters where they are located (they also have a short command radius of 2 squares), and in what order you attempt your Activations. You must activate a unit in order for it to Move, Charge (melee), Shoot, or Rally; pretty much anything except defend itself in melee or evade a charge.
My Carthagenians have made their second Move. Combat resolution is also done using the cards; those are played on the baseline,. I turned good cards here - 10's are as good is it gets for fighting or rallying! Indeed, in the upper right corner you can see 2 Roman units that were "lost" as a result of that combat. Units that are "hit" turn cards to attempt to "save; Barry clearly didn't have as good a draw as I did!
"
The table at the end of Rome's 2nd move - sans the cards!
Displaying his famous cunning Hannibal has maneuvered his nimble Numidian light cavalry on to both flanks of the Romans. "Punic Faith", call out the Romans, in horror at the idea of using brains rather than valor to win a battle. Or maybe it is just better cards...
Rom'e 3rd move sees an African Hoplite unit destroyed by pilum and gladius in the center (note the prominently empty box), and a maniple of Hastati turn to protect the Roman right from the pesky Numidians.
On its 4th move, the other African Hoplite unit gets revenge by destroying a Roman maniple, but Hasdrubal's cavalry is unable to dispatch the badly outflanked Roman cavalry, although the Iberian heavy cavalry does manage to rally for at least the second time.
On the Roman 4th Move, Lefticus manages to withdraw one of his heavy cavalry units from the Carthagenian trap, whilst the Roman Equites inflict a hit on the Spanish opposite them for perhaps the third time. The fight grinds on slowly in the center without much results.
On the Carthagenian 5th Move, Gisgo's Numidians pepper the opposing Roman Princepi with their javelins, and the Legionaries fail to save; having but a single hit (as a small unit), they are Lost, and with them goes another Roman victory medal.
On the Roman 5th Move, the Roman Knights of Righticus are bested by the Carthagenin Noble cavalry, taking a hit and thus becoming Disordered.
The Roman Right is looking quite weak!
However, Lefticus extracts his second heavy cavalry unit, and threatens the flank of both the Numidians and the Gallic heavy cavalry. Perhaps Rome can save the day on its left before it loses it on the right?
Roman losses thus far (the Bull represents a Hero, expended in a melee hit card replay.
Carthagenian losses to date, end of Turn 5. At this point we had been playing for about 3 hours (a large part of that time was spent looking up the rules for each new situation, as Barry had not read the rules prior, and it had been a months since my second read through as well).
Carthagenian Right, end of Turn 5. At this point, the play of the game was actually quite rapid.
The Carthagenian right center at the end of Turn 5.
he Carthagenian Left at the end of Turn 5. At this point we ended the game, as we were due to take the Czarina and the Empress both out to dinner together. Barry was pretty sure that Rome was on the ropes and wouldn't survive the next turn. I wasn't so sure. In any event, the four of us had a nice dinner together at Joey's restaurant and barely discussed wargaming at all in the process. I planned to finish the game solo, and use the opportunity to show a more detailed walk through of the mechanics of the game.
I did that this past evening. Carthage starts the 6th turn, as it had every turn, with its right flank command under Hasdrubal, an attached, Heroic leader. Rome's last moves extricated this flank, under the populist Tribune, Lefticus, from a very bad position. As a result, left Hasdrubal's command is now in considerable jeopardy. He badly needs to improve the situation of all of his units . His own Iberian heavy cavalry is Disordered, and will be destroyed if it takes another hit. Even worse, his Gallic Heavy Cavalry and Numidian Light cavalry are both at risk of being charged in the flank. Where to start? Well, with the unit that has the General with it, as he can replay one failed activation card per turn. He tries to Rally his Spanish HC unit. This is a Simple activation, so he only needs a 2 or more, but, as you can see, he turns a 1! The activation attempt fails. Oh no! (for the purpose of this walk through, I am showing failed cards as turned sideways).
"By the balls of Baal, we can do better than that, can't we, Ladies?!" Hasdubal swears, and uses his replay ability. Ah, a 6! Much more satisfactory. The Rally attempt is Activated!
To successfully Rally, the unit must turn its Save number or better, in this case a 7. The card is increased by 1 because the General is in the same box as the testing unit (he is an Attached General, so he has no choice), but decreased by 1 for each unit that could charge it - in this case, there is one such unit - the Blue Roman HC. So, the modifiers cancel out, and a 7+ is needed. As seen above, a 9 is turned, comfortably rallying the Iberians. Yay, Team! All cards that are NOT for Activations are played on the baseline of the table to avoid confusion.
The reversed stand indicating a Disordered unit is turned to the front. The Iberians are back to being like new! Hasdrubal next decides to attempt to to turn his Numidian Light cavalry to face the Blue Roman HC. As they are in the Zone of Control of a non-light unit (the square directly to the Front of an enemy unit), they can only turn to face at least one unit whose ZoC they are in, or withdraw. Changing Facing is a Difficult Activation, and thus requires one point higher than a standard activation. "But wait, walrus breath,!" Hasdrubal shouts. "The Numidians are a LIGHT unit! Activations are NEVER difficult for LIGHT units!" Thus the Numidians only need a 2 or more to activate their change of facing, and as seen above, they succeed, turning a 4 card.
Hasdrubal could attempt another Activation with the Numidians (such as shooting with their pointy Javelins), or indeed return to the Iberians, perhaps moving them forwards one or two boxes. However, he still needs to get his Gallic HC out of their precarious situation. They are not light troops, so this will be Difficult for them, needing a 3+. That is still better odds than a 7+ for a simple activation for the Iberians, or a 5+ for the Numidians, so the Gauls it is. With a flourish, Hasdrubal snaps a card down smartly in the Gaul's box. A 10! Tens *always* pass an activation, even if the previous card played was a 10. "Perhaps my Gauls will not be divided in three parts this day, Romans!", Hasdrubal jibes.
Next Hasdrubal decides that having his Numidians shoot at the enemy HC is his best bet (and also the most likely Activation to succeed. He needs a 5+, pretty good odds, but turns a 3. Hasdrubal's command's move is over, and he calls for some plundered Latin wine while he awaits events elsewhere on the field.
Carthage chooses to go next to the center command under Hannibal himself. This is a very large command, including ALL of the Carthagenian infantry. Hannibal is an unattached, Brilliant Senior commander on foot, which gives him some additional special properties, none of which, as it turns out, will come into play this turn. He has to be careful to keep all the units of his command within 2 boxes, so they do not fall Out of Command. This is actually a pretty large area of 19 boxes. Also, LIGHT units are exempt from this requirement. Hannibal can move along with any units he is accompanying, and may also move once on his own at any point during the turn, even after his command's move ends with a failed activation.
As he is already in the same box with a unit of African Javelinmen, he decides to start with them, hoping he can save his replay ability for later in the turn. Two Roman Maniples have achieved a partial local breakthrough with their cursed Pila. "Let's give the Latins something more to think about than Veni, Vidi, Vici, eh?" He wants to turn the Javelin to their right, threatening the flank of the enemy Princeps and Hastatus units. Needing only a 2+, the 6 succeeds.
Next, a unit of tough Veteran spearmen is in position to charge a Roman heavy infantry maniple to its front. As a SMALL unit, if he inflicts a single hit on it and it fails to save, it will be destroyed!. Needing only a 2+, the charge Activation succeeds with a 3. This is good because it leaves open the possibility of additional Activations of this unit later in the turn, with a good chance of success.
In Melee, most units require a 6+ to hit; however Light troops, Disordered troops, Artillery, Bowmen, Crossbowmen, Longbowmen and Mobs require an 8+; there are no other modifiers to the number needed to hit. Had the opposing Roman unit NOT thrown their pila earlier in the game, they could use them to issue "Shock Missile Fire" at the attacking Spearmen, needing an 8+ to hit. This defensive fire does NOT require an activation, and it pre-empts the Melee, with any results of the fire inflicted on the target FIRST, before the melee. Alas, "point d' pila, point d' SMF!" The Hoplites need a 6+ to hit the Romans, and as seen above, they miss!
Having survived the charge, the Romans strike back. They too need a 6+ to hit, and also miss. Had their been TWO Roman maniples (SMALL units) in the box, and had the lead unit been destroyed in the charge, it's brother unit could still have struck back at the attacker. Also, 2 small units can exchange places in a box as an Easy Activation, instead of a Difficult one, and they can also change facing within a box as an Easy Activation.
Hannibal decides next to have a Disordered unit of Iberian Scutarius cast their pila at the annoying unit of Cretan archers to their front. The Scutarius are Disordered and vulnerable, but that doesn't effect their fire. He could also have attempted to Rally the unit, but with three enemy units that could charge them, the odds would be long, even if Hannibal himself moved to join them. An Ace (1) is turned, and as Hannibal is not in the box with them, the card cannot be replayed; Hannibal's command is done for this turn...
- except that Hannibal can still use his Command Move, which he does, moving to a box with a unit of Javelinmen supported by some Iberian Scutari.
Finally, it is time for Gisgo's command on the Carthagenian Left. Gisgo is a Detached, Mounted general, and opts to activate the unit of Carthagenian Noble Cavalry that he is accompanying, ordering it to charge home on the Disordered (one hit suffered already) Roman Equites opposite them. Needing a 2+, with an 8 the charge is easily activated.
Needing a 6+ to hit in melee, this 8 is a success. The Romans must try to Save the hit. Like most Heavy units, it can take 2 hits. With one down already, it it doesn't Save. it will be Lost (removed from play). They need a 7+ to save.
Ugh! A 1!
The Hand of Jupiter descends from the clouds above, and ;plucks the Roman Knights from the field.
The loss of the unit costs the Romans a victory medal... actually, it should be TWO victory medals, as this is a 2 hit unit. Ouch!
As I am writing this, I realize that the Nobles should have advanced to occupy the box where they eliminated all enemies in the process of a charge, too! Oh well. Gisgo then attempt to activate the unit of Numidian Light Cavalry that has gained the Roman flank. It can move one box diagonally and then charge 1 box straight ahead, all for one Activation, and, as it is a LIGHT unit, this still counts as Easy, needing just a 2+. The 4 succeeds, and a melee results against the lead Roman maniple.
Because they attacked from a Flank or Rear, the Numidians get to play TWO cards. Because they are a LIGHT unit, however, they need 8+ to hit. Both miss. Because it was attacked from the flank or rear, the Roman target unit may NOT strike back. Ouch!
Next, Gisgo bellows out "Stomper, Mauler - charge Roman bastards!" This straight ahead charge is an Easy Activation for this "Escorted Elephant" (2 hits) unit, thus needing a 2+; the 7 is a success.
Needing a 6+ to hit, this 8 succeeds "How'd you like that tusk between your pteruges, boys?" Gisgo taunts. Once per game, Elephants (and Lance armed Cavalry) can elect to platy a second "to hit" card in melee. Gisgo opts to pass on that here. Now the Romans must attempt to save the hit. The Princeps need a 6+ to save. If they succeed (having thrown their pila previously), they will be able to strike back at the Elephants, needing a 6+.
However, they turn this 2, which definitely doesn't cut it!
As a SMALL unit, it takes only the single hit, so the hand of Janus swoops down and plucks the unfortunate maniple of Hastati from the field
accompanied by the "ka-ching" of another Roman Victory Medal lost.
The General must check for being hit as well. Righticus, from a conservative Senatorial family, is not Heroic, so he needs a 2+, and survives. Had he been a Heroic General (who can replay a Hit Card in lieu of an activation card once a turn during their move for a unit in their box), and thus needing a 3+, he would have been hit.
Gisgo now orders the Numidian Light cavalry to charge the flank of Roman Velites remaining in the box. The Velites can attempt to evade, needing a 7+ to succeed, as they are LIGHT troops in the open being charged by Mounted troops. They don't even bother to try.
The Numidians, being LIGHT troops, need a 8+ to hit, but they get to play a second, bonus card for charging the flank or rear of the Velites. The first card misses, but the second... does not! Now the Velites must attempt to save the hit, needing a 7+.
Once again, the Fates are not with the sons of Romulus today, as the Velites fail to save. "By the stupendous schlongs of the Sicilian Satyrs, who *shuffled* these cards, anyway", swears Righticus. He has, perhaps, forgotten that he too will have to save again because of the hit inflicted by the Numidians against a unit in the same box as he... and he is also at risk of being run down by the light horsemen as they advance into the box after defeating all the enemy units in it.
Pluto's hand grasps at the fallen Velites, who surrender yet another Victory Medal. The Romans have no Victory medals left, and have lost the battle! Gisgo graciously waves off the testing for Righticus' survival, allowing him to return to the Seven Hills with his shield rather than on it.
Total Cathagenian losses for the day.
The Roman losses were rather higher. "Hannibal ad Portas!" is the word in the Forum after today's disastrous events!
The table at the end of the battle from the Roman Left. It will be the Roman Praetor, Centricus, who will lead the Roman retreat.
View from the Roman right at the end of the day. Lefticus cusses as he looks to be left behind!
Conclusion and Observation: To the Strongest! is not complex set of rules, but there are a lot of subtleties to the (many) different kinds of units, the Activations, and the use of Generals and Heroes, etc. There are plenty of decisions to be made, and no plan is ever a sure thing; far from it! The pdf format of the rules is superbly done. Beautiful pictures, many clear diagrams and examples of play, and best of all, a hyper linked table of contents and a well done, hyperlinked index make the pdf easier to use than a print book (also available), the only downside being the need to have a tablet or laptop on or near the table. There is even an icon on each page that takes you directly back to the Table of Contents. Many army lists are available, all of them free. The rules accomplish their stated objectives well, and are fun to play. I am ready to explore some different army match ups (and some terrain on the battlefield) soon. There is also a discussion forum for the rules I am already thinking of ways to steal adapt the Activation system to other situations or rules as well. Highly recommended!
Although really having nothing to do with Rome, this 1897 march by Czeck composer Julius Fučík, "The Bohemian Sousa", is a great number (and a lot of fun to play as well). Forget the association with circus music (under the title, Thunder and Blazes). I especially like the final, melodic movement of the piece.