Sunday, June 30, 2013

Prussian Artillery, 1813

    In the wake of the drastic reduction in the strength of the Pussian Army resulting form the treaty of Tilsit in 1807, the Prussian army's artillery was reorganized into three "brigades", each to have a strength of 12 Foot and 3 Horse batteries. In terms of uniforms, the brigades were distinguished by the color of the shoulder straps - Prussian Brigade - white, Brandenburg Brigade - red, and Silesian Brigade - yellow. The Guard 6# Foot and Horse batteries both belonged to the Brandenburg brigade. In 1814, these distinctions were discontinued, and all batteries had red shoulder straps thereafter... at least on paper!

    Thus, the army maintained a fairly high Artillery contingent compared with the Infantry and Cava;ry establishments. Doubtless that was in part due to the technical nature of the Artillery service. By August 1813, there were six 12 lber batteries, one Howitzer battery, one 3 pounder Foot battery, twelve 6 lber Horse batteries, and thirty 6 lber Foot batteries. Of these eight were Landwehr batteries, all 6lber foot batteries except one 6 lber horse battery. Prussian batteries ordinarily consisted of six guns and two howitzers.


A pair of Prussian 12 lber batteries; one Calpe (with Calpe guns), and the other Old Glory (with Sash and Saber guns).


The Calpe unit is ti the front here; it was painted 10 years ago, while the Old Glory battery was just finished last night!


In this shot, the Old Glory Battery is to the left of the picture. 


This is a pair of Old Glory 6lber foot batteries, with Old Glory guns, once again painted about 10 years ago. 


The Old Glory guns run rather small , although these Prussian pieces are better than some of the others. I use the excellent Sash and Saber guns whenever possible now. 


Left overs from Old Glory Prussian Dragoon packs painted as mounted horse artillery...


equipped with Old Glory guns once again.


The dark "Prussian blue" sharaques are in evidence; the fellow on the grey is painted as a Trumpeter (note the "wings", for all artillery musicians, these should actually be black with white lace (yellow lace for the Guard units).

Here is a newly painted Prussian 6lber foot battery with Old Glory crew and Sash and Saber guns. The belts and other leather equipment were black for all Foot batteries. 


The foot artillery jackets had black collars and cuffs, piped in red, 


The turnbacks were solid red for the Foot artillery. Grey pants with black gaiters complete the uniform.
.

This is a Guard 6lber Horse Artillery battery. If the shakos were uncovered, they would have a yellow band on the top (in place of the white of the line batteries), a Guard star on the front of the shako, and for Parade use, a white"Busch" plume.


Alas, no one I know of makes such a figure, so the only clues as to this unit's Guard status are the yellow litzen on the collars and cuffs...


and the Guard star on the cartridge boxes.


These distinctions being rather subtle, I took a little liberty and pained the woodwork on their tools a light blue color to match the carriage color to make the Guard units stand out a bit more.


Here is a pair of Prussian Horse Artillery batteries with all the gunners dismounted for action, once again using Old Gory crew and Sash and Saber guns. 


In contrast to the Foot Artillery, Horse Artillery had white belts in stead of black, 


The turnbacks on the jacket (when worn instead of the Litewka coat, which was authorized as an option for Horse Artillery starting in 1809) were dark blue with a border of black velevet piped in red. 


The horse artillery also wore Cavalry overalls, with red [piping and brass buttons on the outer seams. 


This 6lber Foot battery is painted as a Guard unit. Once again, the covered shako obscures most of the Guard distinctions, which were the same as for the Guard Horse Battery.


The yellow litzen is barely visible. 

Once again I have painted the wood of the artillery tools light blue to help the Guard unit to be more readily identifiable; once again, in parade dress, a black Busch plume would also be worn.  the saddle blankets of Guard officers had silver Guard star emblems in the corners. 


A couple of spare OG artillery officers were used to make an Artillery Commander stand .


The cocked hat was an option for Artillery officers; when worn it had a black plume for Foot Artillery, and mixed black and white for Horse Artillery officers. Like all Prussian officers, a mixed silver and black sash was also worn.


Artillery NCO's had gold lace edging to their collars and cuffs (not shown).

This brings the total for the Prussian artillery arm of my forces top ten batteries (although I am short six 6# tubes still, which I may pick up from Sash and Saber at Historicon).

Peter

Thursday, June 27, 2013

British Beginings

    After I finish my 1813 Prussian expansion, it is on to starting a British Napoleonic army for the first time since my original armies of pre-painted Ochel flats of the 1960's. Roughly 11 years ago, along with his 1813 Prussian infantry, I bought Jamie's small collection of  (painted) 25mm British Minifigs for $1/figure - hard to beat that! The Prussians were pressed into service almost immediately, but I really hadn't touched the British at all since I bought them. Originally organized by Jamie for Column, Line, and Square, there were two Regiments, the 3rd Line (The Buffs - buff facings -, of course), and the 69th Line (South Lincolnshire -green facings). With CLS organization, that meant that each Regiment was composed of 2 flank companies of three figures each, 8 center companies of three each, a "Command Stand" of three each, plus a mounted colonel.

  For my own British units, after debating I decided to stick to my own standard infantry organization of 18 figures on six stands of three each per unit. I decided to go with 2 Light and 2 Grenadier "Flank Company" men per unit, 3-4 command figures(Officer, Standard Bearer, Drummer, +/- NCO), and 10-11 center company figures per unit.  That meant that I could make 2 units at my organization out of each one of his, more or less. I needed to change the basing to conform better to my own, so after soaking the bases over night in water with a little detergent added, the figures were easily removed, and reorganized and re-based to the above scheme. Jamie really did a great job with very finely detailed painting on these venerable Minifigs, as you can see below:


The 3rd Infantry, aka "The Buffs"; the light company is on the near side of the front rank, the grenadiers on the far side. 


The drummer wears reversed colors - Hurrah!  Even the drum is in the facing color with red rims. Evidently, the body of the drum was often painted with the regimental crest and/or battle honors as well - even in 25mm, not too easy to paint that on!


I have read that British regiments with Buff facings ordinarily wore buff pants and/or even buff colored belts. I am unsure of the accuracy of this information however, so I chose to leave them as painted. 


The wonderful designs of the Regimental Colors are another attraction of British Napoleonic units in miniature!


I used the surplus 15 figures plus the mounted colonel to make a second buff coated regiment; now if I can just find some old Minifigs British command packs!


I made thes second unity the 61st Infantry aka "South Gloucestershire" Regiment. Chosen strictly because it also wore buff facings with silver buttons!


The officer's saddle is in the (buff) facing color with edging in the button color (silver). Hard to beat the British army for military bling, eh?


This is the second of Jamie's two units, the 69th, aka the "South Lincolnshire" Regiment.


The green facings of this unit don't contrast quite as dramatically as the buff of the preceding two units.

Jamie did a fine job of painting these figures back ? 20+ years ago!


The green field of the Regimental colors looks great.


Once again I have pressed the mounted colonel into service as the 6th stand of a second unit (I "borrowed" a stand from the first(69th)  Regiment to complete the Square formation for this shot, though).


Once again, I love the green saddle blanket trimmed in gold on the Colonel's horse!


They look ready to hold the ridge line at Waterloo against the charges of the French Cuirassiers, don't they?


I made this regiment the 19th aka "1st Yorkshire", as once again it shares green facings and yellow metal buttons with the 69th!

  I figured that while I am attending Historicon in a few weeks, I'd take good advantage of my Old Glory Army card, and pick up an order there to start on some of my own British units to paint. Unlike the above units, which are in the later "Belgic" shako, I decided to do my units in the earlier "stovepipe" shakos which were worn through at least 1812, and probably well after that in many if not most units. OG makes these in three different poses: March Attack, Advancing, and Defending. I already have a unit each of Essex Light Dragoons and Hussars to paint, plus about 16 Minifigs Heavy Dragoons from Jamie, so I most need some more Infantry and some Artillery units.  Eventually, I'll have to figure out how all of this will coordinate with plans for Waterloo in 2015 (Joe has been working on painting units for Quatre Bras for 2015 for quite a few years now, using the magnificent Perry miniatures).

1 bag Center companies March Attack  = 3 units worth of  center companies BXI 09 30 figures @$35
1 bag Elite companies  March Attack = 3 units worth w/ 18 left over (become Light Infantry) BXI 10@$35

1 bag Center companies advancing  = 3 units worth of  center companies  BXI 11  @ $35
1 bag Elite companies advancing = 3 units worth w/ 18 left over  (become Light Infantry)  BXI 12@$35

Plus 2 bags of Command for all of the above  BXI 08 20 figures each @$25

Foot Artillery crews   in stovepipe shakos   BXA-03  20 figures at $25
Horse Artillery Crews   BXA-02  $25

That comes to $240, but with the magic of the 40% Army Card discount, $96 is knocked off for a final cost of just $144 for 200 figures.  Hard to beat that for value!


Probable future purchases:
1 bag Defending Center  BXI 13
1 bag Defending Flank BXI 14
1 bag of Command   BXI 08

1 Bag Light Infantry w/ command = enough for 2 units with adding some of the spare Elite company men from above  BXI 21

1 Bag of Fusiliers in Bearskins (? w/ command)  BXI 20

I will need a few more artillery crew, possibly from other manufacturers

 I will also need at least one unit of Rifles (? w/ command) = enough for 1 unit of 12 and one of 18.  I could get Perry miniatures instead. Hmmm.

Highlanders are a bit of a problem - with OG, I would need separate bags for command, center, and flank companies - thus it might be best to buy from another manufacturer, as I only want one or at most 2 units.  Once again, Perry might come in handy here (and they come in packs of 6).

Planning armies is a good part of the fun of our hobby, isn't it?

Peter

Sunday, June 23, 2013

Dresden scenario


    Last month I covered the background for developing my "based upon the Battle of Dresden, 1813" scenario. It did seem to me that the number of Allied troops was rather high. On re-reading my source materials, I discovered that part of the reason for that was that only a small part of Klenau's corps ever made it to the battlefield. Eliminating the surplus Austrian troops reduced the imbalance in the forces considerably. I also left out Teste's small Division on the French side. so adding a few more infantry units there helped, too.  It took me much longer than I expected to put this one together, especially having done it once before with Grand Piquet. Work demands, an annoying cold, and the approaching wedding of The Princess Imperial in August all combined to delay the project considerably!

    The basic idea behind adapting the scenario is to have 5 commands on the Allied side - 2 Austrian, 1 Russian, 1 Prussian, and the Allied reserves. This involved chiefly increasing the number of Russian troops and decreasing the numbers of the Austrians, and reshuffling some Russian troops from the reserves. On the French side, the Dresden Garrison is added to some of the French line corps, and the Imperial Guard troops shuffled around a bit (and I have substituted the Wurttemburg Guides for the Berg Lancers, which i don't have. Thus purists should work off the earlier OOB (with the above corrections) and not this one! This scenario was developed for use with Field of Battle, 2nd edition, by Brent Oman. A description of the rules is found here on this blog. See the prior post for the troop and ground scale, etc.


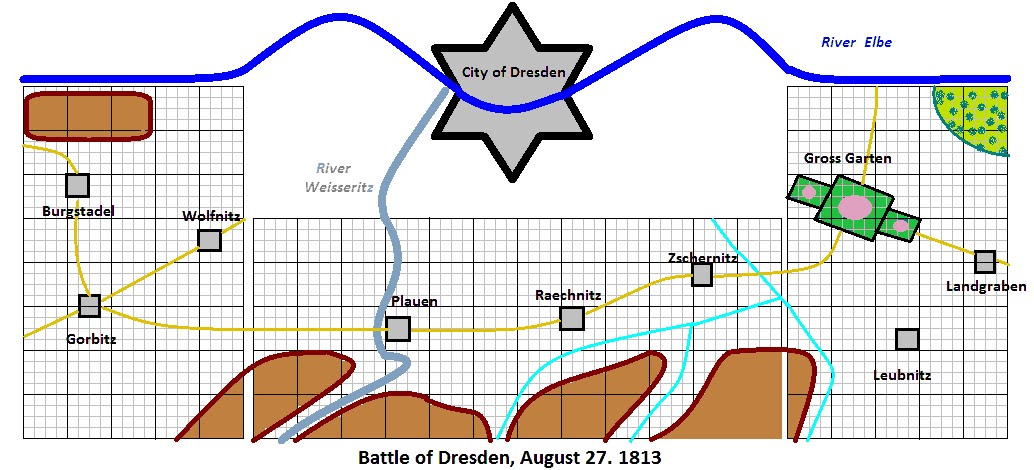
Deployment map for the Dresden scenario (terrain map is at the end of this post)


ALLIES: Schwarzenberg LD 10/Czar Alexander plus King Friederich Wilhelm LD 8 (see special command rules)
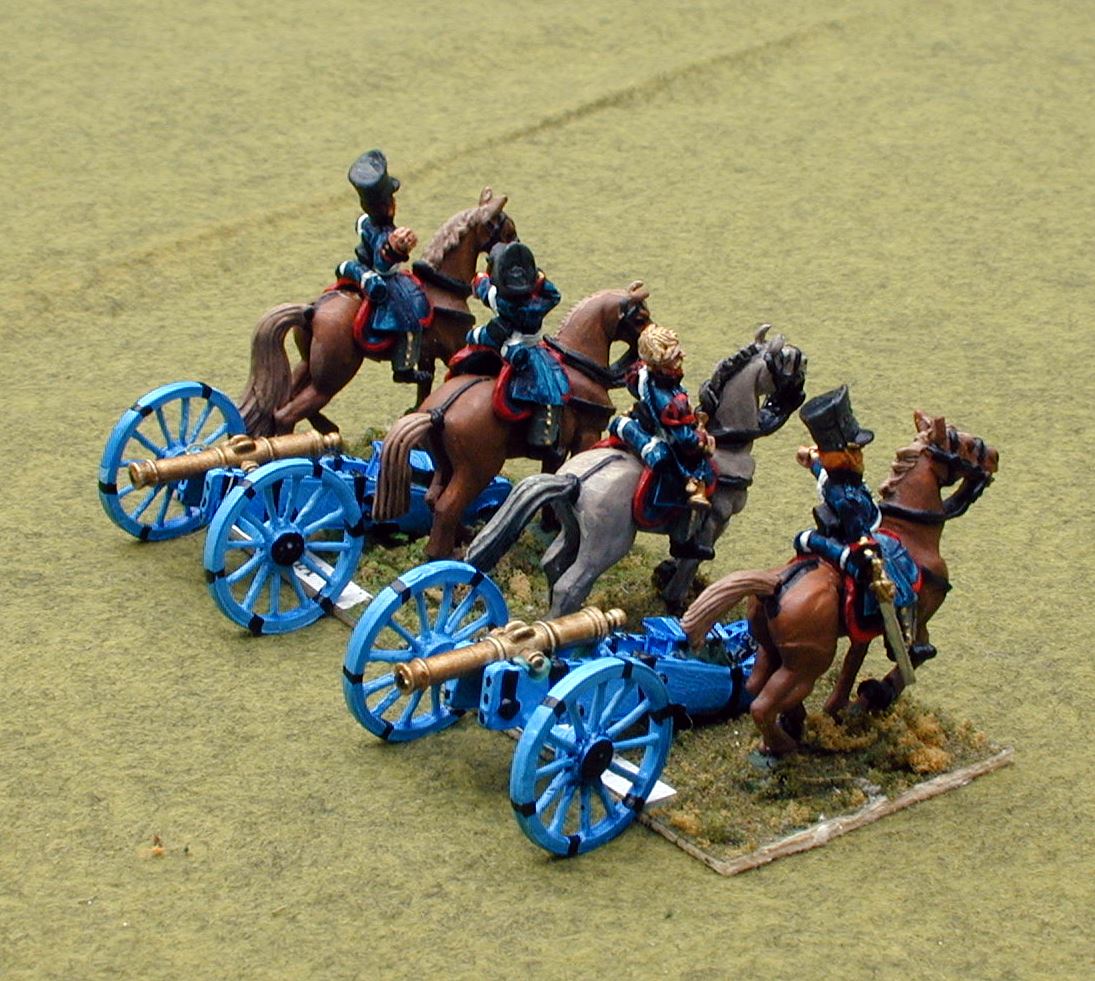
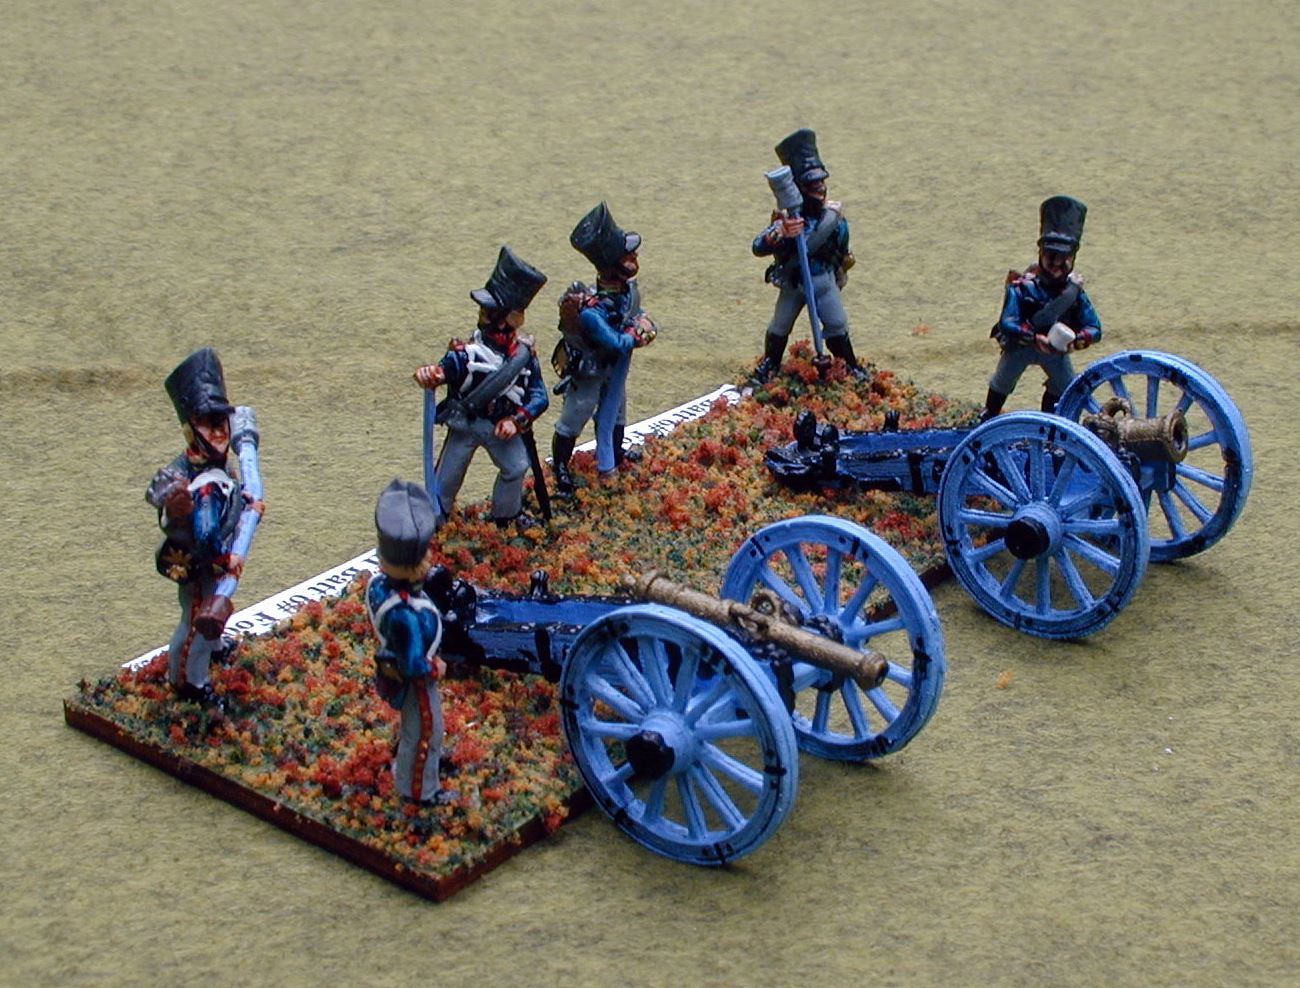
(123 units total: 79 Infantry, 27 cavalry, 19 Artillery)
AVERAGE Sequence Deck


 Ignatz Gyulai (Austrian)  LD8
(19 Infantry, 5 Cavalry, 3 Artillery) - 27 Morale Points

1st Light Division - Crenneville  LD10
3 Grenz  DD4 CD10
1 Chevauleger  DD6  CD 10

1st Line Division - Weissenwolf  LD10
6 Austrian Line  DD6  CD 10
1 6# Battery  DD6  CD 12

2nd Line Division - A. Liechtenstein  LD 8
6 Austrian Line  DD6  CD 10
1 6# Battery  DD6  CD 12

2nd (Heavy) Cavalry Division - Lederer  LD 8
2 Austrian Dragoons  DD6  CD 12

2nd Light Division - Mesko  LD 10
1 Grenz   DD4 CD10
3 Austrian Line  DD6  CD 10
1 Hussar DD 8  CD 12
1 Cuirassier  DD 8  CD 12+1

Corps Artillery Reserve
1 12# Battery  DD6  CD 12+1


 Hessen Homburg (Austrian)    LD 10
(20 Infantry, 5 Cavalry, 4 Artillery)  - 29 Morale Points

Light Division - Moritz Liechtenstein  LD 10
1 Jager   DD8  CD10
1 Grenz   DD4 CD10
1 Cheavu Leger  DD6  CD 10
1 6# Cavalry Battery  DD6  CD 12

1st Line Division - Colloredo  LD 8
5 Austrian Line  DD6  CD 10
1 6# Foot Battery  DD6  CD 12

2nd Line Division - Bianchi LD 10
5 Hungarian Line  DD6  CD 8
1 6# Foot Battery  DD6  CD 12

3rd Line Division - Civalart  LD 8
5 Austrian Line  DD6  CD 10
1 6# Foot Battery  DD6  CD 12

1st Reserve Division - Chasteler  LD 10
3 Austrian Grenadiers  DD 8  CD 12

1st (Heavy) Cavalry Division - Nostitz  LD 12
2 Austrian Cuirassier DD 8  CD 12+1

3rd (Light) Cavalry Division - Schneller LD 8
1 Chevauleger  DD6  CD 10
1 Hussar  DD 8  CD 12


Right Wing - Wittgenstein  (Russians)   LD 10
 (17 Infantry, 4 Cavalry, 4 Artillery) - 25 Morale Points

Advanced Guard - Roth  LD 8
2 Russian Jager   DD8  CD 10
4 Russian Line  DD8  CD 8
1 6# Battery  DD6  CD 12

1st Corps - Gortcachov  LD 10
2 Russian Jager   DD8  CD 10
4 Russian Line   DD8  CD 8
1 Russian Opolochenie   DD4  CD8
1 6# Battery  DD6  CD 12

3rd (Grenadier) Corps - Raevsky  LD 12
4 Russian Grenadiers  DD 8  CD 12
1 Russian 6# Battery  DD6  CD 12

Cavalry Division - Duka  LD 10
1 Cossack  DD4  CD8
1Hussar   DD8  CD 10
1Dragoon  DD6  CD 12
1 Uhlan  DD6  CD 10

Corps Artillery
1 12# Battery  DD6  CD 12+1


Kleist (2nd Prussian Corps)    LD 12
(16 Infantry, 6 Cavalry, 4 Artillery)  - 26 Morale Points

9th/10th Brigades - Von Klux/Pirch I  LD 10
2 Prussian Line  DD6  CD 12
2 Prussian Reserve  DD6  CD 10
2 Prussian Landwehr   DD4 CD10
1 Schutzen   DD8  CD12
1 6# Foot Artillery  DD6  CD 12
1 Landwehr Cavalry  DD6  CD 8

11th/12th Brigades Ziethen/Pr. August von Preussen  LD 10
3 Prussian Line  DD6  CD 12
3 Prussian Reserve  DD6  CD 10
3 Prussian Landwehr   DD4 CD10
1 6# Foot Battery  DD6  CD 12
1 Hussar  DD8  CD10

Cavalry Reserve - Von Roder  LD 8
1 Prussian Cuirassier  DD 8  CD 12
2 Dragoon  DD6  CD 12
1 Landwehr Cavalry  DD6  CD8
6# Horse Battery  DD6  CD 12

Reserve Artillery 
1 12# Foot Battery  DD6  CD 12+1


Russian/Prussian Reserves Grand Duke Constantine  LD 10
 (7 Infantry, 7 Cavalry, 5 Artillery) - 19 Morale Points

5th (Guard) Infantry  Corps Miloradovich  LD 8
4 Russian Guards  DD10, CD 12+1
1 Prussian Guards   DD10, CD 12+1
2 Russian Guard Jager   DD10, CD 12

1st Cuirassier Division - Depreradovich  LD 8
2 Guard Cuirassier   DD10, CD 12+1
1 6#  Guard Horse Artillery  DD 8  CD 12+1

2nd/3rd Cuirassier Division Kretov  LD 8
2 Cuirassiers DD 8  CD 12

Guard Light Cavalry Division - Chevich  LD10
1 Guard Hussar   DD10, CD 12
1 Guard Dragoon   DD10, CD 12

Prussian Guard Cavalry - Von Werder LD 8
1 Guard Cuirassier   DD10, CD 12+1
1 6#  Guard Horse Artillery  DD 8  CD 12+1

Army Artillery Reserve - Hune  LD 10
1 Guard 12 # (Russian)  DD 8  CD 12+2
2 6# Horse Batteries (Russian)  DD6  CD 12

----------------------------------------------------------------------------------------------

FRENCH:  Emperor Napoleon I  LD 12+1
(114 Units total: 62 Infantry, 29 Cavalry, 23 Artillery) 10 Reserve Morale Points
EXCEPTIONAL Sequence Deck


Part Imperial Guard - Marechal Mortier    LD 10
(11 Infantry, 5 Cavalry, 3 Artillery)  -  19 Morale Points

2nd Young Guard Division - Barrois LD 12
2 Flanquers   DD8 CD12
3 Voltigeurs  DD8  CD 10
1 6# Young Guard Battery  DD 8  CD 12

3rd Young Guard Division - Delaborde  LD 10
3 Voltigeurs  DD8  CD 10
1 6# Young Guard Battery  DD 8  CD 12

4th Young Guard Division - Rouget  LD 12
3 Tirailleurs  DD8  CD 10
1 6# Young Guard Battery  DD 8  CD 12

1st Guard Cavalry Division - Ornano LD 12
Wurttemburg Guides  DD8  CD 12
1 Dutch Lancers  DD10  CD 12

2nd Guard Cavalry Division - Lefebvre-Desounettes  LD 12+1
1 Polish Lancers  DD10  CD 12+1
2 Guard Chasseurs a Cheval/Mamelukes  DD10  CD 12+1


Part Imperial Guard - Marechal Ney  LD 12
(9 Infantry, 3 Cavalry, 6 Artillery)  -  18 Morale Points

1st (Old Guard) Division - Friant LD 12+1
2 Grenadiers a Pied  DD10  CD 12+1
2  Chasseurs a Pied  DD10  CD 12+1
Guard 6# Foot Battery  DD10  CD 12+1

1st Young Guard Division - Dumostier LD 12
Fusiliers- Grenadierts  DD10  CD 12
Fusiliers-Chasseurs  DD10  CD 12
3 Voltigeurs  DD8  CD 10
Young Guard 6# Battery  DD 8  CD 12

3rd Division - Walther LD 12
Grenadiers a Cheval  DD10  CD 12+1
Guard Dragoons  DD10  CD 12
Guards d' Honneur  DD8  CD 12
Guard 6# Horse Artillery  DD10  CD 12+2

Guard Artillery Reserve - Senarmont LD 12+1
Guard 12# Battery  DD10  CD 12+2
Guard 6# Horse Battery  DD10, CD 12+2
Young Guard 6# Foot Battery  DD 8  CD 12


II Corps - Marechal Victor    LD 12
(14 Infantry, 3 Cavalry, 4 Artillery)  -  21 Morale Points

4th Division - Dubreton  LD 10
1 Legere  DD6  CD 12
3 Line  DD6  CD 10
1 6# Foot Battery  DD6  CD 12

5th Division - Dufour  LD 12
1 Legere  DD6  CD 12
3 Line  DD6  CD 10
6# Foot Battery  DD6  CD 12

6th Division - Vial  LD 10
1 Legere  DD6  CD 12
3 Line  DD6  CD 10
1 6# Foot Battery  DD6  CD 12

23rd Division - Teste  LD 12
2 Line  DD6  CD 10

V Cavalry Corps - L'Hertier  LD 10
2 French Dragoon  DD6 CD 12
1 Chasseur a Cheval   DD4 CD10
1 6# Horse Battery  DD 8  CD 12+1


IV Corps - Marechal Marmont LD 12
  (16 I, 1 Cavalry, 4 Artillery)  -  21 Morale Points

20th Division - Compans  LD 12+1
1 Legere  DD6  CD 12
1 Line  DD6  CD 10
2 Infanterie de la Marine  DD8  CD 10
1 6# Battery  DD6  CD 12

22nd Division - Frederichs  LD 10
1 Legere  DD6  CD 12
3 Line  DD6  CD 10
1 6# Battery  DD6  CD 12

21st Division - Lagrange  LD 12
1 Legere  DD6  CD 12
2 Infanterie de la Marin  DD8  CD 10
1 Regt Joseph-Napoleon   DD4 CD10

Dresden Garrison - Bernard  LD 8
1 Westphalian Light Infantry  DD6  CD 10
2 Westphalian Line Infantry DD4 CD8
1 Saxon Footguards  DD8  CD 12
1 Saxon 6# Battery DD6  CD 10

25th Light Cavalry Brigade              LD 10
Saxon Chevau-Legers  DD6  CD 10

Corps Artillery Reserve
1 12# Foot Battery  DD6  CD 12+1


XIV Corps - Marechal St. Cyr   LD 12+1
 (12 Infantry, 5 Cavalry, 4 Artillery)  -  21 Morale Points

43rd Division - Claparede  LD 12
1 Legere  DD6  CD 12
3 Line  DD6  CD 10
1 6# Foot Battery  DD6  CD 12

44th Division - Bertheneze  LD 12+1
1 Legere  DD6  CD 12
3 Line  DD6  CD 10
1 6# Foot Battery  DD6  CD 12

45th Division - Razout  LD 12
1 Legere  DD6  CD 12
3 Line  DD6  CD 10
1 6# Foot Battery  DD6  CD 12

Corps Reserves - Pajol  LD 12
1 Hussar  DD6  CD 10
1 Italian Chasseur  DD4  CD 8
1 6# Horse Artillery  DD 8  CD 12+1

V Cavalry Corps - L'Hertier  LD 8
2 French Dragoon  DD 6  CD 12
1 Chasseur a Cheval  DD4 CD10
1 6# Horse Battery  DD 8  CD 12+1


I Cavalry Corps - Marechal Murat  LD 12+1
(12 cavalry, 2 Artillery )  -  14 Morale Points

3rd Light Cavalry Division - Chastel  LD 10
3 Chasseurs a Cheval  DD4  CD 10

1st Heavy Cavalry Division - Bordesoule  LD 10
3 French Cuirassier  DD8  CD 12
1 Saxon Cuirassier  DD 8  CD 12+1

3rd Heavy Cavalry Division - Doumerc  LD 10
1 Cuirassier  CD 8  DD 12
1 Italian Dragoon  DD6  CD 10
3 French Dragoon DD6  CD 12

Corps Artillery
2 6# Horse Batteries  DD 8  CD 12+1

----------------------------------------------------------------------------------------------------------
SCENARIO RULES:

1) Weather

The second day of Dresden featured very heavy rain, often making musket fire almost impossible.I will handle this by adding a couple of Weather cards in each side's sequence deck.  There is no impetus cost to turn this card. The game will start with Light Rain. Upon each appearance of a Weather Card, the side turning the car rolls a D6.  On a roll of 1, the rain decreases a step. On a roll of 2 or 3, there is no change. On a roll or 4, 5, or 6, the rain increases a step.  The levels and effects are as follows:

Overcast - use the usual rules

Light Rain - all Infantry Fire is Down 1

Heavy Rain - all Infantry Fire is Down 2, Infantry and Artillery are Down 1 in melee.

Downpour - No infantry fire allowed, all Infantry and Artillery are Down 2 in melee.

Infantry in buildings (but not the Gross Garten) are exempt from the above penalties.


2) Allied Command Problems

While the Austrians had the bulk of the troops and Schwarzenberg was acting as Army Commander, the presence of both Czar Alexander and King Frederick-Wilhelm on the battlefield meant that Allied generals that disagreed with order from Army HQ could and did feel free to appeal to their sovereign to over-ride them. To reflect this, on each Allied Leadership Card, roll a D6; on a 1,2, or 3, Schwarzenberg is in command; on a 4,5,6 The Sovereigns have effectively taken command - use the appropriate Leadership Die type (D10 for Schwarzenberg, D8 for the Sovereigns) until the next Allied Leadership card is turned. The Allies use an Average Sequence Deck.

3) French Command Strengths

Napoleon was clearly the best general on the field this day. While I have assigned them to Corps for game purposes, Murat functioned as Left Wing Commander, and Ney as Right Wing commander, and they seemed to function fairly well in these roles. Napoleon gets the D12+1 LD rating and a Superior Sequence Deck. In addition, Napoleon gets 10 Morale Points as a "reserve". He can transfer any or all of these to any command(s) of his choice on each French Leadership card.

4) Corps Morale

On each appearance of the friendly  Army Morale Check Card, any Corps with zero Morale points must check Morale as per the Army Morale Check rules. If they fail, they will start retreating towards and off their nearest friendly baseline at full speed at the next available opportunity, and may not initiate melee or regain Morale Points. All units in the Corps are permanently Out of Command, and any units that were Out of Command at the time the check was failed are removed from play immediately.

If the side turning the Army Morale Check card then has more Corps that have failed Corps Morale than the enemy, then a standard Army Morale Check roll must then  be made for that army.

5) The Bridge over the the River Weisseritz

The Weisseritz is unfordable, and can only be crossed at the bridge at Plauen, or, for the French, at the Bridges in Dresden. To use the bridges, a Command must use one Move one segment off the table (exiting within 8" of the point where the Weisseritz runs of the table towards the Elbe), and  and then another Move segment back onto the table, returning withing 8" of the same point (on the other side of the river, of course).

The other streams are all Class II terrain. The Buildings are all Class II Terrain, except the Gross Garten which is Class III. All the  Hills are class II terrain as is the woods. 

Friday, June 14, 2013

Galactic Knights: new Aquarian Alliance book

    Monday Knight Productions released the last of it "Fleet Books"/Rules expansions last month  in a stealth fashion worthy of the cloaking devices employed by the original Superior Starfleet Wars rules version of the Aquarian ships. After a brief debate, of, maybe a minute, I decided that I would get a copy to complete my set, even though the Aquarians are the one fleet I *don't* have.... although Joe (Fishtales blog) has a boatload, er, well a shipload of them! At the same time, I decided that I liked what I have seen and played of the Galactic Knights rules enough to get a 2" hex grid star field table cloth for use with them, so I picked up the largest (6 x 4 feet) one they sell at the same time.


Available from Monday Knight Productions, $10 for CD-rom version, $15 for print, or $20 for both! Certainly a reasonable price; no pdf version as far as I know.


    The book is  a fairly slim 30 pages with a plastic spine binding, of which almost half is the ship charts for the new "standard" designs for the Aquarian ships sold by MKP - 12 ship types in all, with 2 variants for the Aquarian Starbomber (for two very different roles). There are roughly two pages of rather thinly done "fluff" introducing the Aquarians and their place in the Known Galaxy, including what is known of their origins, biology, philosophy, and political stance. Barely adequate, I would say - the Superior materials, although hardly extensive, were better done, I think. But at the end of the day, fluff is, well - fluff!  You can very easily develop your own to replace/modify/augment the "official" version.

   The background does explain the Aquarian philosophy,. which is more to cripple their opponents than destroy them, and their relatively neutral stance in relation to the other star-faring species. This is facilitated by their limited colonization, settling only worlds that are entirely water covered, and thus inherently of low interest to other species, and difficult for them to hold should they succeed in conquering an Aquarian world. The Alliance is rather loosely organized, at times making its actions and motivations even more opaque to other species. Finally, the Aquarians are the most technologically advanced of all the fleets.

    Those familiar with the Starfleet Wars version of the Aquarian ships will want to know first if the cloaking device from those rules appears in the GK version. As I had expected, the answer is "no. Implementing this in game terms was challenging in Starfleet Wars, and would be at least as challenging in Galactic Knights. Thus, I think the authors made the right choice on that one, as cool as it was.

  That being said, what new goodies do the Aquarians have access to? First is their "nannite techonology" armor. This armor is limited in amount,and must be equal on all sides of the ship. The nannite technology allows the Aquarians to "shift" the damaged sections of armor to any side(s) of the ship of their choice during the "drift" phase of each turn, subject to limitations based upon the size of the ship (bigger ships can shift more, smaller ships less). Assuming you anticipate the upcoming threats reasonably accurately. this greatly increases the efficiency of the armor. The "shifting" of damaged sections seems like it might get a bit fiddly in game terms, but I imagined that play testing showed that allowing the armor to function such that it screened all directions within a given layer was too powerful an advantage. The Nannite armor limits Aquarian ships to no more than one shield generator regardless of the size of the ship. 

    Second, Aquarian vessels mount a new kind of weapon, "Pulse Cannons". These are designed to strip off the outer layers of armor and weapon systems from the target, rather than penetrating deep into the critical systems. Thus, hits scored by Pulse cannons are marked off horizontally rather than vertically. 

    Third, Aquarians employ a unique kind of missile, the Harpoon. These missiles do not destroy the target, rather they orbit it and emit a dampening field around the target that impairs the effected ships outgoing fire. The effect increases as more Harpoons are present. this is particularly annoying for large, powerful enemy ships!

    Finally, the Aquarians have one minor wrinkle on fighter bay. Unlike other species, their fighter bays can be located deep within the ship, not just in the surface layer. Fighters exit from such burring bays via Launch tubes in the surface layer. his increases the "survivability" of Aquarian fighters after a battle compared with other species. 

   That's pretty much it; nothing really revolutionary, but enough to give the Aquarians their own special flavor and tactics. I look forward to trying them out on the tabletop... even though I still have plenty of other systems/species to try out as well. 

   In other news, next the folks at MKP are considering developing rules for their space stations (yay!), and possibly a scenario and or campaign book(s) (whoopee!). 

   Ugh, whats that cold, slimy fin on my back? Commander Pyke? Leaking state secrets of the Alliance to outsiders? Why, sir, I was merely trying to explain to them why your illustrious forces were best left alone. After all, sir... 


<Blub, blub, blub>

Sunday, June 9, 2013

Prussian Guard Infantry, 1813

    As related in "Singin' the Prussian Blues", I have these 16 Minifigs casting of the Prussian Foot Guards in Full Dress for almost 10 years. With the Battle of Dresden  on tap for next month at Historicon being one of the actions where they took the field, it was finally time to put some paint to the lead! For some reason, the Krylon white spray primer that I always use went on rather granular (it was the end of the can, maybe that was a factor?),and that plus the clean line of the castings made me decide that I would not use the "magic wash" on these figures, and that shading would be limited to the plumes, faces, and hands. I also decide for these "parade ground" uniforms, I would apply the Prussian Blue full strength and un-thinned; indeed, due to the somewhat granular  priming, many parts of the jackets got TWO coats of Prussian Blue. This is a much darker looking shade than the thinned version I have used on my other Prussians.


Although not worn in the field, who can resist the magnificent Busch plumes that the Guard wore for Parade dress? Surely not an aficionado of military bling such as I! The stand on the far right of the picture has black belting, thus representing the Fusiliers of the Regiment. 


The standard (from Warflag) is that of the 1st battalion, with the rather unique blue grey background to the central Prussian Eagle motif (usually seen in orange). The base of the officers plumes is black, with the iother 80-90% white. The Drummers have a red Busch, as well as red and white shioulder wings. 


2 spots are left for future additional acquisitions to bring the unit to a full 18 figures!  Only 12 figures per unit  are needed for my convention Field of Battle games, however. 


I under coated the red collars, cuffs, and turnbacks with white so that the bright red would really "pop" out. In this picture you cab see the guard lace on the collars and cuffs; with out the plumes and with the Guard stars on the shako covered, the Litzen would be one of the few ways to tell that a Prussian unit belonged to the Guard.


    In the reorganization of the Prussian Army that followed the debacle of 1806 and the treaty of Tilsit in 1807, the Garde Regiment zu Fuss was originally numbered as the 8th Infantry regiment.  A Garde-Jager battalion was also part of the post 18108 establishment. To make things confusing, in June 1813, this regiment was taken out of the Line sequence, and re-designated the Erstes (First) Garde-Regiment zu Fuss. Simultaneously, the Zweites Garde Regiment zu Fuss was created from the Normal Infantry Battalion, the 1 st Battalion of the Colberg Regiment, and the Leib-Fusilier Battalion. The second regiment wore the same uniform as the first, except that the style of the cuffs was different, and yellow metal buttons and Litzen replaced the white of the 1st regiment.  As a results, the old Line Regiments 9 - 11 were all moved down one number and a new 12th (Brandenburg) Regiment was raised from reservists. In 1814, a new Garde-Schuetzen battalion was raised. Also in 1814, the six independent Grenadier battalions were regrouped inr the newly designated Guard Grenadier Regiments, which were #1 "Czar Alexander" and #2 "Kaiser Franz". 

Wer eine wahre Preußischen Herz hat , folgen Sie mir!

Peter

Saturday, June 1, 2013

Vive L'Empereur: The "Regiment" as the Maneuver Element

   About the same time that I started my Residency (1981), a new set of wargames rules was released that really sparked some reconsideration of my approach to the subject. With a nominal figure scale of 1:100, Ned argued in favor of using the regiment as the basic tabletop unit. This would translate to infantry units ranging from about 12 to 24 infantry, and 4 to 12 cavalry.. Although written with 15mm figures in mind, for 25 mm figures, basing was to be 15mm frontage for infantry (20mm for British and other 2 rank infantry), 35mm for Cavalry, and 10mm per gun in a battery. Ground scale for 25's was 1mm = 2 meters, in other words, effectively 1" = 50m.  As a result, again in 25mm terms, that set musket fire range at 10 cm and Rifle fire at abut 14cm, :, with Artillery ranges at 14cm for "effective", 30 cm for "average",  44 cm for "long" and 60 cm for "far" range. Movement was divided into "Full Moves", which were every rigid and allowed neither changes of facing, formation, nor reaction to the enemy, and combat moves, which were half the distance of Full moves, but did allow the above niceties of response and maneuver strategic conversion, there was also a Triple Move, representing units string out in Road column and moving over greater distances. A turn was sent to represent about 30 minutes of battlefield time.

The Full Move distances for 25 mm troops were as below:


Unit type
Road
Column
Line
Square
Skirmish
Retreat
Infantry
36 cm
28 cm
16 cm
12 cm
28 cm
32 cm
Lt. Cavalry
64 cm
52 cm
40 cm
-
-
60 cm
Hvy. Cavalry
56 cm
44 cm
36 cm
-
-
60 cm
Foot Artillery
36 cm
16 cm
16 cm
-
-
32 cm
Horse Artillery
56 cm
36 cm
36 cm
-
-
60 cm
Generals
72 cm
-
-
-
-
-

 The rules tracked combat effectiveness by "status points":, which, along with the figure strength of the unit and the other usual modifiers, were the key determinants of combat and losses. Vive L' Empereur also included extensive designer's notes (8 pages), explaining Ned's thinking. I love it when rules authors include these kinds of notes!

Published in 1981 by Chaosium, "Vive L' Empereur" was one of the first widely distributed sets of Napoleonic rules to use the Regiment instead of the Battalion or the Brigade as the basic tabletop unit. 

   Anyway, the rules had many good ideas, but the one thing I got most from it was the idea of a unit being a Regiment instead of a battalion or squadron. I'll quote the author here, as he presents the rationale better than I can:

    The Regiment, a group of men about 2,000 strong, was chosen as the basic maneuver unit. In this way a typical Corps Commander would have about 20 units to handle, a number I felt optimal for one player. he average Corps might have three Divisions of 4 [infantry] Regiments each, with a cavalry Division of 4 regiments, and 5 artillery batteries. Another reason for using Regiments and Batteries comes from an item by Clausewitz. He states that the fire of an 8 gun 6 lber Battery 'certainly does twice and possibly three times' as much execution as a Battalion. Since a 'Regiment' would contain 2 or 3 Battalions, I found that Regiments and Batteries could be considered about equal in Firepower and potential. 
    Since the Command level being emphasized in the game is Corps,  Command, it is not necessary to portray historical units at the lowest level, such as the Battalion. Once the command level gets under the Division, the the number of maneuver units we choose to have needs to be considered only in terms of how many are playable. The "Regiment" of 2,000 men in some campaigns may have been a small Brigade, but the important point is that we are working with for which there are size equivalents in most armies, even if the names are different.  There is also some flexibility in portraying larger or smaller Regiments of, say, 1,500 to 3,000 men. Further, a "Regiment"  can handle many of the smaller level changes that may have historically occurred. For example, an 18 figure French "Regiment" could represent three 600-man battalions in 1813, or two 900 man Battalions of 1805.
    The Regiment thus represents smaller units, Battalions, assumed to be operating in proximity.  We are considering the Regiment as covering a certain area, representing both a body of men and the critical space around them that would involve those men in combat if entered by an enemy. We don't need to worry about lower command levels - they are being abstracted to make our chosen command level of simulation easier to use. For this reason, if  any part of a Regiment touches any part of  another [enemy] Regiment, we assume that both units are entirely in close combat.

    The author also observed that the 1:100 figure ratio made for easy conversion of Historical rosters to tabletop units, as well as keeping the size of collections needed to play the larger battles of the era at manageable levels. Ned remarked that setting the Maneuver unit as the Regiment also has the tabletop units at the same level at which most of the colorful variations in uniforms that the Napoleonic era is justly renowned for occurred. This made a lot of sense to me, and I decided that henceforth my units would represent "Regiments" of Infantry and Cavalry of 18 (6 stands of three each)  and 8 figures (four stands of 2 each)  respectively, and Batteries of Artillery with  2 stands of three crew (four for 12 lber batteries for ready identification on the tabletop).

    Finally, I'll note that an eight figure Cavalry regiment conveniently makes the 1st figure the "elite company" in French regiments! Similarly, an 18 figure Infantry regiment mounted on six stands of three figures each  pretty neatly represents 2 large Austrian Battalions, 3 smaller French ones (allowing one stand each of Grenadiers and Voltigeurs, and four of Fusiliers per unit), a Prussian Regiment of 2 Musketeer and 1 Fusilier battalions (again allowing four stands of  Musketeers and two of Fusiliers), and probably almost a Brigade of the habitually under strength Russian units (here I fudge a bit by having one stand of Grenadiers and five of Musketeers/Jagers). As I approach doing the British, I confess that I am debating doing them as 20 figure regiments, probably each with 4 x four man stands of "center company" men, and two 2 man "Flank company stands. However, the more I think about it the more I am inclined to do them as 18 figures like all the rest, with one of the three man stands having 2 figures of Grenadiers on the right side, and a second having two figures of Light Company on the the left end of its stand. Close enough! Hmm, time to browse the Old Glory catalog for a sizable order of British to pick up at Historicon, perhaps?!

Peter