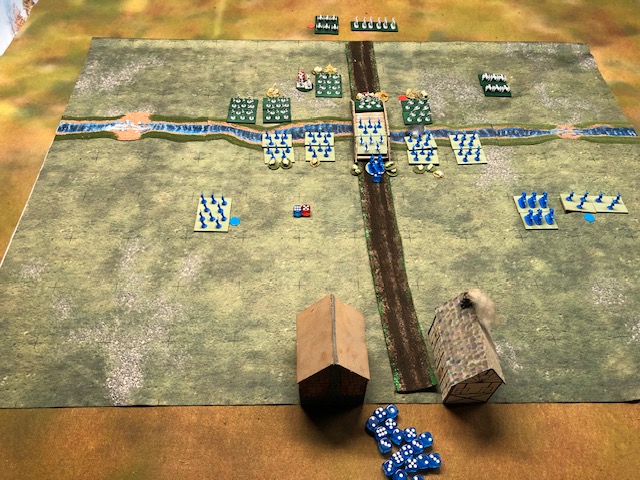
These rules are modified from "Eagles Cheaper than Brain Cells" by Steve over at the Sound Officers Call blog/
I have been wanting to try out these relatively simple rules for several years now, and finally got the chance in the weeks before Christmas. I selected OHW scenario 18, "Counter Attack" The twist was that I wanted to use a ridded table - in this case my 4" gridded table with my "Risk pieces" armies.
As suggested, I rolled for forces as per OHW, adding 2 infantry unit to the forces thus rolled. Blue had 6 infantry, 1 Skirmisher, and 1 cavalry, whilst Grey (red) had 5 infantry, 2 Artillery, and 1 Cavalry.
The twist is that Red starts with just a single infantry unit defending the bridge, but Blue has not scouted the position and is thus unable to use the fiords, while Red can. Red's reinforcements will start arriving om Turn 3. Blue automatically moves first on Turn 1.
Turn 1; Blu rolls uip just 2 orders, while red rolls a great excess of what can be used, with 4. Any unit with a General attached gets a free activation, and the commander can move up to 4 boxes during the Orders phase. The colored discs indicate units that have Orders.
Blue uses March moves to advance his three Ordered units as far as possible; however, units that use March movement cannot fire that turn.
Standard Musket range is 1.5 boxes, but "all units" (does this include cavalry and artillery as well) can issue skirmish fire in any direction at up to a 2 box range with a single D6. Infantry needs a 4,5, or 6, so the skirmish shot misses*. Having March moved, Blue's units cannot shoot at all. (* I forgot that Red could have used its unused Order to add an extra die to its fire).
Turn 2 - Blue retains the initiative (must beat the opponent's roll by 2 to seize the initiative and change the turn order). Blue rolls up 5 orders (plus the General's effect), while Red rolls 2 orders (but only needs 1).
Blue March Moves up 3 more units, whilst the three original units move forward with regular movement, preserving their ability to fire later in the turn. At Volley fire range (1.5 boxes), infantry roll 3D6, looking for 4,5, or 6 to hit. Blue beats the odds somewhat, each unit inflicting 2 hits; a standard infantry unit takes 7 hits to eliminate!
Red shoots back with its own 3 dice (again, I could have added an extra die for an unused Order), and score 2 hits on the center Blue unit.
Turn 3 - Red seizes the initiative (6 vs 3), and rolls up 4 Orders to only for Blue.
Red brings on 4 units of infantry from its reinforcements, and pulls the badly battered center unit back using a MANEUVER order (a 1 box move in any direction, wind up facing in any direction) , to hopefully recuperate.
Blue uses one of its orders to bring a 4th infantry unit up to the river line, and uses the free activation for the unit as a RALLY order; on a 4 or a 5, 1 hit is removed, while on a 6 to hits are removed. A unit with the General gets a +1 to the die roll, so this 5 is a "6" - two hits removed... except that the FIRST hit can never be rallied off!
Red fires first, inflicting 2 hits on the center Blue unit, while the other three units draw bead with their long range skirmish fire, each unit scoring a hit.
Blue's fire is rather more erratic this turn than last, only managing to score 2 hits with 9 dice!
Turn 4: Red retains the initiative, and rolls up 4 Orders to Blue's 3.
Orders issued.
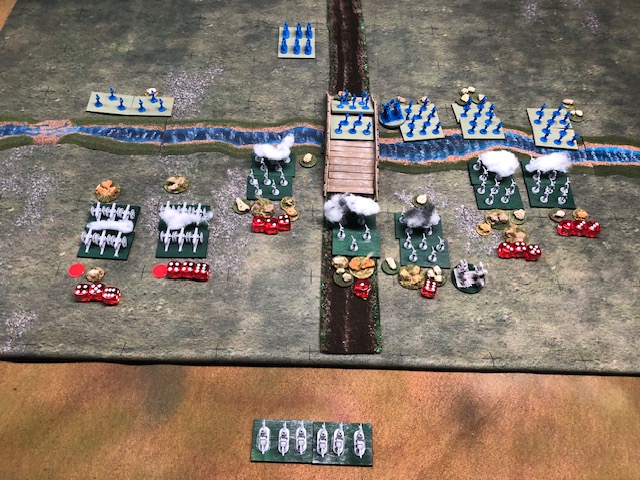
Red brings up 3 infantry units to Volley range, and one of the Artillery batteries at last enters on the red Left flank; artillery units that move cannot fire the same turn, and require a BOMBARDMENT Order as well to shoot. I forgot to to try a RALLY order for the battered unit with the General. Blue uses their Orders to bring up the lagging units. Red's fire is about on par with expected results
Blue's shooting is exactly average this turn as well; casualties are mounting on both sides!
Turn 5: Red retains the initiative, but only manages to roll up 3 Orders, while Blue fares even worse with just 2.
red uses 3 Orders for Rally Orders (all of which fail!), and one to bring on the second battery on their left.
Both sides blaze away, with the overall advantage to Red; I forgot that even though the one battery didn't move, it still requires a BOMBADMENT order to fire. Had I recalled that, I would have forgone one of the (failed) Rally attempt to shoot. Artillery hit on a 3, 4, 5, or 6, and roll 3D6 at a range of 3 boxes or less, 2D6 for 3.65 to 6 boxes, and 1 D6 for 6.5 to 9 box range.
The Center Red infantry unit scored hits on all 3 of its dice; whenever a unit suffers 3 hits form a SINGLE opposing unit, it is IMMEDIATELY pushed back 1 box. This would then have placed the center unit at 2 box range when it fired, so only a single die should have been rolled for its fire - Note that this can have interesting consequences, as in this case. After all shooting is completed (and ONLY after), any units that have suffered their maximum hits are then removed, as is seen here.
Turn 6 - Red retains the initiative, but can manage only a single Order to Blue's 3. Having remembered the Bombardment Order, the Red General moves to join the nearest battery so that it can fire (the infantry don't require orders to shoot).
Blue uses Orders for Rallies, and to bring up his Light infantry; per scenario conditions, they cannot use the Ford. Blue's Rally attempts fail miserably!
Red fires with great effect, the left center battery and infantry both scoring 3 hit Forced back results!
The rightmost Blue infantry was pushed back out of range of any targets, and reached 7 hits total and was thus removed. Blue's fire was rather less effective this turn again. Still, Red's infantry units are taking a collective pounding as well.
Turn 7: Red retains the initiative, and rolls up 3 Orders to Blue's 5.
Even with the General helping, Red's attempt to rally the shattered (6 hits) original defenders of the bridge fails yet again! Another order is used to pull back another battered unit from the bridge, and 2 more top allow red's batteries to do BOMBARDMENT. Blue succeeds with 3 out of 4 RALLY orders, and moves one infantry onto the bridge, and his cavalry towards the middle.
Reds battery score 6 out of 6 hits on the Blue Light infantry, obliterating them (as well as forcing 2 1 box retreats). Red's infantry fire, on the other hand, is subpar.
Blue's infantry fire is a bit below average as well...
but still enough to eliminate a Red infantry unit. Two other Red infantry are hanging on by a thread with 6 hits each!
Turn 8: Red rolls up Three Orders, to Five for Blue. Blue then seizes the initiative! Note that the initiative roll takes place AFTER the Orders are assigned. However, the player doesn't have to declare what the order is FOR until the unit is activated.
Recalling that the Victory condition for the scenario is control of the town and the bridge, Blue makes an ASSAULT MOVE across the bridge; this is resolved before any other actions.
The defending unit has an Order marker itself, which it expends to issue defensive fire at the charge; it only manages to score 1 hit.
In the Melee, both sides roll a D6 for each remaining strength point; in this case, both units are battered and roll only 2 dice, looking for 4,5,or 6 to hit; Red scores 1 hit, Blue scores none, and must retreat the difference, i.e., 1 Box.
This pushes the unit back through friends; each time this happens, the retreating unit loses another strength point. That brings the Blue unit to 7, and it is removed.
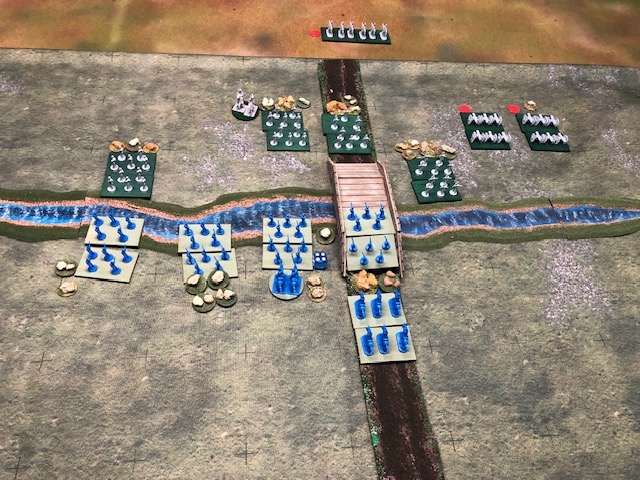
Situation after the failed assault.
Blue makes a successful Rally, and move his cavalry over in position for a future charge across the bridge.
With no remaining targets, Red uses his orders to turn the two Artillery batteries to their right, and finally bring on the last of their reinforcements, the cavalry regiment.
Blue Infantry shoots with above average effect.
Red's infantry fire is once again subpar.
Another red infantry unit is removed due to losses.
Turn 9: Blue retains the initiative, with both sides rolling only 2 Orders.
The Blue cavalry make an ASSAULT (charge) over the river. The Red defenders, having an Order marker, fire defensively, but to limited effect.
In the Melee, the Blue cavalry rolls 4 dice for its 4 remaining strength points, plus a bonus die for charging, and needs 3,4,5, or 6 to hit - FIVE hits! Ouch! The red infantry, with only 2 SP remaining, roll 2 dice, with no 4's, 5's or 6's amongst them. The Red infantry is destroyed; had it survived, it would have had to retreat the difference in hits - 5 boxes!
Blu uses another Order to Rally one of his infantry; with the general assisting the roll of 3 succeeds in rallying off one hit. The Blue cavalry, having won the melee, can either advance into the box of their target, or use a free facing change. With 2 artillery batteries on their flank, they turn to their right.
Red actually manages a RALLY; with the General adding 1 to the roll, the "5" becomes a "6". and 2 hits are rallied off.
Blue infantry fire; had the Rally not succeeded, the remaining Red infantry unit woukld be at 7+ SP lost.
Red's artillery fires, scoring 3 hits on the cavalry, and thus forcing them back 1 box. I ruled this meant they were NOT in control of the bridge at the end of the turn. Red's infantry score 2 hits, bringing their target to 6 SP lost.
Turn 10: red rolls up 4 orders to Blue's one, and then seizes the initiative back!
Red fails to Rally despite the General, but the blue unit recovers 1 hit. The Red cavalry move boldly across the bridge, but the Blue infantry unit with the general turns to flank them!
The two Red batteries fire; either one was sufficient to eliminate the severely battered Blue cavalry (one SP left), so I allowed the other battery to fire on a different target. Not sure that was correct.
Blue infantry, adding a 4th die for flank fire, manage 2 hits on the Red cavalry. The other 2 Blue units use their 1 die skirmish fire, and score 2 hits on the Red infantry. The Red infantry should have had its own single D6 skirmish fire before being removed, but it looks like I forgot that.
Turn 11 - Reed maintains the initiative, and both sides get only 1 order. The red general doesn't have enough movement (4 boxes) to reach one of his Batteries or his Cavalry so that it can be ordered.
The red cavalry charges, and the ordered Blue Infantry issues defensive fire - missing completely!

Blue rolls 4 dice and hits with 2; Red rolls three dice (an error - should have had a bonus die for cavalry charging!) and hits with all 3.
The Blue infantry is pushed back, but in the fire phase its single D6 skirmish fire score the 5th and final hit on the cavalry, eliminating it!
Rules question - if an infantry unit has already issued defensive fire (which requires that it have been Ordered), can it then shoot again in the regular Firing phase? I said yes.
Turn 12 (of 15 maximum) - red retains the initiative. Both sides have only 2 units and roll far more orders than either can use.
Blue makes a desperate push for the bridge, but the Red Artillery fires to good effect, eliminating the lead Blue Infantry unit.
Turn 13 - Red retains the initiative. With only 1 SP remaining, seizing the bridge in the face of 2 opposing batteries is clearly impossible. Similarly, even in the likely event that the last blue unit is eliminated, red cannot control the Town in 2 turns. Thus the battle ends in a bloody draw!
 The Gardes du Corps comprised a single squadron of the Wurttemberg Gardes zu Pferd. The squadron had its origins circa 1806.


