Friday, December 31, 2021

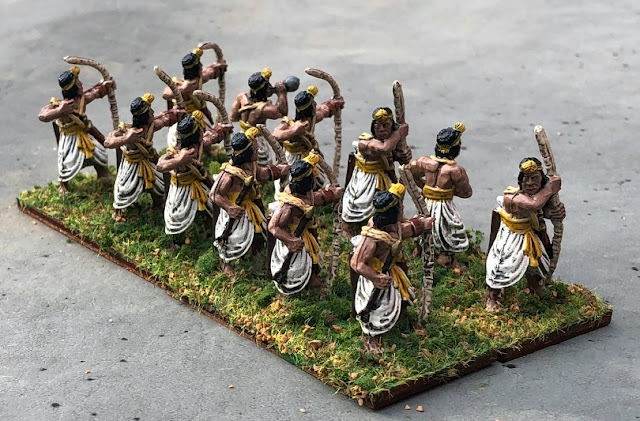
Mauryan Indian Archers

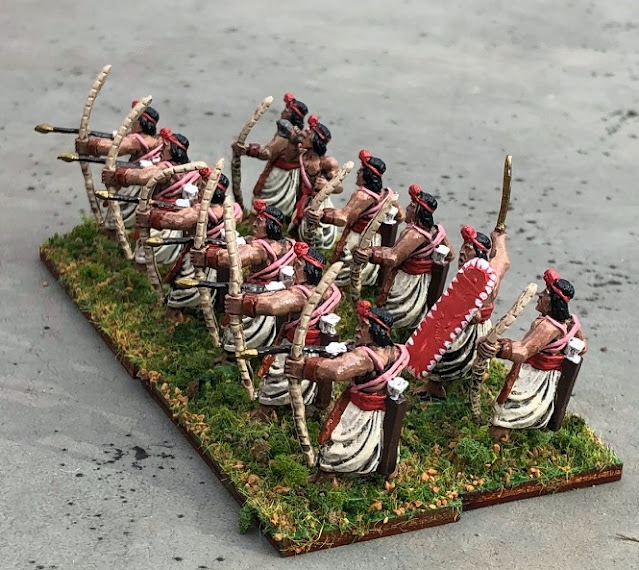
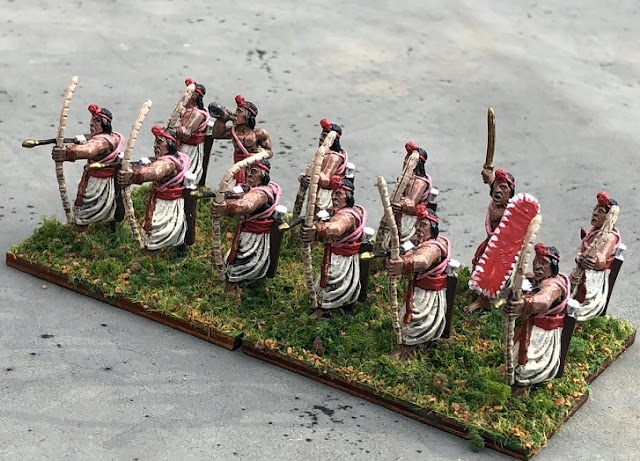
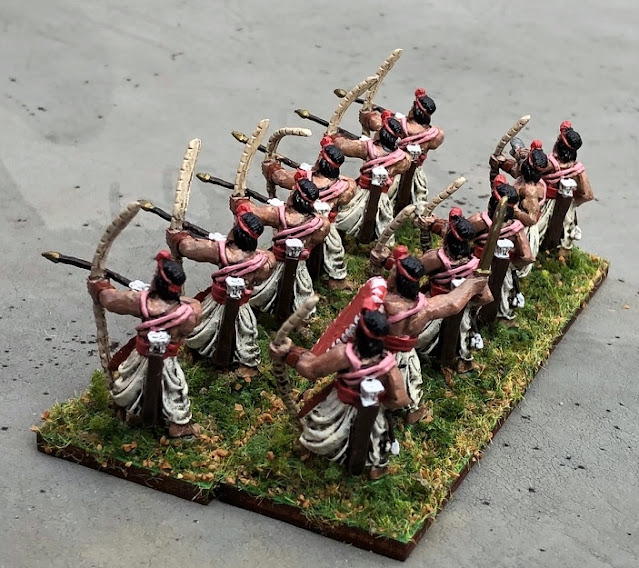
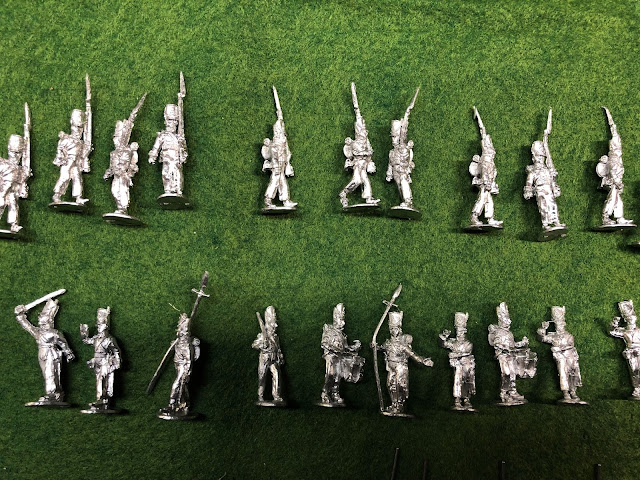
Squeaking in just under the wire for 2021 are a p[air of Archer units from the Classical era, 


These are Old Glory figures.


I wound up using Delta Ceramcoat "Bambi Brown" for the flesh color for these two units. 


The pinkish color I used for the straps was suggested by the natural fiber cords I see some of my Indian patients wear. 


The Indian longbows were said to be very powerful.


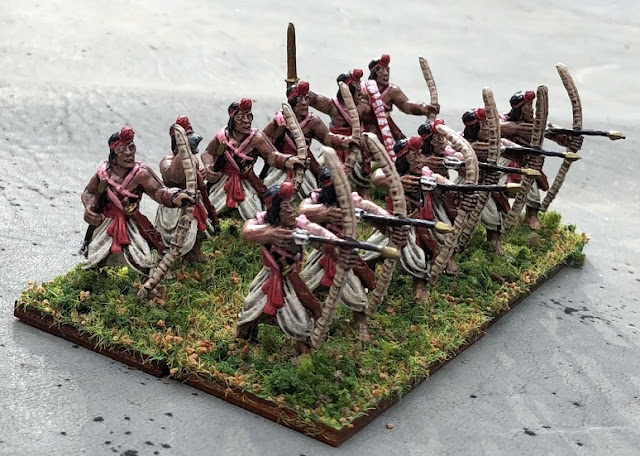
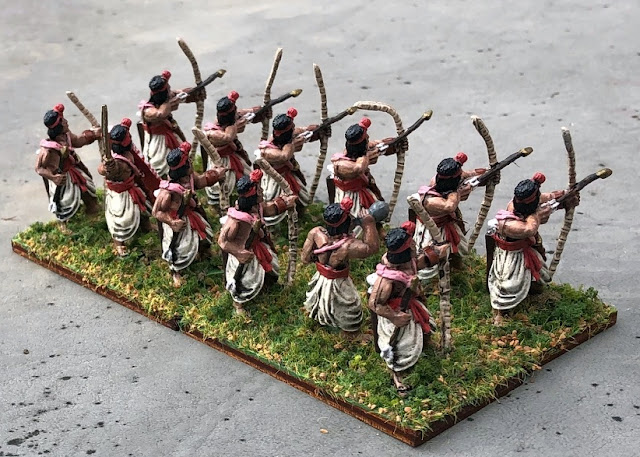
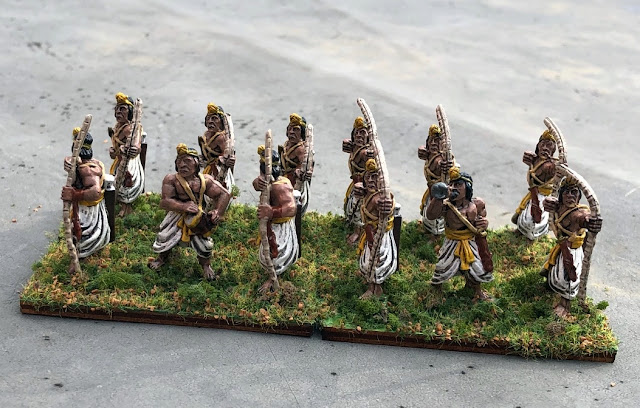
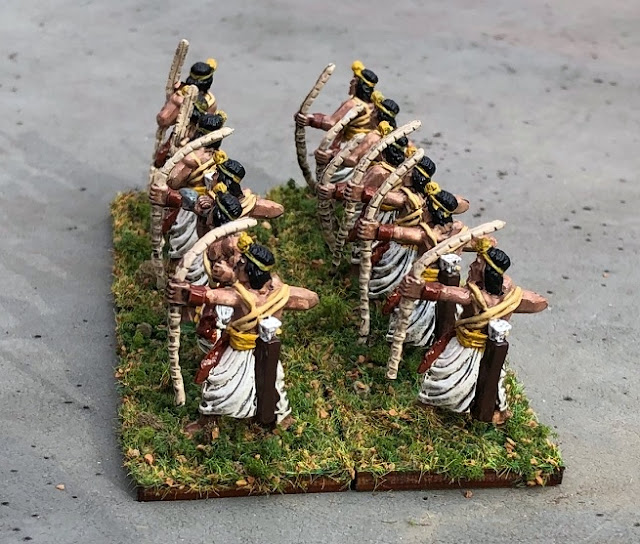
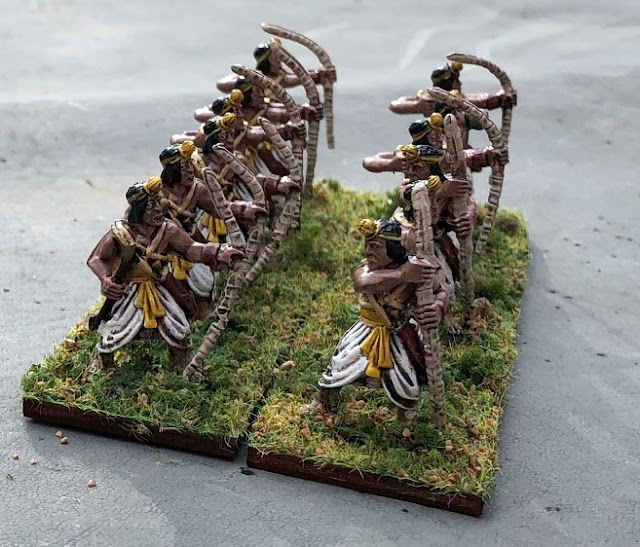
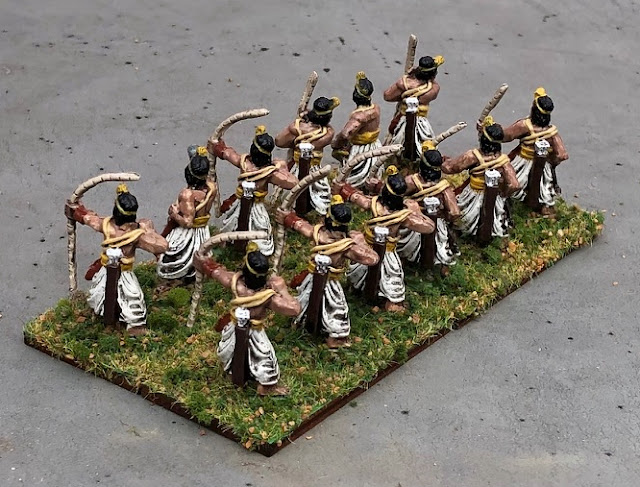
Here's a second unit of Archers.


Most army lists give them the option of having 2 handed swords as a secondary weapon.


Once again I tried to suggest died natural fibers for the straps. 


Troops of this general type fought Alexander's army when it arrived on the Indian subcontinent.


The actual Mauryan Empire began not long after Alexander's time. 


There are many more Indians planned for 2022, expanding my quite old army of Minifigs.


Happy New Year, all! 

Thursday, December 30, 2021

Snappy Nappy 1799 Rivoli Campaign in a Day, part 6 (Conclusion)

With the year drawing to a close, it is past time to wrap up the Campaign in a Day event from back in October(!) 


From the pen of French General Rey, aka Mark Mclaughlin

Napoleon and Rey (me) start out at Mantua laying siege.  one of us has to stay there to keep the city under siege and keep its defenders inside. that is a condition of victory.

Nappy decides he will leave the minimum to mask the fortress.  takes a quarter of his army on the move, follows me to Verona, where i join up with Massena.   Alvintzi shows up.  I decide Massena and i should crush him...but Nappy shows up.   tells me to stay as his army reserve.  sends Massena in alone  (sigh).

i detach a quarter of my corps and give it to Massena, telling him he will need it.

Nappy puts me in defense around Verona while he and Massena attack.   an Austrian column appears out of the mountains.  I turn to face it.  they scurry back off the table.  i send the guides to follow to see where they are going...and to slow them down.

Nappy gets messages from Joubert and Augerau.  each are engaged with larger forces.  Joubert at Rivoli, Augerau at Este.   Nappy tells me to send hussars and chasseurs to scout out both and report back, keeping the rest of my corps in reserve.

Augereau is holding his own at Este.  Joubert is being overwhelmed.  Nappy agrees to let me take half of my corps to help Joubert...but to leave the last quarter as a reserve.

i go to help Joubert who is being slammed.  i stabilize the front. I send to Nappy - "I have them stalled.  either use my reserves to help Massena or send them to me"

i do this four turns in a row.  On the fifth turn they reach me....just in time to cover my withdrawal, leaving Joubert to fort up as best he can

(The Austrians had two batteries when i arrived...i had one.  they had two regiments of cav..I had one...i was holding my own until his lancers broke a square  (each side rolls a d10 in combat.  i rolled a 2 and he rolled a 10....that was enough to make my infantry take morale.  they failed, and broke out of square to fall back.  a second infantry unit received a charge in line, failed to make square, and was beaten...but not broken.  that ended that

i got my shattered corps back to Verona so i could rally it...the Austrians did not follow me, as Nappy had feared, but decided to finish off Joubert

Massena fell back from Alvintzi, both sides in bad shape, and in the end, Augerau was all but annihilated.  Not a good day to be French!  My corps should have been thrown in all intact either at Alvintzi at start or to help Joubert....and all in, instead of in pieces

We were just too cautious...   but it was a hell of a lot of fun, as always!


Napoleon, as told to Montholon, on St. Helena:

"As I look upon it now, it is clear that the failure of the Army of Italy was due to Augerau's and Massena's misunderstanding of the orders for defense.  Despite what has been said, the outcome would have been completely different if only their scouts, and not their entire forces, were engaged East of the Adige as they were told to do.  Defending at the Adige was necessary,  as defending an interior river line is a schoolboys' exercise. Improper strategic movement doomed the defense, despite the valor of our soldiers in the field.  Such is war, of course."

I know the table set up made that look odd, and it would have been really boring to play that way I think!!

I had a great time!  Thanks, everybody!

Rob


Some final Austrian commentary from General Bajalich to General Lusignan:

 It occurred to me last night (no doubt in a bad dream), that when I got your plea for reinforcements (I think it was from you?), I actually could probably have sent off two infantry units to you relatively quickly. I don't remember exactly, but I think I got your note around 1400, and if you'll notice, the time stamps on my photos #4 (1330) and #5 (1430), show my Padua forces quite close to the Vicenza DZ's. So, one way or another I could actually have spared you at least a few units which could have reached you in probably like 45 minutes or so at worst (not the two hours elapsed time that I believe I had replied to you).


Especially galling, I knew the exact table layout connections between myself and you. My forces were all on the Padua table, I had laid out the Table V (Vicenza) terrain myself and my forces started on Table V, and I had cav recon to the Verona table - so I knew all the distances and interconnections. And yet, when the plea for help came, I still did not visualize the space/time/geometry properly. Shows how great SN and the multi-table setup is in reproducing the fog of war. Good little lessons learned for me here.

Also makes me even more aghast at Napoleon's genius in his ability to have so often exactly correctly done the same sort of calculation over and over.

So, General Lusignan, please accept my sincerest apologies for not having come to your succor. It was an error on my part.


My dear General Bajalich,.


At the time, I saw the French Rey (Mark) appear on my table and start sending about a third of his command to join Massena and then Napoleon himself arrived with a cavalry unit in the lead -- now I'm figuring two more commands were comin' my way. Meanwhile, Massena was sending in his artillery reserves.
 
I knew what I had and it was attrition of my lads that was limiting what I could do. I had no idea what was going on on other tables, but I knew the connection between Montebello - Vicenza - and where your (original) garrison troops had marched off -- it would be a quick transit of the Vicenza table, so ... I asked on the off chance there was a garrison unit hanging around the rear areas.
 
No apology necessary. From the sounds I heard at your table, you were quite involved, and from Peter's blog post, the French had done well to push troops off the hill at Este -- probably around the time my request showed up.
 
Three things bailed me out:
 
Ocksay showed up near Verona, holding 2/3 of Rey in place.
 
Napoleon did not bring any other troops except that cavalry.
 
John and Adam (non-players) showed up and my luck changed, including that miserable right flank artillery battery that dragged every 1 and 2 out of its die rolls for hit rolls or should I say miss rolls -- and there wasn't a corresponding number of 9s and 10s on the other shots and melees. These two guys arrived and like a light switch, the fortunes of war changed. Well....until the end (see attached recap). :)
 
I narrowly held on and managed an advance, so it worked out
 
>visualize the space/time/geometry properly.
 
It is tough to do. It is even tougher when the tables do not abut. For example, I marched from Trente to Levico to Borgo to Bassano. On the map, there's a stretch of road that includes Primolano, but tabletop wise, that stretch is not there. Obviously, any table with that road stretch is just a warp-speed transit table, but I completely forgot about that little wrinkle, so I thought that I reached Primolano -- it was really Bassano -- and that the town holding your original garrison was Bassano -- it was really Vicenza.
 
Then I saw French cavalry. How did French cavalry get to Bassano? Us Austrians are about to get stuffed here in the foothills -- we'll never get to Mantua! (woe is us and our plan!) :)
 
Then I learned the location. Obviously, I was pleased, as any commander would be, that I was closer to my objective than expected. Then I'm thinking about what awaits me on the next table...
 
>Napoleon's genius in his ability to have so often exactly correctly done the same sort of calculation over and over.
 
Practice makes perfect.  :)
 
Although his marshals sometimes goofed or just ignored his plan. Russia, especially, with his nephew (?) lollygagging and failing to close the trap near Minsk, and then Jomini failing to close the trap at Smolensk.
 
> Shows how great SN and the multi-table setup is in reproducing the fog of war.
 
Thanks. Mostly because the former tries not to get in the way of the latter. :)


Finally, the GM's (me) perspective:

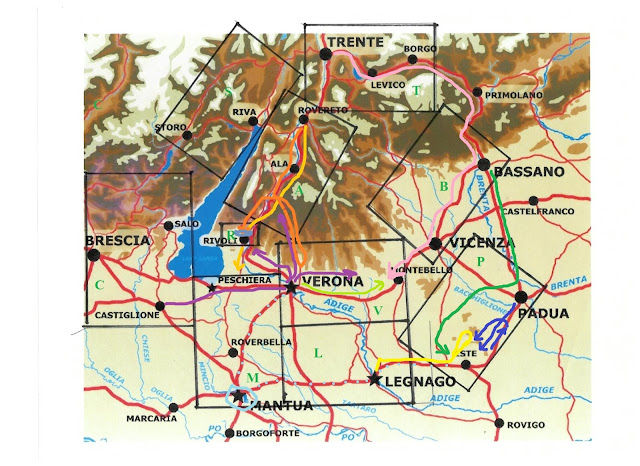
GM's summary of moves; 
For the French - Purple is Rey, Yellow Augerau, Lime green is Massena, Steel Blue is Jouibert, and light Blue is part Serurier (the forces that could be spared from the siege). 
For the Austrians - Pink is Lusignan, Medium Green is Bajalich, Medium Blue is  Provera, Light Orange is  Vukassovich, and Orange is Ocksay.


    The French had a tough assignment in this one. They were outnumbered 5:4, more or less, with only a very slight quality advantage in troops and a bigger one in Leadership. I would agree with Mark (Rey's) analysis; Rey's entire command should have been committed at Rivoli or Montebello, with Serurier's detachment perhaps serving as a small reserve at Verona. I did provide a tiny bit of assistance to the Austrians, as Alvincy and Ocksay were both new players. Ocksay was backed up behind Vukassovich trying to enter the Rivoli table. After a while, I asked Ocksay "Where do you think those other roads lead to?", after which he thought about it and sought new orders from his C-in-C to split his command to allow some of his forces to enter table R on the Western portion. 

    After Rey's reconnaissance of Table A with just Bonaparte's Guiides had ended, I pointed out to Alvincy that all Rey had to do was send some infantry to occupy Ala (which he never tried), and the supply line for both Ocksay AND Vukassovich would be severed. When that happens, those commands may not advance more than 6" further until supply is restored, AND all out of supply units have to take a single Morale test once each hour until supply is restored. A 2 unit garrison was dispatched to Ala not long thereafter. 

One of the other objectives was to create a scenario where we would NOT have one large battle with 4 or 5 players a side fighting, due to pandemic concerns, and that  worked well, with 3 players fighting at Este, 3 at Montebello, and 3 at Rivoli, for the most part. I can't wait to do another one!
 

Wednesday, December 29, 2021

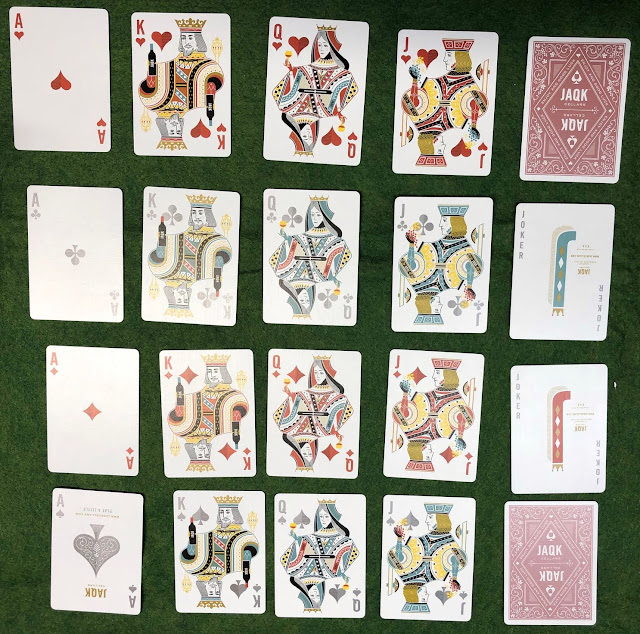
Yuletide Treasures #3: Cards by Theory 11


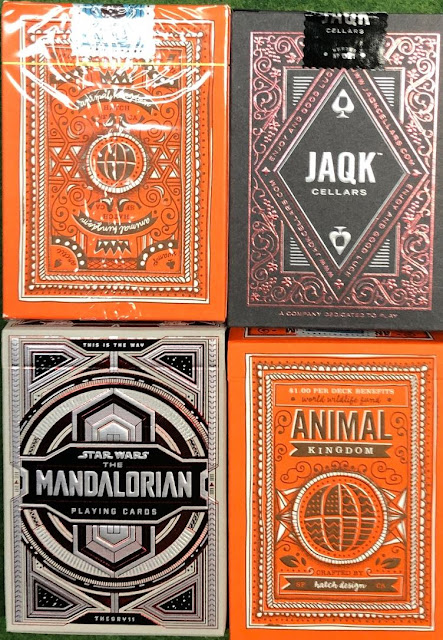
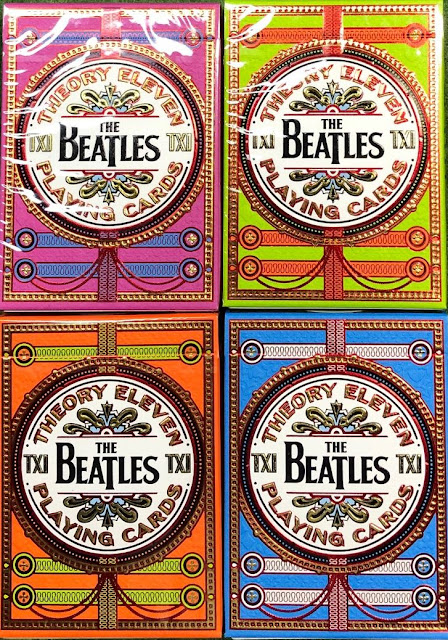
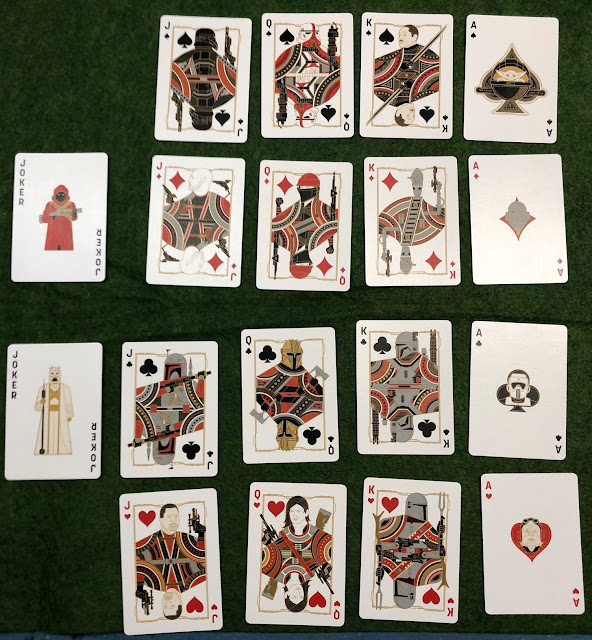
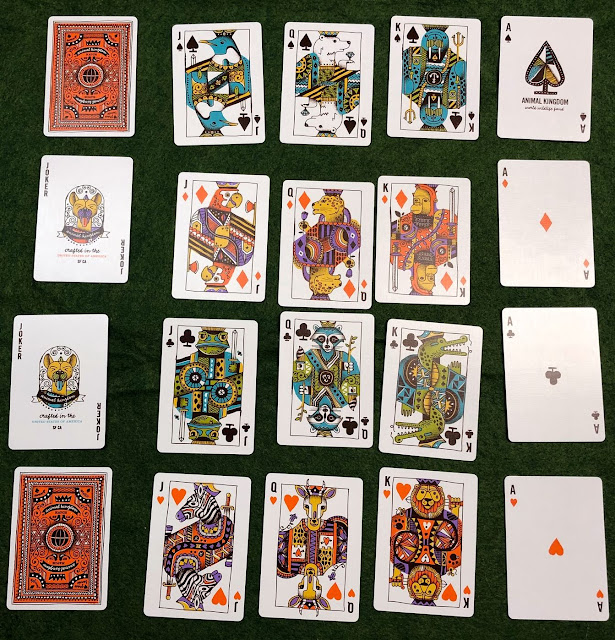
Last year, I got a number of unique decks of Playing cards from Theory 11. They have extra special deals around Christmas time, as well as several new and interesting decks, so I once again acquired quite a few. The Animal kingdom decks aren't new, but I almost got them last year, so this year I did. The Mandalorian Deck is new. The JAQK Rose deck was a freebie if your order exceeded certain parameters... and I did, of course! 


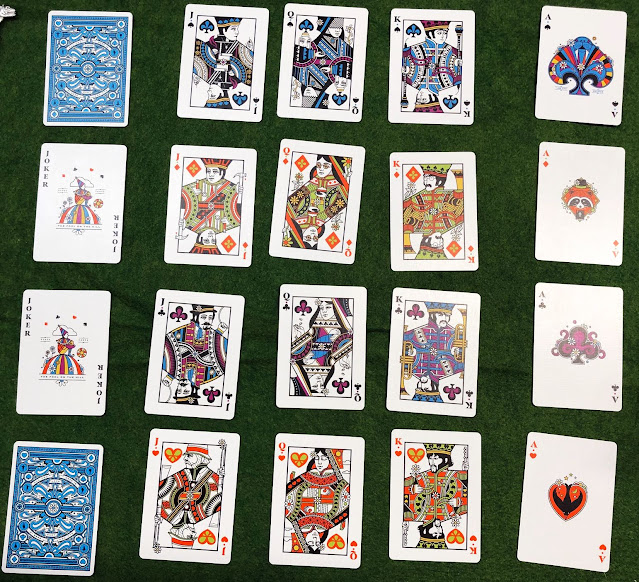
Brand new were the Beatles Decks, with the backs inspired by the outfits the fab Four wore on the cover of the famous Sergeant Pepper album. So of course I had to have one in all four  colors.


Also new this year were Harry Potter Decks, once again four different color backs for each of the four Houses of Hogwarts Gryffindor (Red), Ravenclaw (Blue), Slytherin (Green), and Hufflepuff (Yellow). They are not seen here because I gave the four decks to my older daughter. She is a huge Harry Potter fan, and I knew that she would love them... and she did! . 


The unique cards of the Mandalorian deck. 
This is the way...


Colorful court cards of the Animal Kingdom deck. These may get used with To the Strongest/For King and Parliament, or other games using playing cards. Of course, they can always as used just for standard card games, too!


The unique cards of the Beatles decks. There area great many references to Beatles songs, and the Kings of course are John, Paul, George and Ringo themselves. 


The JAQK Rose deck - I was very pleasantly pleased with this deck; in vino veritas!  :-)


Another motivation for the decks is the latest project by my freind, Bob Jones, a Horse and Musket set that uses decks of standard playing cards, called Poquer.  Bob is due out with the latest playtest version soon, and I hope to do a solo play test shortly thereafter. There is a rambling but wonderful recent interview ("Battlechat") of Bob by Henry Hyde, where he briefly droops a few hints about Poquer, one of the design parameters being that the rules are only 5 pages long (well,  five plus a page of explanation of concepts). I've seen all of the versions to date, and I think they are very promising. As Bob also explains, with him, a new rules set always begins with a game mechanic concept. 

Tuesday, December 28, 2021

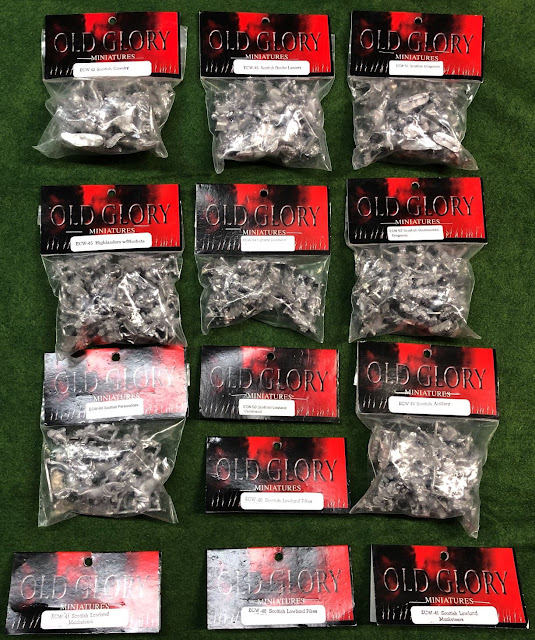
Yuletide Treasures #2: New Figures - a Great Lot of Scotts!


This year, there was a very, very heavy box under the tree, filled with Old Glory goodness (courtesy of the Army Card Renewal, as well as the Empress). 60 Lowland Pikes, 60 Lowland Musketeers, 20 Lowland Command, 30 Highlanders w/ Muskets, 20 Highland Command, 10 Mounted Dragoons, 30 Dismounted Dragoons, 10 Border Lancers, 10 Scottish Cavalry, 6 Scottish personalities, and the free Army Card pack was the Scottish Artillerymen. 


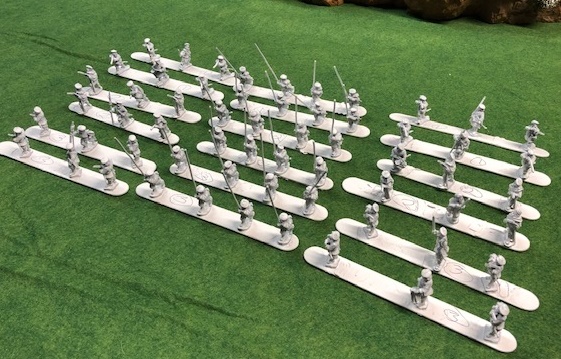
That should be enough to allow me to field 8 Battalia of Foote, 3 units of Dragoons, 4 units of Highlanders, 2 units of Scottish cavalry, and 2 units of Border Lancers, and far more batteries than they will ever need, plus command figures/"gallant\ Gentlemen" for the Scotts.... 250+ figures in all. I doubt that I will even come close to completing all that this year, but I have the figures all prepped and pa=rimed for the first 3 units of Foote. Part of the Scottish motivation is the appearance of a Scottish force in the scenario Book for "For King and Country", which we should resume playing the end of January. 

From every thing I've read, the Scotts were a drab lot for the most part - light grey clothes, blue bonnet. I'm thinking of using the early "tartan" on their cloaks as a distinguishing color (red cross hatching for one, then yellow, green , white, etc). I may reflect that in the color of the flags for some; not everyone carried the standard "auld blue blanket" Cross of St Andrew design, although it seems most flags were variations on that theme at most. Any help with the dress of the Scotts of this era would be great!


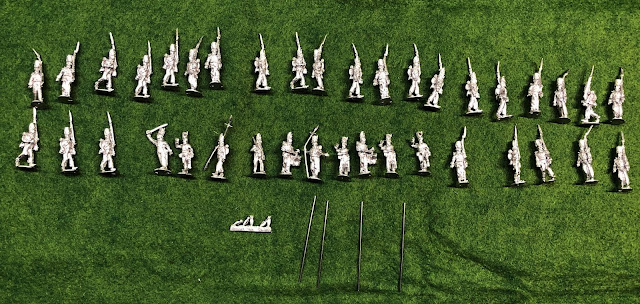
I also bought 2 packs of Old Glory 2nd edition British in the later Belgic shakos. These are the first Old Glory 2nd edition figures I have purchased. They never really took off. From my stabdpoint, that wass because they seemed nearly identical to the Sash and Saber French, Austrians and Russians, which I already had enough of. However, S&S didn't do British or Prussians, while the Old Glory 2nd edition includes them. Well, the Line Infantry, anyway; they pretty much stopped developing the 2nd edition range after that.


I actually plan to use these as Portuguese; those new Peninsular QWar scenario books by Michael Hopper have lots of Portuguese troops in it. Now I just need to find a manufacturer that does 25/28 figures more suitable for Cacadores, that mix with old Glory/Foundry sized figures!

Sunday, December 26, 2021

Yuletide Treasures #1: Books

Of course, the true Yuletide treasure is time spent with our family and friends, and the season of Peace on Earth and Goodwill.  For a second year in a row, COVID has made it difficult for us to experience those things as as we might ordinarily have done. However, here we're talking about the materialistic side. :-)  I can't recall a Christmas in 60 years or more that hasn't involved books!


First up are a pair of scenario books by my freind, Michael Hopper. Michael was distraught over an error in the final copies which caused the place names on the maps to be in a much lighter font than intended. Frankly, even with being told, I didn't rerally notice it, but he has provided purcasers with PDF files of all the maps as they shopuld have come out. This is actually a fantastic bonus, as it is easy to print out the maps you need to set up or run a game; much easier than photocopying, actually!


As you can see from the contents, this volume is all actions in Spain and Portugal. 


The second volume covers a lot of unusual scenarios from around the globe...


The battles take place in Naples, Denmark (4 scenarios no less), Swedish Pomerania, Argentina, South Africa, The Low Countries, and of course Spain and Portugal! These books can be ordered directly from Michael ( log1cal.mh@gmail.com). With a batch mailing from the US, it was $100 Canadian for both books with postage, etc.


We had our pre-Christmas gathering with our good friends (outdoors, high was 36 that day, but with warm clothes, propane heaters, and sun on their deck most of the afternoon, it worked out well, with good conversation, food, champagne, and gifts. They "get" my love of books and history, and always find interesting items. While not military, understanding an era certainly requires reading above and beyond the battles, troops, and Leaders. I look forward to learning much more detail about Napoleon's difficult relationship with the Vatican!


Napoleon as Gardener?!  That's a take I haven't seen, and look forward to exploring. 


While napoleon is on the cover, this one explores a broader theme.


Once again, Napoleon is an example but just one of many examples exploring strategy and Coup l' Oeil, seizing the exactly right time and place to intervene for maximum effect. 


Ospreys need no introduction, but this is one I didn't have and should be quite useful. 


Finally. my younger daughter gave me the concluding volume of the Saga of Lord Kalvan of Otherwhen, as written by John Carr. This one came out a few years back, so I was happy to get a copy!


Thursday, December 23, 2021

Renaissance Reconnaissance, Part 10 - Box #14; "Go Light on the Cavalry!"


Aside from the Stradiots and Genitors displayed previously, the bulk of Light cavalry during this era were mounted Crossbowmen and Mounted Arquebusiers. 


It seems likely they probably dismounted to shoot and/or load. 


24 Mounted Crossbows, 24 Mounted Arquebusiers, and yet another 7 mounted commanders.
Figures are a mix of Hincliffe, Essex, and  Old Glory.

Monday, December 20, 2021

The Battle of Wildbrooke Common


This is the second scenario from the ECW Scenario book  intended for use with "For King and Parliament" by Simon Miller and Andrew Brentnall. 


The Parliamentary forces are defending, whilst the Royalists have advanced across the river. We played this game back in l;ate October, and I am only now having time to post a brief battle report!


Thomas and I played the forces of the King.


The Parliamentary right; John commanded the forces of Law and Order.


Peter C. had a last minute issue arise, and the John was left to manage the Roundheads alone.


I had the fibne Royl;aist cavalry, which promptly charge and rode down some Roundhead horse, still using the deep "Dutch" doctrine. 


Having to advance into the box of their destroyed opponents left them vulnerable to a devastating flank attack, which John's horse were more than happy to execute. 


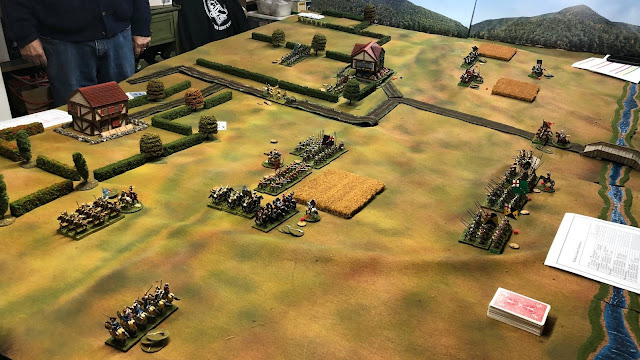
Overview of Wildbrooke Common after the first two moves. 


"Turnabout is fair play, ye turncoats!"
Being hit in the flank by Swedish Horse expending both Dash and their Pistols... that's TEN hit cards played! Needless to say, that's another 3 Victory medal unit of Parliamentary Horse pulverized! 


The other cavalry melee on the Royalist left is a toss up so far, while the opposing main battle lines of Foote close to long musket range. 


The Roundheads try to evict a Forlorn Hope from the Manor, while cavalier Horse sweeps wide to their right. 


The Royslist Horse prevail yet again, threatening the flank of the Parliamentary Foote, while yet another Cavalry melee plays out. 


The Forlorn Hope is flushed out,, but the Parliamentary Gun literally cannot hit anything.  Nopte the Left flank Cavalry continuing to sweep wide to their right. 


The opposing foot battalia close to point blank range!


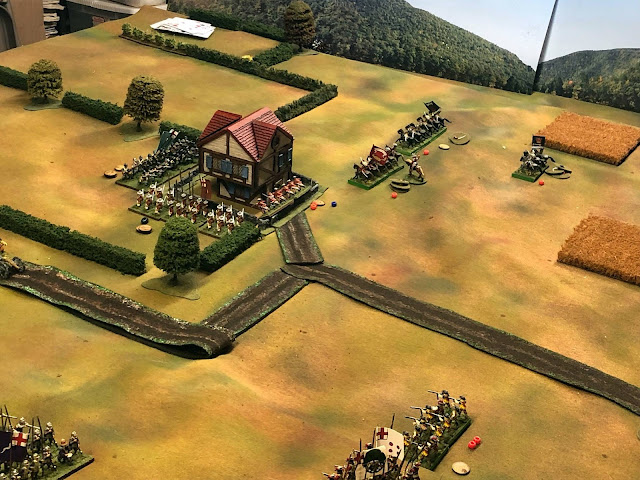
The step off in the table occurred as a result of a near catastrophic table collapse during the game. My table rests upon two ping pong tables, one ancient and with the tubular aluminum legs held together with duct tape. I had had to move it the month before to allow an old freezer to be removed from the basement and a new one put in its place. This destabilized the legs resulting in an earthquake at the Commons. Fortunately, the three of us were able to put things to right after the game!


A Royalist Colonel is Lost!


Being charged in the flank doesn't seem to discomfort the Parliamentary Red Regiment... or perhaps their attention is focused on the Pike  Heavy regiment of Royalist Foote to their front!


Roundhead (dismounted) dragoons venture forth from being the their hedgerow cover, while the opposing cavalry continue to duke it out. 


View of the Center; the Parliamentary C-in-C himself is lost; a heavy blow indeed!


The Red regiment was routed shortly thereafter, and with that the Battle was lost. A second victory for the cause of the King!


At game's end, there were still 6 Victory Medals left for the King's forces. The onus is on the adherents of Parliament to prevail in the next action of the Campaign, which will likely take place in January some time.