Wednesday, December 31, 2014

New Books and Old Shelves - Old Tales and a New Year!

Today being on the cusp between the Old Year and the New, it seemed a suitable occasion for a post combining the Old and the New as well. The later part of this year, my mother in law (a wonderful woman) moved into a (high class) assisted living arrangement at age 88. Her new apartment didn't have room for all of her furniture, so when asked if we wanted any of it, I lept at the chance to acquire some "new" old shelving. Like many historical wargamers, my book collection must weigh as much or more than my lead! (My freind, Bob Jones, would tell me it's time to give them all away and stick entirely to digital media - not happening for another decade or two, Bob!) This pair of bookshelves fit exactly beneath a window in my study/computer room. It wasn't until it was in place that I discovered that the height of the shelves *precisely* matches that of Ospreys! Thiss is great, as Ospreys have a tendency to warp etc when set on end on their own.


The new shelf in place. As you can see, I have plenty of Ospreys (don't we all?), Also prominent are works by Chandler, Gill, Petre, Arnold, Oman and many more, as well as my "Lord Kalvan of Otherwhen" sequels. Of course, I have at least 4 times as many more books on OTHER shelves, but still, these shelves have been hugely useful!


This old fashioned "Barrister's Bookcase", of the sort that often held legal books, had been in pieces in the basement of my in-laws condo since they moved there 20 + years ago. It originally belonged to my wife's paternal grandfather (his old chestnut desk, refinished, has been my desk at my office for over 30 years)  It seemed to be thoroughly broken, but it still looked like it had such promise that I decided that I'd take it and see what I could do to fix it. 


Once the pieces were laid out in my own basement, I realized that it was actually a modular unit, and although one of the 4 modules was broken beyond any reasonable chance of repair, the other three were... perfectly fine, and just needed to be stacked up in the right order to be almost as good as new. Viola! A new, classy bookshelf for my colletions!


After some consideration, I decided to install my English Civil War troops into these shelves. They are among my most attractive figures, yet the soft  metal alloy pikes mean that they don't travel away from home. They had been out on display back to my college dorm days in the mid 1970's, and so they are now once again today!  On top of the shelf is an old fashioned cast iron coffee grinder from my parent's home. The unit could use a little wood polish once I get around to it!


Close up of the ECW troops on the shelves. That left one more empty shelf - what should I put in that display case? 


Well, it turns out that I have a number of HMG Historicon trophies that had just been siting out gathering dust on top of an old refrigerator in the basement, so this presented an ideal location for displaying them. 

    The large Eagle was from Historicon 2007, the "Vietmeyer Award" for the Battle of Dennewitz, 1813, presented to me tableside by Pete Panzeri, commenting that it was for Big Battles with big figures, in the tradition established by Fred and CLS. 

    On the far left is an unpainted figure in tricorne, from Historicon 2010, the first year at Valley Forge. I actually was awarded TWO of them that year for 1809 games - one for Tarvis 1809, and the other for Sacile, 1809. Both times the presenters commented that the games looked good, were large, and had many players including youths, but that what struck them, was that it was a NAPOLEONIC game, and yet all the players were LAUGHING and SMILING and obviously having a great time. Well, yes!  

    The ACW figure was another PELA award, this time from Historicon 2011, for Znaim, 1809. Similar comments were made on presentation of that award, and the game WAS a blast. For that I thank the players at least as much as the GM. 

   The green Hussar was given to our informal "Hofkreigsrat" group of six at Historicon 2009, for the best theme game (1809 theme), for Eggmuhl. We also ran Razyn, Teugen-Hausen, Aspern-Essling, a Raid set in central Germany 1809 (Von Schill and an Austrian Streifkorps versus a motley conglomeration of Westphalians and Rhinebund minor principality troops), and of course - Wagram. 

    The final figure is of course of  The Emperor himself, and was a gift to me this Christmas from one of my patients, herself the daughter of one of the old guard physicians of our town from the pre World War 2 years. It is from her late husband's collection, as a thank you for taking on a grand daughter with severe medical and emotional problems  who had been to 4 different ER's over 2 weeks, severely ill,  without benefit. (She is now thankfully dramatically improved - it's amazing what you can learn from the patient themselves - as Sir William Osler said "If you listen to the patient, they'll tell you what's wrong with them". The sad thing is that such an obvious thing seems almost profound to doctors now days... and it did even back then, too!)

    Well, enough then of the old. What of the new? This Christmas I got several interesting new books from friends and family. In no particular order, here they are:


This latest sequel (by John Carr) to the late H. Beam Piper's wonderful novel, ":Lord Kalvan of Otherwhen, was due out quite some time ago. It turns out that John himself was very seriously ill, and hospitalized for over a month with a bone marrow transplant. He has finally recovered, and I can't wait to read this latest saga set in the Aryan Transpacific Timeline, Styphon's House Subsector. For more on Kalvan's adventures, see the label on the side bar and John's website, Hostigos.com.


From our good friends who "get" my love of history, and share it as well, comes this book about the sunset years of the Empire. I look forward to reading this one  as well!


It has been said that the only person in history who has had more books written about them than Napoleon is Jesus Christ. Thus, a new Biography of Napoleon?  Yes indeed, and it has had very favorable reviews. I haven't  read a non military history of the Emperor in many years, so I look forward to this tome as well! 


From the publisher: This book examines the rise of Sweden as the pre-eminent military power in Europe during the Thirty Years War in the 1600’s, and then follows its line of warrior kings into the next century until the Swedes finally meet their demise, in an overreach into the vastness of Russia. Focusing on the Thirty Years War, which hasn’t been the subject of a book since 1969, Lunde examines the military role of Northern and Eastern Europe from the late sixteenth century to the early eighteenth century. Ultimately, this book examines how a poor country with a population of only about 1.3 million people was able to become a military superpower against larger and more wealthy countries such as Russia, Poland, the Roman Empire, Bavaria, and Spain." With my interest in the Pike and Shot era, and my Scandinavian heritage, this one promises to be a good read as well!  Now I just need some time to curl up and read these latest additions to my library!


Ein glückliches neues Jahr!
Feliz año nuevo!
Bonne année!
Felice Anno Nuovo!
Godt NytÅr!
Próspero Ano Novo!


Which, of course is to say: a very happy, healthy, and prosperous New Year to you all, my friends!

Peter

Sunday, December 28, 2014

40th Infantry Regiment: 2nd Somersetshire

Formation and Early History

    The unit that would eventually become the 40th Regiment of the British army was formed in 1717 by the governor of Nova Scotia, General Richard Phillips, who merged eight companies of local service troops into a single regiment. In 1751 this unit was assigned the numeral 40, and 10 years later it left North America for the first time for in the West Indies. In June 1775 the Regiment was sent to Boston Massachusetts, which meant that it was already in North America on the outbreak of the American Revolutionary War. It fought in the West Indies as well as on the American mainland during the war.


The newest addition to my growing British Napoleonic Army, the 40th (2nd Somersetshire) Regiment


French Revolutionary and Napoleonic Wars, through 1808
    The regiment's first deployment during the French Revolutionary Wars was two-faceted, with its center companies fighting in Flanders and Brittany, and its light-infantry flank companies deployed to the West Indies. The regiment was reunited in the West Indies in 1795, serving on Santo Domingo and Jamaica before returning to Britain in 1798.

    In 1799 the regiment raised a 2nd Battalion for the Helder campaign in Holland. The following year the flank companies of both battalions landed at Aboukir Bay near Alexandria, Egypt. The 2nd Battalion was disbanded in 1802. From 1802 to 1804 the regiment was kept in Britain, raising another 2nd Battalion in 1804 for service in Britain and Ireland. The 1st Battalion was dispatched to South America, where it was part of the failed attempt to capture Buenos Aires in 1806.


Old Glory 28mm figures, with a GMB flag. Buff facings (and belts), gold lace for the officers. I have given this unit grey trousers instead of buff ones, though. 


Peninsular War

    The 40th was deployed to Spain and Portugal from 1808 to 1814. It was thus one of only three regiments to serve throughout the Peninsular campaign. It saw extensive action there, participating (chronologically) in the battles of Goleta, Vimiera, Talavera, and Albuhera, the siege of Ciudad Rodrigo, the assault of Badajoz, the battles of Salamanca, Vittoria, and The Pyrenees, the siege of St. Sebastian, and the battles of Nivelle, the Nive, Orthez and Toulouse. It was then sent to Canada in 1814 to fight in the War of 1812 (later participating in the fighting around New Orleans), before being quickly recalled to Europe the following year when Napoleon escaped from Elba.


Nicknames for the 40th Regiment included "The Fighting Fortieth "(for its courage in Egypt), and "The Excellers" (a pun on its Latin numeral, XL)


Waterloo:
    The 40th had recently returned from campaigning in America. The soldiers were seasoned veterans of Wellington’s Peninsular victories. With the 4th (King’s Own) and the 27th Inniskillings, they formed Lambert’s brigade. After a forced march from Ghent, they arrived near the village of Waterloo late in the evening of 17 June, and the next morning were placed in reserve behind the center of Wellington’s position.

    At about 3 o’clock, following the repulse of a massed infantry attack on the Allied left centre, Wellington ordered Lambert’s brigade into the front line to defend the vital cross-roads behind La Haye Sainte. Shortly afterwards, mistaking allied redeployment on the ridge for signs of retreat, Napoleon launched eight and a half thousand of his superb cavalry, led by Marshal Ney, in an impetuous charge against the center of the Allied line.

    The 40th, along with the rest of Lambert's brigade, formed square and held their ground against repeated attacks by French cavalry, infantry and guns, sometimes combined and sometimes separately. At times they were engaged by several columns of infantry at once, and were frequently surrounded by French cavalry, who became more and more desperate as the battle developed. Their position, some three hundred yards from the farm buildings of La Haie Sainte, was particularly exposed when, at about 6.30 pm, the farm was captured by the French. An enemy break-through in Wellington’s center appeared imminent, but despite the ferocity and persistence of the close-quarter infantry assaults, the constant and destructive cannonade of the enemy guns, and the fire of the French tirailleurs on the rising ground to their front, the Regiment yielded not a foot of ground.

    Major Heyland, commanding the 40th, was shot dead that day during an attack by massed infantry. At the end of the day around one in four of the 40th had fallen around their Colors, which were shot to ribbons (their losses totalled 167 killed and wounded). 


For their steadfastness, discipline and stubborn gallantry at Waterloo, the 40th Regiment of Foot was permitted to encircle their badges on heir Colors with a wreath of laurels, a tradition which continues to its successors of the present day.


A great on line source for this unit, said to have been "perhaps the finest Regioment in the Army today", is: Historical Records of the 40th Infantry Regiment

Friday, December 26, 2014

Battle of Santo Miguel with Die Fighting 2: AAR and Review

See my earlier post for the set up of this battle, set circa 1810 in the Peninsula.


Barry lost no time pushing the British command forwards. He chose to use 2 red resource dice per move, burning up dice at a good rate, but he had better commanders overall, and turned 2 Infantry Action Cards during the first turn. The Napoleonic Template allows a "Mass Column" formation - essentially 3 or more contiguous units in Attack column. The advantage of this formation is that although each unit still rolls individually, only the Best roll is used, and the entire formation moves (up to) that distance. The formation also gets to roll a green Free die, making the maximum possible move distance 18". 


Somewhat cramped for space, the Brunswick command stationed behind chose to advance only with their Jagers in Skirmish Order. Skirmishers in DF2 also get a free Green die when moving, and re-roll their lowest die; if they are also Light Infantry or Elites (as is usually the case) they get a second, green Free Die for movement. 


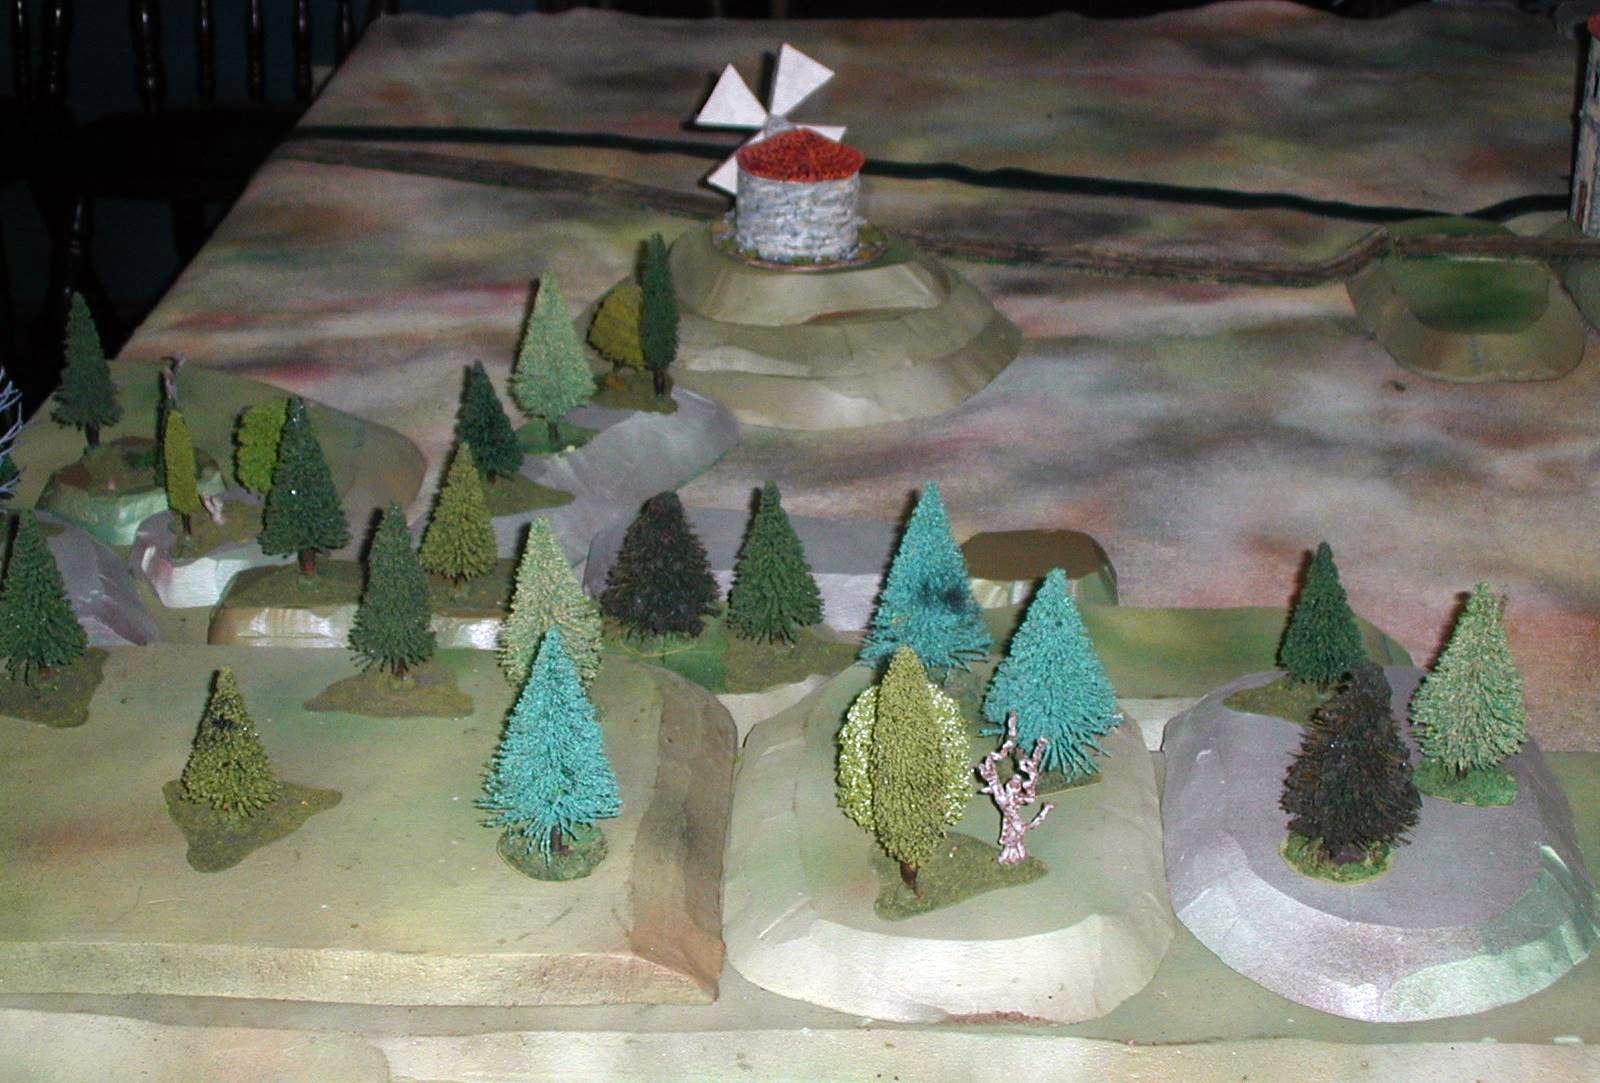
View of the British advance from the rear. Musketry range is generous in DF2, with short range at 4", long at 8" and extreme at 12". Both the deployment and the objective markers placed on the chapel of Santo Miguel and the far road exit (French line of communications) made this line of attack (and defending against it) pretty much a necessity.


On the Allied left, the Headstrong Portuguese commander also advanced. Being Headstrong, his units  HAD to always roll two red resource dice for movement, plus an additional Green Free die for having a Headstrong commander, AND they had to move the FULL distance rolled! With so many dice in play, they easily closed to short range of the defending Germans. The crack, elite Baden Jagers in skirmish order thorough;y annoyed the Portuguese, whose own skirmishers (cazadores) were Poor.  Skirmishers get an extra green free die when firing, and also an extra green free die when fired at, AND cause Disorder more readily than the volleys from formed unit. We made a mistake at first as well, bu having these uber-menschs reload on both the Special Actions card AND the critical "Four-R" card (Rally, Remove, Restore, Retreat). This seemed wrong, and we ultimately discovered our error, but not before the Terrors for Baden had thrown back 2 Portuguese units in Disorder. The close range cannister fire of their (poor) supporting battery accounted for another Portuguese infantry unit thrown back. the final unit, though, was able to charge home on the guns, inflicting a marginal defeat on the artillery men (the total of their red, free green, and yellow Command dice was 6 or less higher than the opposition.  In this situation, the defender has the option to pay the difference in  score from his red dice  AGAIN (he already paid it once for the combat loss itself) and stand in good order, or withdraw a D6 roll in inches (also in good order). Artillery that are over run in melee award a 3 x D6 roll worth of Red resource dice to the enemy command doing so. Ouch! I opted to pay the red dice and stand in good order. In retrospect, having plenty of supporting units nearby, taking the withdrawal (also in good order) would probably have been the wiser call. However, in this case, my German commander was also Headstrong, and such characters MUST buy down marginal losses in melee and stand - so I really didn't have that choice in this case after all!

I ended turn 1 without having turned the critical "4-R card". There are 8 cards in the standard DF2 deck -  two each Infantry Action and Cavalry Action, 1 Artillery Action, One Special Actions, 1 Officer Actions, and 1 "Four R" card. The "Four-R" card is critical because it is the time when you get to replenish each command (and the C-in-C's" pool of red Resource dice. When this card appears, any unused yellow command dice are lost, but the officer's allotment of Yellow dice is returned to full (note that wounded officers lose a yellow die for each wound they suffer). Those restored yellow dice are rolled and each command adds the score worth of red Resource dice to its pool.  All "smoke" markers are removed from units that have fired (exception : skirmishers and cavalry), enabling to fire again. Disordered and or Routed units may rally, and those that do not do so retreat.  DF2 has a special rule for this allowing you to forgo the last card of the turn IF you have not turned the 4-R card earlier in the turn. In this case things are the same as if you had turned the Four R card, except that each officer rolls their full complement of yellow Leadership dice (3 to 5), but only rolls of 3 or more are restored - effectively a 33% reduction in Leadership dice for the next turn. It is these reduced dice that are then rolled and the score in red Resource dice added to the command';s pool. However, NO units may be rallied on the Modified procedure - all units with Black dice retreat the roll of those dice (never more than 2, any unit that would acquire three black dice is eliminated instead), plus 6'". Disordered units stay Disordered. Thus my having to use this alternate procedure at the end of turn 1 placed me at a disadvantage at several levels at the end of Turn 1. 


On Turn 2, Barry used an Infantry Action card to attack the French Division defending the plateau, along with the pesky Badener Jagers, and to resolve the continued melee with my Wurttemburg battery. My defensive fire succeeded in repelling one of the British units and pinning his Light Infantry in place, but the other 2 British units closed! 

Die Fighting 2 handles terrain modifiers in a rather elegant way. Terrain ranges from Class 0 (normal open terrain) to Class 6 (impassable). Class 1 represents minor impedances that may not show on the battlefield such as muddy fields, ditches, and the like. Class 2 represents light woods and gentle slopes, Class 3 is dense woods, stone buildings, steep hills, and so on. For movement in difficult terrain, the unit stops on contact. When nit next attempts to move in the difficult terrain any dice rolling the Class of the terrain or less are eliminated -0 thus if you move at a unit in a Class 3 Forrest, any dice rolling a 1, 2, or 3 are ignored! The same thing applies if you are shooting at or engaged in melee with a unity in difficult terrain - all of your rolls that score the class of the terrain or less are dropped. Simple, elegant, and very effective!


Barry's attack proved to be all too effective - The Jagers and artillery were both soundly defeated  (fighting skirmishers in melee gives the formed unit an extra green die in melee), the artillery catastrophically (oops - this should have awarded Barry's Portuguese command a much needed 3D6 roll worth of Red dice!). Barry had more yellow dice to allocate to his troops, due to both having better commanders and my having had to use the modified 4R card rule the previous turn. The unit attacking the plateau opted not to engage in melee after all once the modifiers were tallied!


A view of the Anglo Allied rear area. They have quite a few units that have been repulsed in the initial advance, but there are plenty more at hand. This is a good time to make an observation about long range artillery fire. This is seldom effective, and thus seems a waste of the red resource dice needed to fire ... except that the target MUST roll at least 1 red resource dice itself, and often two if you roll two - thus the effect is much like softening up the target command over time by depleting their stock of Red dice. Of course, you need to decide judiciously where it is worth it to expend your own dice in this fashion, but it certainly can put added pressure on a command that is already in precarious shape. Much the same is true of trading volleys between two units in similar formations. Of course, if the target belongs to a command has NO red dice remaining, they become very vulnerable to the demoralizing effect of being under fire!


Sir Barry is a bit of a beau sabre, and in his first turn, it was his two Cavalry action cards that were discarded, so his cavalry pretty much twiddled their collective thumbs that turn. This turn he had two Cavalry Action cards in quick succession. This lead to a daring attempt by the Portuguese Dragoons to charge the advancing Westphalian infantry (Militia rated). Despite generously allocating yellow dice to the charge, they fell short in Disorder, and many saddles were emptied by the Westphalian muskets firing at close range!  Note the black die - a unit suffering a loss of 7 - 12 dice in melee or fire combat gets a black die, the roll which is subtracted from all of its future dice scores. 


The French use an Infantry Action card to infiltrate their skirmishers onto to the flank of the British attack, shielded by the impassable Muro river. Chivalrously, I declined to fire at his now exposed flank at this time. Clearly must have been thinking I was fighting in the previous century, LOL!


Overview of the German sector of my line. The defeated Jagers and Artillery are notable, but Barry's Portuguese infantrty is isolated. I could have ganged up on it pretty badly, except.... that I was out of Red dice for this Command. With no Red dice for the command, I am in serious trouble. First I am at risk of losing the battle as of the end of the turn. Second, if I am required to lose any more, my entire German command will be thrown into Disorder. Finally, I cannot move forward or shoot with any unit in the command, even with my loaded units. Ouch!


A view of the French defensive line around Sarto Miguel. I had had the opportunity to transfer some of the 25 red dice in the C-in-C's dice pool earlier this turn when I turned the 4R card this turn, but forgot that was the card used for Red dice for transfers as opposed to the  Command Card (which pretty much just allows the Command stands to move). Barry and I (especially me) forgot to use the C-in-C's yellow dice for much o f anything. That could have bolstered my German units in their melees, although his low rating with only 3 dice not only limited the number of dice he had, but also the odds of  making a successful transfer. Also doing so puts the C-in-C at risk. To transfer Red dice or add yellow dice to a unit's roll, you roll dice equal to the commanders rating - the total must be less than or equal to the distance from the Command stand to the unit (or subordinate), or the transfer fails and the dice are lost. 


We reached the end of the turn, and this time it was Barry who has failed to turn the "Four R" card and thus had to use the alternate procedure as cited above. At the end of Turn 2, the Red dice totals stood as follows:

Anglo-Allied
C-in-C: 42
British Division: 17 (only 5 before the modified Four R card rule was applied)
Portuguese Division: 11 (only 1 before the modified 4 R rule was applied, BUT they should have gotten a bonus 3D6 worth of red dice for causing a catastrophic defeat)
Brunswick Division: 53

French
C-in-C: 25
French Division: 37
Rhinebund Division: 0
Westphalian Division: 54


In Fie Fighting 2, the game ends and Victory is determined in one of three ways:

1) Ignominious rout: If two or more sub-command buckets of an army are empty at any time on the same turn, the game ends immediately with their defeated army rolling a die for each unit
in the depleted commands -– 1 or 2 and the unit is considered lost to pursuit.

2) Decisive defeat: If any sub-command bucket remains empty when the turn has ended (the modified 4R may not be used to escape this circumstance), the game ends immediately and the defeated army rolls for each unit in the disorganized command. Any 1 rolled indicates the unit is considered lost to pursuit.

• Note: If BOTH armies are simultaneously suffering the above
situations the game continues without any restrictions until only
one army is so affected, or one concedes.

3) Narrow defeat: If an Army that has placed a Concede card in the deck (done at the re-shuffle at the end of each turn) and turns over that card on a phase, and all commands have red resource dice, then this is a concession with an orderly retreat. The battle ends. No losses after its appearance.

Scenario conditions of victory may of course supersede these. 

As my German Division ended the turn at zero Red dice, the French thus suffered a Decisive Defeat. Of course, this could have been averted had I transferred any dice to this Division before the start of the game, or on my Four-R card in turn 2, or if I had fired into the flank of the British with an effect of 5 or more (thus reducing them to zero Red dice as well). 

It can easily be seen  how smoothly this process would translate into a larger campaign!


The scenario (which is in fact the San Michelle 1809 - Eugene vs Erzherzog Johann, scenario from my own Blunders on the Danube scenario book, adapted and modified for DF2, and with the French in the position of the Austrians, and the British in the role that the French took) was perhaps somewhat dense in units for DF2. It also left 1 command on each side largely out of the action. For a first game, and with only one player on each side, that was perhaps not such a bad thing!


Rules Review/Commentary:

    Rating the units and commanders and generating the starting Resource Dice was relatively quick and easy. I would suggest writing the rating rolls and the Poor/Crack distinctions on the roster sheet provided (as a PDF). Assigning ratings to the units is best done with a broad brush - hence the the "Militia" status assigned to the Brunswickers and Westphalians, and the Guard status given to the Fusiliers. 

    The changes from the original Die Fighting have improved and simplified the game considerably, while increasing the tension level. The game was fun to play, and played quite quickly, even with being new to the rules and each of us handling three commands. Had we grasped the importance of distributing the C-in-C's die pool in a timely fashion, the game would certainly have gone at least three turns, and almost certainly no more than five turns. The interplay of the rules is quite subtle at times, but no less effective for that. The rules as they stand now are quite elegant. The Napoleonic template seemed to have appropriate modifiers to encourage period tactics and troop usage. There was one omission on the template related to Square formation in melee, which has already been corrected by e-mailing a new, corrected template to purchasers. 

    As one might expect from a Bob Jones design, there are a lot more choices for the player to make than in most wargames rules, and those choices will usually be the main determinants of defeat or victory. Doing nothing is often both a viable and wise move - a command that does little for a few turns and then uses its stock of accumulated red dice to move to the attack could be difficult to stop if the target command has already been "softened up". Similarly, a command with poor leaders and sub par troops had best stand on the defensive if at all possible! 

    It is  not necessary to purchase 100's of red dice to use with the rules. Poker chips, playing cards, floral glass "stones" or similar can be used to track the red "resource dice" instead (we used hash marks on the roster sheet for this game). On the other hand, there is something to be said for the tactile and auditory effect of discarding actual dice, and it makes it less likely that you'll forget to expend them as you roll them!

    The video presentation conveys the rules effectively, and is very professionally done. It runs about an hour.  If anything, I could have done with rather more video examples of play on the CD! The low cost of the rules and of shipping, especially overseas is another plus of the CD format. I kept my laptop alongside the table and did refer to the PDF "slideshow" quite a bit for this first game. The organization of the slideshow made it fairly easy to find the right slide (page), although an index would have been useful (I have to download Quicktime to my touchscreen  Laptop, which might improve the ease of finding a given slide (page) of the rules on the laptop - using the scroll wheel works great on my Desktop!)The need for that should decrease exponentially with further play. I definitely plan to develop my own QRS for some of the common rules issues that arise, and it will occupy the reverse side of the period Template in use. 

    Bob has plans to produce a premium set of phase deck cards, which will be welcome, as the ones printed out from the pdf provided are functional but nothing more. He also has a really interesting plan to produce "decks" of historical commanders for some of the eras covered by the templates, so that one would draw a card from the deck and that would be your officer for the game. Some days you draw a Davout or a Lannes, and others you draw... an Oudinot!  Even then, such personalities might have unique features associated with them - Oudinot, I'd allow to re-roll any result indicating his death to convert it to "just a(nother) flesh wound", and Ney might be worth only three Yellow dice, but they might count double when influencing hand to hand combat or rallying troops! The possibilities are almost endless. 

    While the rules can easily be used for historical scenarios, I think they are stronger for hypothetical engagements, "Imagi-nations"and "pick up" type games.  The creative use of the Objective markers is probably one of the best ways to handle historical scenarios, and they play a significant role in shaping fictitious actions as well. The development of the planned Campaign rules, "Die Marching", is eagerly awaited in that regard. The defined victory conditions and relatively short playing time would seem to make the rules very convention friendly!

Bottom Line:  I like the rules... enough that I have decided to run a game with them at HAVOC this spring and Historicon this summer!

Peter


Thursday, December 25, 2014

Merry Christmas!

Rory, Annie, and Zoe are in the Christmas spirit of love, just before the family carol sing last night!


A very Merry Christmas to all that celebrate it. 
Hope you got the toys you were wishing for!

Sunday, December 21, 2014

Battle of Santo Miguel with Die Fighting 2: Set up

    For a first play through of Bob Jones' new "Die Fighting 2!" rules, I decided to take my new British Napoleonic troops out for a test drive. This also allowed me to use some other British allied troops that had seldom, if ever seen the tabletop - my Portuguese and my Brunswickers. My large basement table remains set up for a retest of my Bicocca scenario with Hostile Realms, so the dining room table was commandeered for the day. With a second, folding camp table along side, it made a 6 foot by 6 foot surface for the game, which would be set in Spain... the battle of Santo Miguel.

    One of the key difference between the original version of Die Fighting! and the second edition was immediately reinforced upon the initial set up of the scenario. In the original version, each unit contributed a number of red "resource dice"dice to an army wide pool, according to its type. In Die Fighting 2!, the initial resource dice are generated by the commanders - the number of units in each command is not factored in at all (typically, a Command has 7 -12 units in it). Each of the commanders is rated by rolling 2 D6; the score determines the number of Yellow Command Dice each leader has; many will have special characteristics as well. The various period templates have suggestions for modifications of these rolls for nationality and year, but we used the unmodified rolls for this game. Each Commander then rills the appropriate number of Yellow dice TWICE before the start of the game - the total is the number of resource dice that Command starts with. Each army C-in-C rolls his yellow dice only once, and takes that number of Red Resource dice. Prior to the start of the game, the C-in-C can allocate some or all of his red Resource Dice to any mix of his commands.

    Similarly the individual units can be Poor, Average, or Crack. This too is determined by rolling 2 D6 for each unit, and once again the period templates have suggested modifiers by nation and year. Militia units, however, can never be Crack and Guard units can never be Poor. Once again, we ignored those modifiers for this battle. The OOB below was set  by the scenario; the ratings and starting dice as we rolled them are also shown.


Anglo-Allied:  18 Infantry, 4 cavalry, 3 Batteries

C-in-C:  Sir Barry, Viscount Franberry . Very Dependable, 4 Dice  (19 Resource Dice) 

Command 1: Sir Arthur Weasley - Very Dependable, 4 Dice  (31 Resource Dice)
3 British Light Infantry (Elite)  1 Crack
3 British Line Infantry (Regular)  1 Crack
1 British Fusilier (Guard)  Crack
1 9# British RHA (Elite) (Heavy Artillery)
1 British Light Dragoon (Regular)
1 British Hussar (Elite)

Command 2: Conde de Cabeçalouca - Headstrong, 4 Dice  (32 Resource Dice)
4 Portuguese Line (Regular)  1 Crack, 2 Poor
1 Portuguese Cazadore (Elite)  Poor
1 Portuguese Dragoon (Militia, HC)
1 6# Portuguese Artillery (Regular)  Crack

Command 3: Graf von Schwarzbach - Very Dependable, 4 Dice  (32 Resource Dice)
2 British Line (regular)
1 Brunswick  Light (Regular)
3 Brunswick Line (Militia)
1 Brunswick  Hussar (Regular)
1 Brunswick Lancer (Regular)  Crack
1 6# Brunswick Foot Battery (Regular)


French and Freinds:  15 Infantry, 2 Cavalry, 2 Batteries

C-in-C: Maréchal Pierre Heureux- Average, 3 Dice  (11 Resource Dice)

Command 1: General de Division Renée Blasé - Average, 3 Dice  (24 Resource Dice)
1 Legere (Elite)
4 Line (Regular) 1 Crack
1 Vistula Legion Infantry (Elite)
1 French Chasseur a Cheval (Regular) Crack
6# Battery (Regular)

Command 2: General-Major Heißenkopf - Headstrong, 4 Dice  (30 Resource Dice)
1 Baden Light (Elite) Crack
2 Baden Line (Regular)
2 Hessian Line (Regular) 1 Crack, 1 Poor
1 French Dragoon (Regular) Crack
1 6#Wurttemburg Foot Artillery (Regular)  Poor

Command 3: General-Major Faber du Funf - Fabian, 5 Dice  (31 Resource Dice)
1 Westphalian Light (Regular)
3 Westphalian Line (Militia)


The battlefield from the West, Southern half. he Chapel of Santo Miguel on the plateau dominates the field, and is a British objective. So too are the bridge and especially the distant road exiting through a ravine, which is the French line of Communications. The River Muro is unfordable, and the  distant, swift flowing stream beyond the plateau is Class 3.


The Battlefield from the West, Northern half, Dominated by step hillsides. The wooded portions are class 2 terrain, the bare hillsides are class 2. 


The French Division occupies the Southern part of the plateau, supported by a Rhinebund Division to the North. Their objective is to hold off the British and their allies until nightfall, so that they can make good their withdrawal. Marechal Pierre is said to be one of the Emperor's favorites. When presented with candidates for command, he is often heard to ask "Ist-il... Heureux?


A small, not very enthusiastic Westphalian Division has lagged behind, but is marching to the South towards the sound of the guns!


Sir Barry's  main strength is the excellent British Division to the South, supported by Portuguese allies to the North, and a band of Brunswickers of dubious quality supporting them from behind. 


    Both Sir Barry and Marechal Pierre deigned to transfer any of their personal Resource Dice pool to their sub-commands prior to the start of the game, evidently preferring to maintain flexibility and await events. We shall see if this was a prudent decision or not! Thus the table is set, and the players have taken the stage. The next post will reveal how the game unfolded...

Wednesday, December 17, 2014

Napoleonic Sailing Ships - The Spanish

Another, smaller fleet from my collection of 1:1200 Napoleonic warships is the Spanish. At the start of the Revolutionary and Napoleonic Wars, Spain had the third largest fleet, after those of Great Britain and France. At various times, the Spanish were both allied or enemies of both of the two main protagonists, making their ships versatile from a Wargames perspective.


The 36 gun Frigate Santa Cecelia and an old, undersized 64 gun Ship of the Line, the San Juan.


Close up picture of the Santa Cecelia and the  San Juan


This  top down view gives a better idea of how the decks and Ratlines look. 


The next pair ate the 74 gun 3rd Rates San Leandro and San Antonio. As a wargames convention, I have chosen to give my Spanish ships dark red sides. There were indeed Spanish ships painted in that scheme, but certainly not the majority. it suits my purposes for ready identification, though - although the colorful Spanish pennants and flags probably do that even better!


This picture shows the reef lines on the sails well. 


The ships' bases are 1.5 inches wide by 3 inches long. 


Last are two heavy hitters - the 80 gun San Rafael, and the enormous 112 gun Real Carlos. The Spanuish fleet at the time of the battle of Trafalgar (1805) included the world's largest warship, the gun Santissima Trinidad. It was originally laid down as a 112 gun ship, but was later modified to carry a staggering 140 guns!


Larger image of these two imposing Spanish warships. 


The San Rafael and Real Carlos again. There is something impressive about these tall ships, even in miniature. I have been on several square rigged ships under sail, and they are very impressive from on deck as well... and also very finicky to handle. Tacking across the wind (Jibe) takes a fairly large and experienced crew,. as well as a seasoned captain to avoid the ship being caught "in irons" and failing to make the transition to the opposite tack!


The entire Spanish squadron of 6 ships.  Patrick O'Brian's tongue in cheek Spanish Frigate, the Cacafuego, is oddly missing!  :-)  A great series by the way, if not quite as action packed as the C.S. Forester Hornblower novels. 


They are a most suitable ally (or foe) to the French ships posted last month!


A modern depiction of the enormous  Santisima Trinidad at anchor.

Saturday, December 13, 2014

Piquet/Field of Battle : New PDFs and Holiday Sale!

My freind, Brent Oman of Piquet, Inc has been busy adding new items to those available in pdf format, AND is having a big sale on PDF's for the next week. I'll let Brent do the rest of the talking:


To help make your holiday funds go a bit further, I'm having a sale on all of the rule sets in PDF form.  From now until the end of day next Friday (12/19), all sets previously $15 are $8, and sets previously $12 are $6.    I may, or may not, extend or change the sale date and our prices after the 19th.   So act now!

I'm also adding new sets for availability:


Band of Brothers, 2nd Edition
Peter Anderson & Ken Baggeley

Archon, 2nd Edition
Eric Burgess


Barrage!
Eric Burgess


Chef de PK
Jim Getz


Din of Battle, 2nd Edition
Eric Burgess


Field of Battle: World War II
Brent Oman


The half price sale prices for all items are:

Archon 2nd Edition:  $8
Band of Brothers 2nd Edition:  $8
Les Grognards 2nd Edition:  $8
Chef de PK:  $6
Grand Piquet: $6
Blunders on the Danube:  $8
Hallowed Ground 2nd Edition: $8
Din of Battle:  $8
Barrage with Point of Attack 20th Century:  $8
Field of Battle: World War 1  $8
Field of Battle:  World War 2  $8
PKowboys:  $6
Theatre of War:  $8

As always, please pay via PayPal to me at brentoman@q.com .

Brent

Such a deal!  And with pdf's, no worries about delivery before Christmas!

Peter