Someone starts out the 3rd Initiative of Turn 3 with a big run... could it finally be Karl?
Heck, no! At this point (if not well before), any human player would concede the game and walk away. OK, well, maybe not the LA guys, but anyone else! Those not wishing to see more Austrian butt being kicked may want to skip to the end of this final post on Caldiero. However, by this point I was morbidly curious to see how bad it would get! Also, per Field of battle, 3rd edition, in a Campaign game, a player can only concede on an Army Morale card, not just any time they feel like it. That has implications for the margin of victory and the entire Campaign outcome.
Thus, Massena unloads on Karl using the first of his nine cards - INFANTRY FIRE. No effect here. ..
or here.
The two French Columns were already "loaded", as were the Austrian Grenadiers - all smoke and no real losses here.
Knowing he has a long run of impetus, the columns fire again, leaving them "unloaded", and inflicting a single UI loss in aggregate.
Another exchange of fire that favors the French by 1 UI. Many other units reload across the battlefield.
On the second (MELEE) French card, The unstoppable French Grenadiers charge the Austrian line they just shot up, and drives it back with the loss of another UI.
The two French columns also charge the opposing Grenadiers they just shot at, obl;iterating them. They advance in good order to sieze the position after the melee, having rolled even.
A third French charge has the Austrians gaining the edge in the first round, but as in every such melee in the game thus far, the French ultimately prevail here as well (not shown).
Almost as if on cue, Massena's third card is MOVE; this is perversely timely as the French have pretty much destroyed everything within musket range of them.
Mermet's Cuirassier brigade gets one segment,
and closes on the flank of the Austrian position on the Southern ridge.
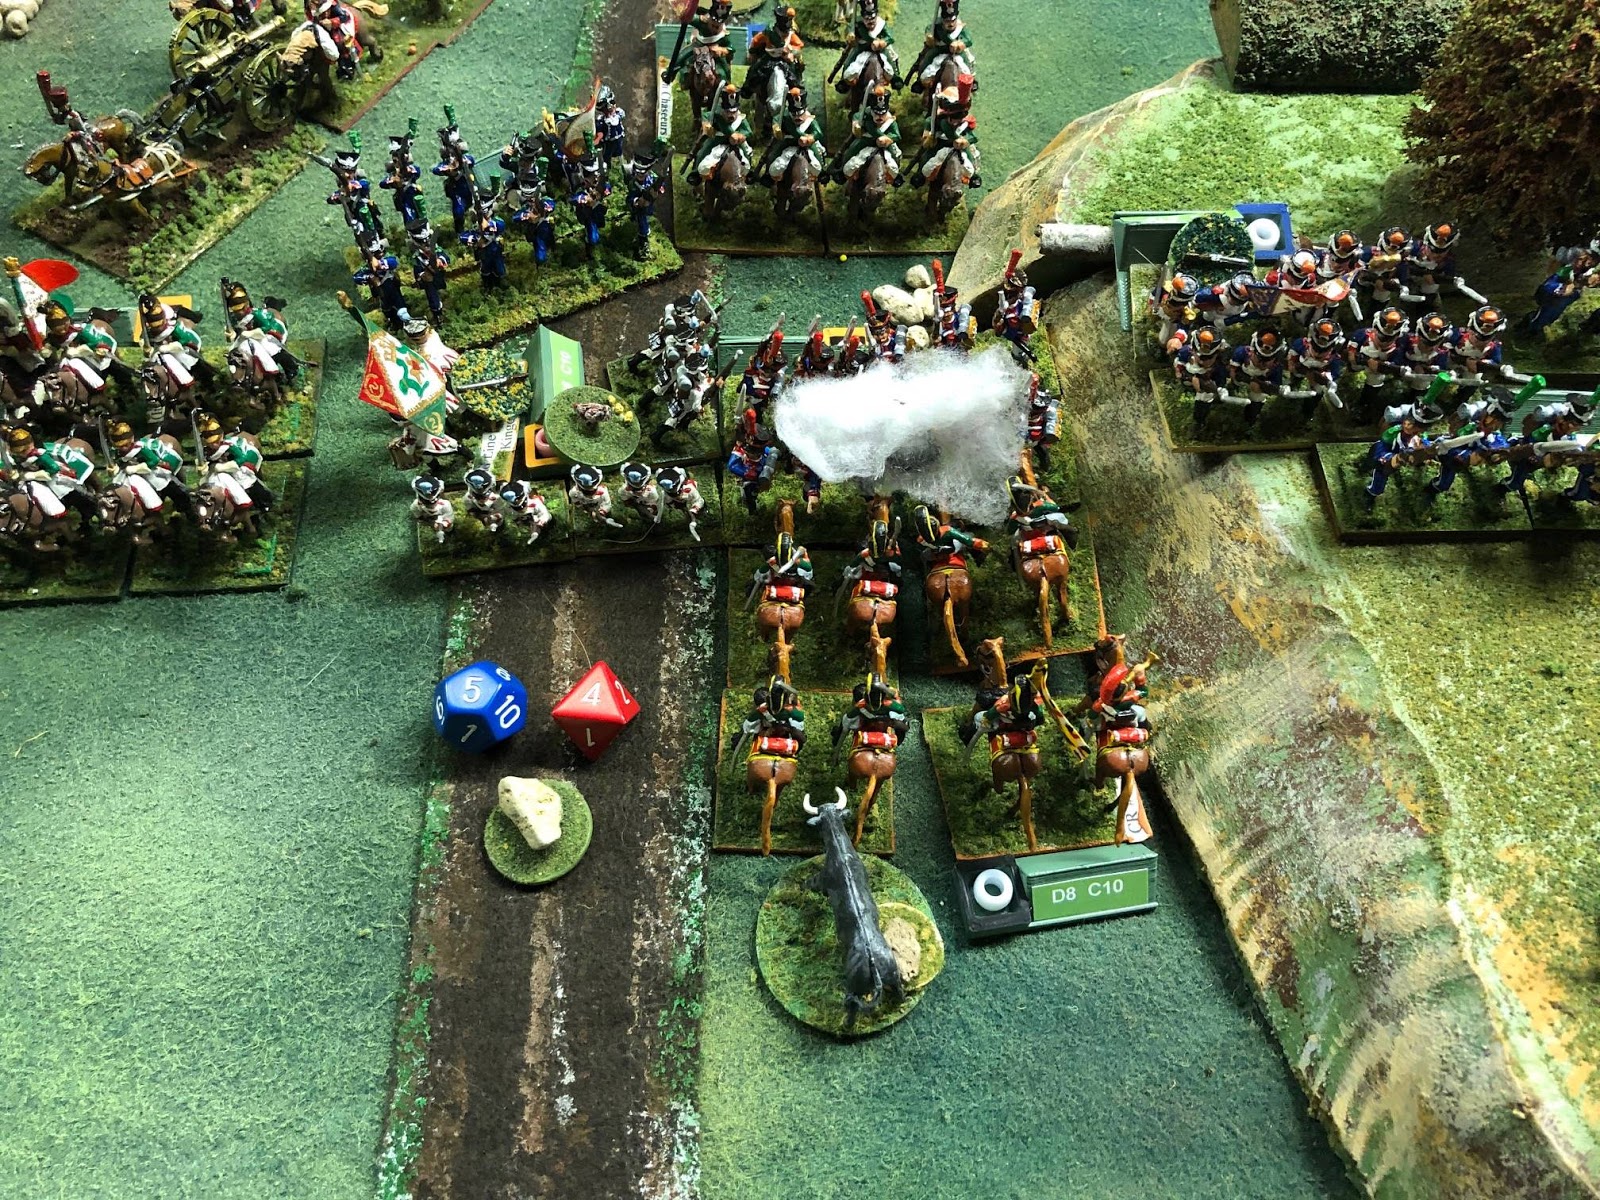
However, Lacour rolls up a triple magic move for his Dragoons.
They launch a hell for leather charge on a severely battered Hungarian line unit... but are stopped just shy of their target by the defensive fire of the infantry, although they lose no UI.
A Triple magic Move for G(h)oulus' brigade as well!
The horse battery, its field of fire likely to be obscured by the MOVE, pops off at the Austrian position behind the works on the ridge, to little effect.
One of the French units blasts the Hungarians away with a point blank volley, accomplishing with Fire what the Dragoons failed to do with the sword! With 3 UI already lost, they can only suffer one more, and are dispersed.
Positions after the move.
The Magic in your (die rolling) touch!
FML Reuss is contacted by the advancing French. On a D12 roll of 1 or 2 he is lost (which would cause his entire Division to become Disordered); on a higher roll, he is moved that many inches away.
A French column charging the flank of the unit holding the works opposite Caldiero; not surprisingly, they are routed!
The remaining unit holding to works is charged in the rear, and routed as well (that's at least a D12+3 they are rolling).
The Kaiserlicks catch a tiny break when Solinac's aides all fail to find the units they are carrying orders to, leaving them inactive.
A hum drum single segment for Compere's brigade...not that Karl wouldn't give a lot to have that for his boys!
More triple magic for Lenchatin's command.
Before they step off, there is a thunderous exchange of long range artillery fire, which accomplishes little but creating clouds of black smoke!
This fresh Austrian regiment stops the French charge cold, with losses. Go, team!
Well, at least Line formation is good for
something; another Austrian volley inflicts severe losses on the French advance.
Contacted by the French, these routed troops are removed from play; no additional UI/Morale points are lost, however.
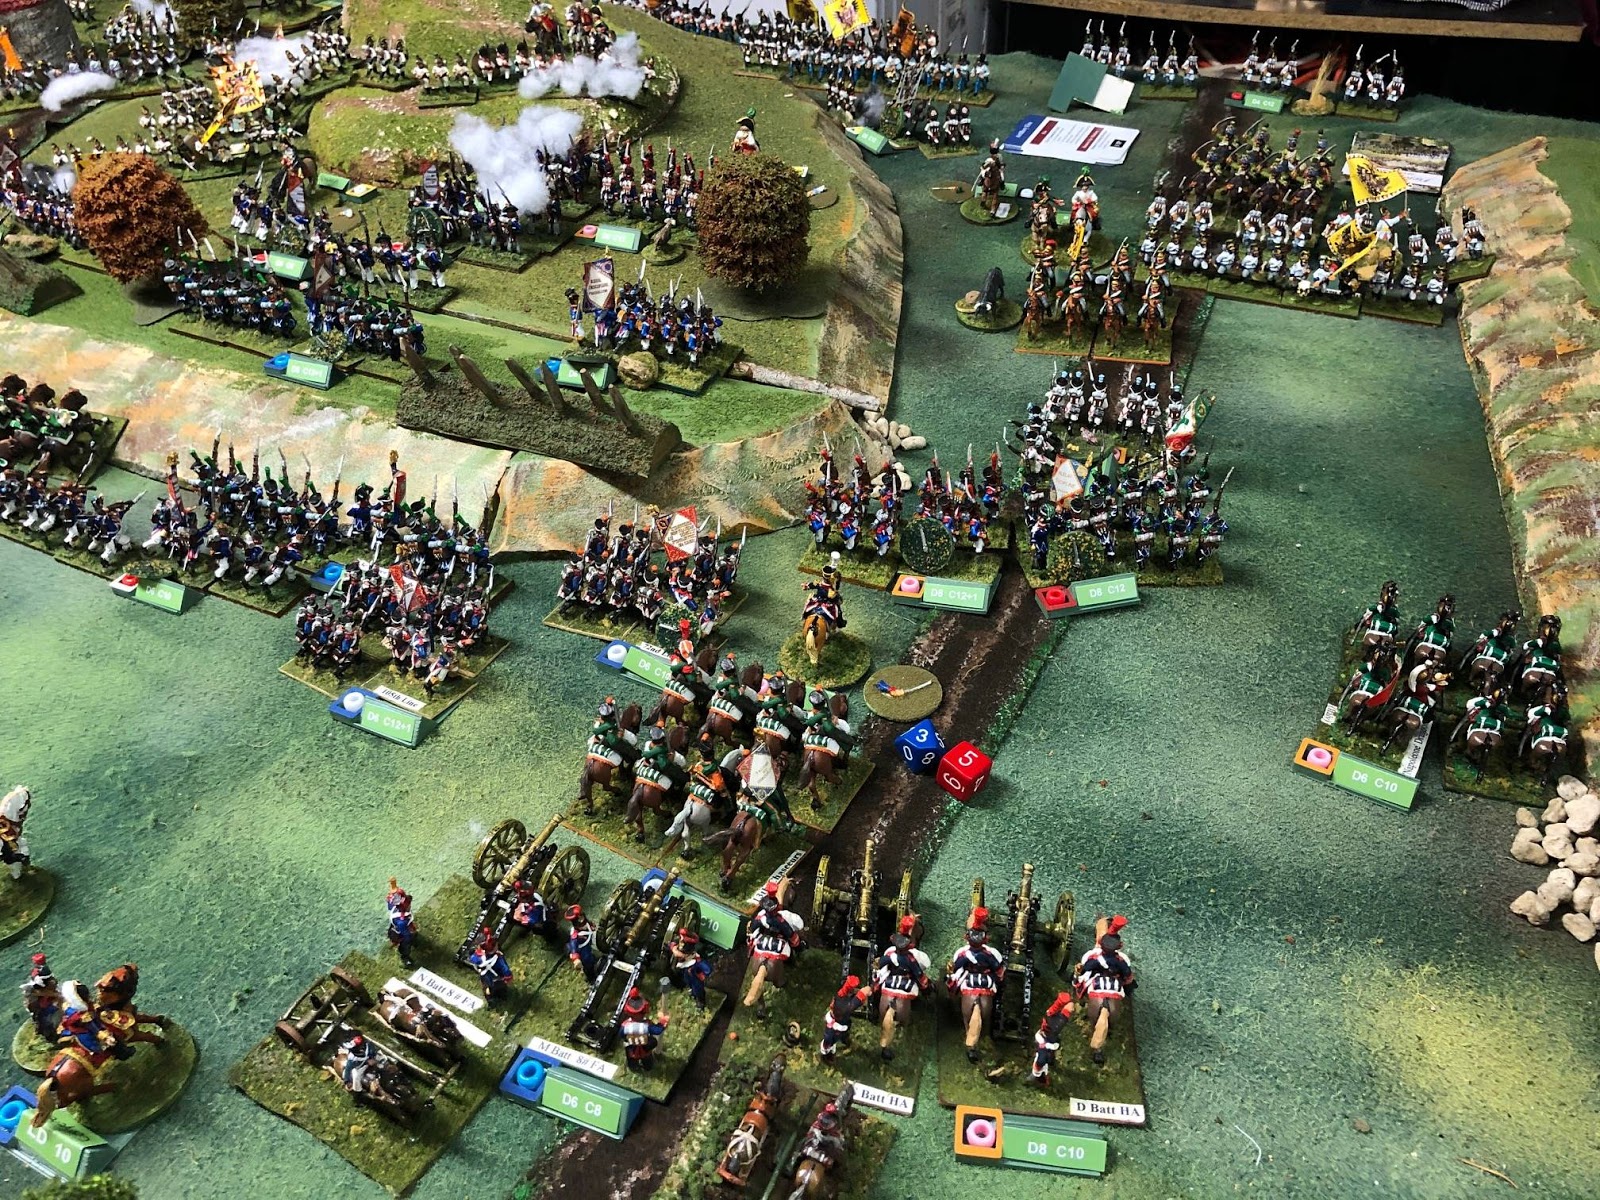
Overview of the Southern half of the Northern ridge; Karl himself is close to being overrun!
The same from the French vantage point.
A plain single move for Espagne's Light Cavalry Division.
With the Austrian position crumbling everywhere, he moves forwards cautiously to apply some pressure to the far North of the Austrian position.
Overview shot.
Another view, form the South this time.
A view from the North here.
L:EADERSHIP; rallying time again, men!
Non!
Je ne pense pas!
Mutton for dinner tonight!
Pas de chance!
No longer feeling sheepish!
Cinq me! (said in Trevor Howard voice, a la "The Scarlet Pimpernel")
Ne se passe pas!
Pas ici non plus!
Pas assez...
Massena's next card... another MOVE!
Double Magic for Lacour's dragoons.
They take the opportunity to heart, riding down GM Colloredo. ..
then sweeping behind the Austrian position!
Triple Magic for Mermet's Cuirassier brigade.
Routers ridden down..
and units charged in the flank*; all in a day's work.
(* I actually did this a bit wrong; wheels must happen at the start of a charge. However, with the new definitions of a flank attack they still could have attacked the flank of the lead unit, but it would have looked a bit different geometrically!)
The Southern ridge is almost completely lost!
No magic for Camus' brigade.
Situation after their move.
Another single move.
The unstoppable Grenadiers capture an Austrian general; unable to close to melee, their volley pushes back the beleaguered Austrian Grenadiers with loss.
Single Magic for Brigade Compere.
Situation thereafter.
"Time to cook lunch" for Valory's brigade.
Single move for Lenchantin as well.
Situation after that.
Single segment for the 12 lber Artillery reserve; long passed by, they limber up.
Trois fois la magie!
Evidently winded from ascending the slope, the French shoot wildly.
Better aim here!
No move for Valentin's reserve Grenadiers.
Save it and remember to use it!
Karl remains hapless, unable to seize the initiative on the LULL.
A second TA!
More overview shots; from the North...
from the West...
the Center...
from the South...
from the East...
The Verona - Venice highway
The Southern ridge.
With the initiative finally passing to Karl, he can only use the MELEE card in one place.
The Cheavu-legers charge the Grenadier column; defensive fire empties some saddles, but does not stop the charge.
Round 1, of the melee, advantage Austria.
Round 2, advantage Austria again (we know how these things have worked out thus far, right?)
Round 3 is a tie...
and Round 4 sees the bold Chevaulegers driven off with more loss.
Figures, right? ARMY MORALE! Karl would definitely concede at this point, but just in case I rolled for him, and the Austrians must withdraw; Game over, man! Phew, that was epic!
At the end of the game, the French have lost 2 units, both retreated off the table with remaining UI, and have 50 Morale Points!
These 2 Austrian reserve brigades never even made it to the battle; the 4th MOVE card never came for them!
Five Austrian units on the table but in Rout at the end of the game.
16 infantry units, 7 Artillery units, and 1 Cavalry unit either completely destroyed or routed off the table at the end of the game. More than half of the entire army; add in the routed units (5) and the reserves that never arrived (6 units) and that's 35 out of 55 units unavailable the end of the game.
Marechal Massena reports the great victory at Caldiero to the Emperor. Somewhat skeptical at first, at the conclusion of the Campaign he confers upon Massena the title of "Prince of Caldiero", and more appropriate for the always avaricious Marshal, an equally grand annual income to go with it. He also quietly has Fouche keep a close eye on the Marshal and his associates for any signs for higher ambitions!
This was probably the most lopsided game using Field of Battle that I have ever been involved in! The only one close to it was at Historicon a year or two after the publication of FoB1, where the Velas brothers supplied a mass of beautiful 28 mm Front Rank troops for a big Saturday night pick up game. There were 8 - 10 players in the game, with myself, my freind Paul Yankowich, and Ken Baggaley amongst the Allied side, and Jim Mauro and Jeff Valent being among the French commanders. The French were on the attack. I was the Allied C-in-C, and won the first initiative roll with 9 pips. Figuring that the French would burn through a lot of useful cards before they closed, I gave the initiative to them. BAD mistake! First card was a MOVE, and they rolled mostly Triple Magic Moves for their commands. Our defensive fire was as inept as Karl's in this game, and they just swept right over us, turning just the right card they needed each time, including two or three MOVES. By the time it was our initiative we had almost reached zero Morale Points, and many of our units were routed or destroyed. During our own initiative, we reached zero AMP, and then of course prompltly turned (and failed) the ARMY MORALE check card. It all took less than 90 minutes - a Napoleonic Rossbach! Jeff tactfully observed "I'd be lying if I didn't say I enjoyed that!".
After playing the scenario, I would revise it back to the way Michael Hopper had it originally - rate all the Austrian Line as Regular, and all their Grenadiers as Elite, and delete the extra French battery. I'd allow the Austrians to use Attack Column, but NOT engage in immediate melee with their infantry. That would make the game closer, although little of it would matter much if the Austrian luck was as poor again as it was this day!
As a solo game, this was actually a lot of fun to play out. It helped point out a number of changes in FoB3 that I hadn't noticed despite proofreading it several times for Brent. Finally it reinforced why I love these rules so much - the unexpected, the dramatic, the streamlined mechanics, the subtle effects of little things like Disorder, and more. I hope to try an ECW battle next, as well as exploring the (included)new Season of Battle simple campaign rules. Definitely a keeper in my book (no surprise there, eh?). I think Brent did a great job with this update and revision to an already outstanding set of rules.