Wednesday, March 21, 2018

Spanish Generals, Grenadiers and Guerilla

A few odds and ends to share today...

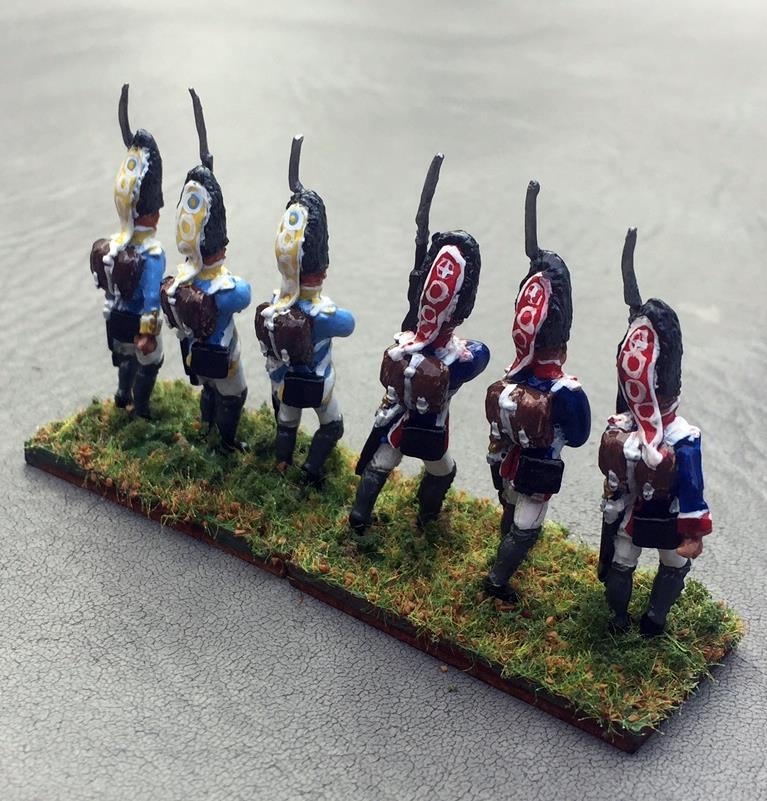
Grenadier companies for the Irish (Irlandia) and Swiss (Redding) regiments posted earlier.


Gotta love the long bags or flammes on these enormous bearskins!


These are Three Armies figures - the owner kindly sent me a freebie pack of 6 grenadiers with my order for 72+ Line troops.


Not being one to let free lead go to waste, they have joined the ranks of my Spanish army.


Very nice sculpts indeed!


Another shot of the rear of the bearskins.


A trio of as yet un-based figures.


The front two are Brigade games, and the rear one is a spare Three Armies officer painted as a Brigadier. 


The female partisan wears a cast off jacket from an Irish regiment, and carries weapon worthy of "The Gun" (aka The Pride and the Passion")


The portly fellow is painted as a Major General. I haven't yet decide how to base these with some other command and Guerilla figures in the pipeline. 


"Perdóname cuando recorto mi bigote!"

Friday, March 16, 2018

Spanish "Reding" Line Infantry regiment (Swiss)


By the time of the Peninsular War, there were six "Swiss" regiments in Spanish service. The oldest of these traced its history back to 1734. All of the Swiss units in Spanish service traditionally worse dark blue coats, hence their nickname "Suizas Azules".


These regiments were raised by contract with the Colonel, and their names changed with the changes in commanding officer. 


From 1767 on, the Swiss regiments were given royal permission to add a white edging to their red Spanish cockades. These figures are  28mm Three Armies Spanish Line infantry, painted as Swiss. 


The Swiss regiments all wore the virtually same uniform in 1808, scarlet collar, cuffs, lapels, shoulder straps and turnbacks, which most but not all sources indicate were piped in white, as I have shown here.


 One regiment had dark blue collars piped white, and sat least one had blue instead of red cuff flaps, again piped white. All units had white metal buttons.


The flags carried by the Swiss regiments were reminiscent of those carried by the Swiss units in the service of the Bourbon kings of France, but with the red cross raguly superimposed upon the wavy designs, as opposed to the white cross borne on the flags of the Swiss serving the French king.


From what I have been able to find, the drummers in the Swiss regiments wore essentially the same uniform as the rest of the regiment. The epaulets and buttons, etc of the officers were silver in Swiss units. Flag is by Adolfo Ramos. 


Swiss Regiments, 1805

Regiment
Cuffs/Turnbacks
Lapels
Collar
Buttons
Wimpfen
Scarlet
Scarlet
Scarlet
Pewter
Reding Senior
Scarlet
Scarlet
Scarlet
Pewter
Reding Junior
Scarlet
Scarlet
Scarlet
Pewter
Betschart
Scarlet
Scarlet
Scarlet
Pewter
Traxler
Scarlet
Scarlet
Scarlet
Pewter
Preux
Scarlet
Scarlet
Dark Blue
Pewter


Add: For more information on the flags of the Swiss regiments in Spanish service during the Napoleonic was:  Banderas Militares - Regimientos Suizos

Wednesday, March 14, 2018

Snappy Nappy Campaign Planning: Spain, Spring/Summer, 1809

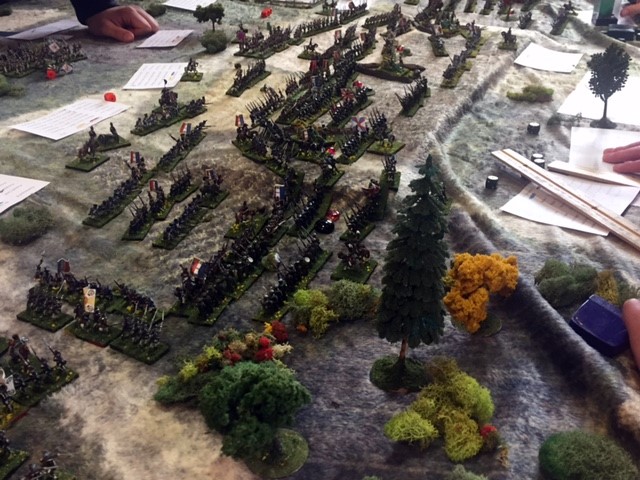
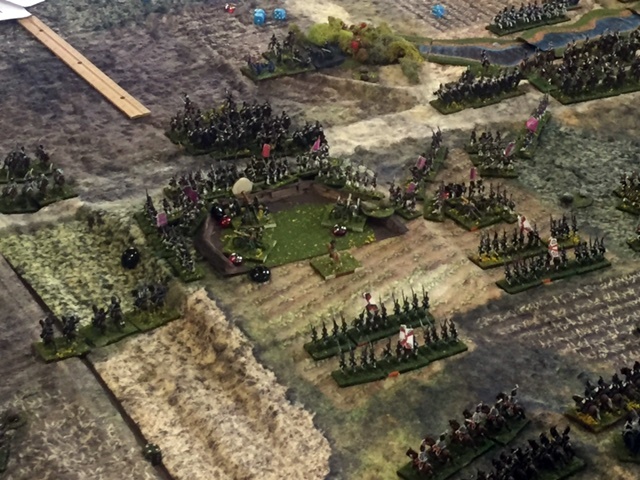
    On Sunday, April 29th, we will be running another Campaign in a Day event at The Portal in Manchester CT. Expected hours are 10 AM - 5 PM. All of these events have been a great deal of fun. This one involves the fighting in the parts of Spain and Portugal depicted below, beginning shortly after Sir Arthur Wellesey's return to Portugal. Loss of either Madrid or Lisbon will end the campaign with a decisive victory for the other side, otherwise total losses inflicted will be the determinants of success. 

    This game will also serve as a test of the scenario for  similar event to be run at Historicon this July, planned for Thursday from 10 AM - 5 PM. Depending upon registration for the event, forces will likely be roughly twice as big for that game. For information on previous events, and to get a feel for what they are like, see the "Campaigns in a Day" page on this blog. 

Signed up so far:

Allies:
James  Venegas
Vic -  Cuesta #1
Russ   Cuesta #2 (Zayas)
Peter O  La Romana
Mike - British #1 Wellesey
Bruce  British #2  Hill
Karl -  Portuguese #1 Beresford
Marty Portuguese #2  Silviera
Brian   Don Julian Sanchez (Guerrillas)

French:
Mark M- Marechal Michel Ney
Mark - Marechal Victor
Richard H - Soult #1
Mark H -Soult #2 (Lapisse)
Caleb Marechal Mortier
Phil - Sebastiani
Michael Lambros - Latour Mauborg #1
Herbert Arico  Latour Mauborg #2 (Milhaud)
Jim  -  King Joseph/Marshal Jourdan

Dan - half of Mortier (Gazan)

Greg - reserve player and Assistant GM. 


   Barely had Napoleon finished chasing the British under General John Moore out of  Spain, culminating in the battle of Corunna and the evacuation of the army by the Royal Navy, when he hurried back to Paris.  He was never to return to Spain again. All indications were that the Austrians would declare war in the Spring, and thus he began withdrawing troops from Spain to be redirected to the Danube front. With the British gone, the French under Marshal Soult once again invaded Portugal, and took the key city and port of Opoprto. The other corps in Spain were dispersed to pacify Galicia, Asturias, Estremadura, and Andalucia, and put an end to the epic sieges engendered by the Spanish resistance. Saragossa finally fell in February 1809, but at a cost of over 10,000 French lives (and many more Spanish ones). Back in London, Sir Arthur Wellesey, the victor of Rolica and Vimiero in 1808, was cleared by the commission investigating the Convention of Cintra. With general Moore having perished at Corunna, Wellesey convinced the British Government to intervene once again in Portugal, and had arrived in Lisbon in late April of 1809 - just as Napoleon became embroiled in the war with the Austrian Empire. The Emperor would have no men to spare for Spain for the foreseeable future. Napoleon's brother, King Joseph, and the squabbling Marshals nominally under his command, would have to fend for themselves, "aided" only by outdated and unrealistic directives from the Emperor.

Loss of Lisbon or Madrid will end the campaign in a decisive victory for the French or Allies respectively.Otherwise one victory point will be scored for each enemy unit that is eliminated, except that Militia units count only 1/2 point each, and NO Victory Points are gained for destroying Guerrilla units.  

Each command, except the Guerrillas and Gendarmes, will have a bridging train. For game purposes, permanent bridges may not be destroyed, but temporary ones (laid down by bridging trains) may be destroyed/removed.  See section 22.1, on page 36 of Snappy Nappy


The French players may collaborate.

The British and Portuguese players may collaborate with one another.

The Spanish players (including Guerrillas) may collaborate with one another, BUT they may NOT collaborate with the British and/or Portuguese players *prior* to the start of the game. 

Any or all players may prepare dispatches in advance to be sent at the start of the game, including communications between the Spanish and their allies. These will be given to the GM and delivered after a suitable delay. These could be considerably more detailed the usual in game messages. These might be an explanation of your starting plans, elaboration of your forces, inquiries of your allies, proposals for cooperation, etc. 

For players new to the game, communication with fellow players can be key. Messages are typically delayed roughly 15- 20 minutes real game time, less if players are close, more if they are distant. 

Although all tables are visible, which table is what and what forces are what, and what they are doing will not be clear for some time, if ever. You will quickly become engaged in your own situation, and thus getting the "Big Picture" can be difficult. When you jump from one table to another, you never know quite what you will find there!


In game messages are usually short, hurriedly scribbled (illegibility, just like in real life can be a definite problem). They usually take the format:

FROM:
AT:                                      TIME:
TO:


We like to save the messages at the end of the game, as it helps understand how events unfold. Usually messages will be very frequent at first, and then decrease as events become clearer. Of course, messages can be out of date before they even arrive!


Royal Navy: 8 ships
** Special Rules
1) Each ship may transport 1 stand of Allied troops from one harbor to another harbor (anchor symbol) on the map. Transport time variable. 
2) Both harbors must be unoccupied by any French troops (no opposed landings!)
3) Ships do not affect land combat in any way.

**Spanish Special Rules
1) Spanish troops may retreat off table (as a group)  into "impassable" mountains", or entirely off the main areas. If they do so, they may not return for at least 30 minutes of game time, BUT all damaged stands will automatically be fully rallied.
2) Spanish troops have no central command.

Guerrillas
** Special rules
1) No points are scored for eliminating Guerrillas
2) Guerrillas may always retreat off board into "impassable" mountains.
3) If French dispatches traverse an area with Guerillas deployed (umpires call), there is a 5% chance per Guerrilla stand along the route that the dispatch will be captured, and both never delivered and also delivered to Don Julio Sanchez.
4) Guerrillas are expected to act as spies and report their findings to Allied players as they see fit.This includes possibly forwarding copies of captured dispatches!
5) Eliminated Guerrillas will "re-spawn" in 30 minutes on any table(s) in Spain that are free of French troops (including Gendarmes) If none are free, they may re-spawn in off table areas of Spain (NOT Portugal).


Gendarmes
** Special Rules
1) Gendarmes may be deployed as single stands to suppress Guerrilla activity
2) Gendarmes suffer no penalty for lack of command.
3) Gendarmes do count as troops on the table for the purpose of enemy movement, and do cost Victory Points if lost.
4) Gendarmes present on a table will negate the effect of Guerillas on French communications  for up to 2 stands of Guerrillas per stand of Gendarme
5) Gendarmes may not enter Portugal.


GUERRILLA AMBUSHES:


1) The Guerrillas my prepare ambushes on any table where there are no French troops other than Gendarmes. (this would include the tables they start out upon, even if Gendarmes are deployed on that table). 

2) Ambushes may be set within mountains, hills, woods, or villages. 

3) Guerrillas lying in ambush are removed from the table. The site of the ambush is indicated by a slip of paper hidden under the terrain in question, noting the forces placed there and the time placed. If there is m ore than one stand of Guerrillas on the table, as many ambushes may be placed as Guerrilla stands are removed. The Guerrilla player may place as many dummy slips as there are Guerrilla bands on the table (to mislead any casual onlookers).

4) When the Guerrilla player springs an ambush (which may be at the END of any French phase of a turn), he rolls THREE morale checks, needing a 9 or a 10 (usual score for militia) on any ONE roll. If there are Gendarme stands present on the table, the number of checks rolled is reduced to TWO if there is one stand of Gendarmes, and ONE if there are two or more stands of Gendarmes on the table. 

5) If at least one check is passed, the Guerrillas are placed on the table and then act normally on the Allied Phase of the turn.

6)  If NO checks are passed by the Guerrillas, the stands are placed on the table anyway, BUT they may NOT act, except defensively, until the FOLLOWING Allied phase. 

7) The GM will be advised, either verbally or in writing, of the placement of ambushes. 

8) Guerrillas in Ambush still disrupt French communications.


As for Gendarmes

1. how do they react when facing regular forces, non-guerilla units?

2. Are they treated as regular infantry for fire, melee and other gaming needs?

3. What limitations do they have when facing enemy non-guerilla regular units, both cavalry and infantry.

4. How can they be used to guard non-permanent supply depots?


My intent is that the Gendarmes otherwise fight as normal troops. They may NOT be added to any player's command. They could be used to garrison fortresses.

While I had considered having supply rules for this game, in the end I decided it was probably taking things a level too far. 


Some difficulty can arise when players leave token garrisons behind to hold critical bridges and bottlenecks, etc. It can unduly penalize opponents encountering such token forces when they have to twiddle their thumbs, unable to move because their opponent keeps running away to do moves in a much bigger battle on another table.  Of course, delaying the enemy (within reason), as well as getting notice of the movement of enemy troops into the area, are the two main reasons for leaving token forces to begin with.

1) A "Token Force" consists of not more than 3 units of infantry, or a single Cavalry or Artillery unit. Combined arms forces are never considered "Token Forces".

2) Wherever possible, the owning player will play their own troops provided that it does not unduly slow play on that table or elsewhere.

3) Another player on the same side, or the GM or their assistant may be assigned to run the force if necessary to maintain the flow of the game. 

4) Failing any of those, or by the consent of the owning player, the Token force may be run by the opposing player following the Default Orders given to the Token Force as follows:

Place a pre-printed card underneath the token force when it is detached that gives it Default Orders:

- Hold at all costs, always orienting to fire on the nearest enemy.
- Withdraw as quickly as possible away from the enemy.
- Withdraw as quickly as possible towards Deployment Zone  _________ (fill in the blank).

In the absence of a Default Order,  "Hold at all costs" is assigned.


On encountering the Token Force, and after suitably informing and getting the OK from the GM, a player could run his own troops and pretty easily and reasonably run the opposing token force. Mostly the token force is not going to move (or will move away as quickly as possible), so one only needs to do trivial movement or roll shooting and morale for it. The Token force will impose a 60 second delay per unit each turn on the cycling of the active player. In other words, a Token Force of 3 Infantry units would impose a 3 minute delay per turn cycle upon the opposing player. The timer on a cell phone can be used to track such delays. 


SPANISH RETREAT INTO THE MOUNTAINS RULE

"Spanish troops may retreat off table (as a group) into "impassable" mountains", or entirely off the main areas. If they do so, they may not return for at least 30 minutes of game time, BUT all damaged stands will automatically be fully rallied."

Wow. Just caught this. 

Does retreating off table mean any edge? Or just into the 'edge mountains' that Greg is making? Or is it off any road? Or, I should say via any Deployment Zone? 

They may of course retreat (and thus perhaps rally) via Deployment zones the same as anyone else, but they have the special ability to retreat across mountain table edges (whence the French cannot follow them). This happened repeatedly during the Peninsular War, which meant the French defeated the Spanish again and again... but they were back again next season! The Spanish actually raised an astounding number of troops over the long course of the war. This ability should keep them a thorn in the French Derriere!

TERRAIN

On the table maps:

 "Mountains" = Severe (Spanish Cavalry and Artillery ONLY may enter, but ONLY to retreat off the table, other nations Cavalry and Artillery may not enter)

"Woods" = Rough

"Hills" = Broken

Buildings = Town, except clusters of 2 or 3 = City.

Fortresses are as marked on Table maps. 

All rivers are 1" wide (thus NO small arms fire across them), and may only be crossed at bridges, whether permanent or pontoon.


The Campaign Map, a reduced section of the "Murat's Maps" page for Iberia.


Some maps from Colonel Lipscombe's excellent The Peninsular War Atlas that help set the b background. Recall that mid April 1809 corresponded to when Erzherzog Karl crossed the Isar into Bavaria, opening the fighting on the Danube. 


Events leading up to the battle of Talavera


Post Talvera. None of these maps correspond exactly to how the forces will start at the outset of the campaign, but still useful to get a feel for the overall picture. 


The main commands will be:

ALLIES:

1) General Sir Arthur Wellesley with the British Army

2) Generals William Beresford with part of the  Portuguese Army

3) General  Francisco Silveira with the rest of the Portuguese Army

4)  General Francisco Javier Venegas with the Army of La Mancha

5) General Gregorio García de la Cuesta with the Army of Estremadura

6) General Pedro Caro y Sureda, Marqués de La Romana. with the Army of Galicia

7) Don Julián Sánchez, "El Charro", with the Spanish Guerrillas


FRENCH:

1) Marshal Claude Victor-Perrin, Duc de Belluno with the 1st Corps

2) Marshal Jean-de-Dieu Soult, Duke of Dalmatia with the 2nd Corps

3) General Count Horace François Bastien Sébastiani de La Porta with the 4th Corps

4) Marshal Edouard Mortier, Duke of Treviso, with the 5th Corps

5) Marshal Michel Ney, Duke of Elchingen, with the 6th Corps

6) General Marie-Victor-Nicolas de Faÿ, Marquis de La Tour-Maubourg with the Cavalry Reserve

7) King Joseph Bonaparte and Marshal Jean-Baptiste Jourdan with the Army Reserve


COMMAND RADIUS AND LEADER RATINGS:

I am thinking the Spanish really should be penalized here, but the 9" radius is too short, especially using 25mm troops, so we will use 12" for Spanish (same as for later Prussians and Austrians), and 18" for everyone else. 

Leadership Ratings:

BRITISH:
Wellesey - Genius (+3)
Hill - Charismatic (+2)

PORTUGUESE:
Silviera - Dashing (+1)
Beresford =- Dashing (+1)

SPANISH:
Cuesta - Dashing (+1)
Zayas - Reliable (+0)
La Romana Dashing (+1)
Venegas Reliable (+0)
Don Julian  N/A

FRENCH:
Ney - Charismatic (+2)
Soult - Charismatic (+2)
Lapisse - Reliable (+0)  (he was closer to Poltroon in real life!)
Victor - Charismatic (+2)
Sebastiani - Dashing (+1)
Mortier - Dashing (+1)
Latouir Mauborg - Charismatic (+2)
Milhaud - Dashing (+1)
Joseph/Jourdan  - Dashing (+1) 


Ratings:
Portuguese:  Cacadores Veteran (6+),  Line Seasoned (7+), Cavalry  Seasoned (7+), Artillery Veteran (6+)
British: Guards Guard (4+), Elite (5+), Line Veteran (6+), Lt Dragoons Veteran (6+), Dragoon Guards Elite (5+), Artillery Elite (5+)
Spanish  Militia Militia (9+), Line Conscript (8+). Lights/Grenadiers  Seasoned (7+), Artillery Seasoned 7+, Garochistas Militia 9+, Line cavalry Seasoned 7+, all other cavalry conscript 8+
Guerrillas: Militia (9+)
French: Legere, Poles, Guard, Gendarmes - Elite (5+), Line Veteran 6+, Rhine Confederation etc Seasoned (7+), Artillery Elite 5+, Hussars and Polish Uhlans Elite 5+, Chasseurs and Dragoons Veteran 6+

For the purposes of the campaign:

British Dragoon Guards
French Dragoons
Spanish Line Cavalry and Dragoons


will be considered Heavy Cavalry


The battle of Talavera de la Reina, by William Heath (in the publc domain)

Saturday, March 10, 2018

Battling with Bastardized Black Powder: Big Bash Based upon Borodino, Part 3

We pick up the action with the Russians eagerly awaiting their half of Turn 3. However, what happened was... French Turn 4, as Napoleon played his "Seize the Initiative" card, giving the French a free Turn!


There was much lamenting in the Russian camp over this unexpected turn of events (neither side knew what cards the other had, nor what they did). but after some melodramatic wailing and and even a few brotherly hugs of  consolation, they did what Russians always do - dug in their heels on defense, and planned how to wear down the enemy until their chance would come!


French gave them little respite before pressing the attack! I believe that is the Old Guard behind the lines of French infantry in front of the Fleches. 


Napoleon himself looks on as the French attempt to take the Great Redoubt!


French cavalry charge Russians in the woods. As might be expected, this didn't end well for them, but some times you gotta try it to find out!


The very ground nearly shook with the roar of the canon and the sharp pops of musket fire all along the lines. 


Chargez!


French and Italian troops press the attack on Utitsa and the hanging Woods. 


Another view of the situation on the South of the field. 


And yet another view from the Russian perspective - they have plenty of reserves behind Utitsa! 


On the extreme North of the woods, a French column charges a Russian Line. 


Some of the heaviest fighting occurred around the Fleches.


Especially brutal was the combat in the French salient between the hanging Woods and the Fleches. 
"The Battle of the Bulge!"


Russian position between the Fleches and the Great Redoubt... 


and between the Great Redoubt and the Northern Woods. 


Aerial view of the Fleches.


French troops try to swarm the Great Redoubt. 


The Rusians seem to be gaining the upper hand in the Bulge.


In the great Redoubt, 2 Russian batteries are shaken and Disordered, another with 2 hits. This battery would be Shaken if it were anything but Russian, but the large Russian batteries have a stamina of 3... just like the Russian Infantry has a stamina of 4 instead of 3 like the French. Still, how much longer can the Russians hold this position?


We had three visitors to the game from HMGS East, including the Treasurer and a photographer. Jared's club has received modest financial support from a grant from HMGS, and they'd like to see similar, successful programs at other schools. 


General Uvarov contemplates when and where to best use the special effects of his Command Cards. 


Hours of combat can  be exhausting... even the miniature kind!


Close up of the fighting around Utitsa. 


Volatile situation around the Hanging Woods.


View from the ruissian side, looking just North of Utitsa. 


Close up of combat North of the Hanging Woods. 


Close ranks!


Intense fighting continues around the Fleches. 


The Hands of God (Junot) pluck a dispersed unit from the table. 


"The Bulge" again


Overview of the battle form the North near the end of French Turn 4.


The French attack upon Utitsa is defeated!


SCORE:  French 25, Russians 14 at the end of French Move 4,, Russian Move 2. The French have done some serious damage, but will it be enough? 


The Russians finally get their chance to strike back, and, if your humble correspondent's memory is correct, Kutusov plays the Counterattack card; all Russian infantry will get an additional +1 in Melee this Turn!


It is now 2: 20 PM, and the French seem a bit exhausted by two back to back turns of fighting!


Back to the action around Utitsa. 


Action in the Bulge and the two Southern Fleches. 


Situation at the Northern end of the field. 


Desperate fighting continues all along the line at the Fleches. 


View of the fighting at Utitsa, the Hanging Woods, and the Bulge from the French vantage point.


"Send in the Cossacks!" bellows Kutusov, comiting them from Reserve 


Blood bath at the Great Redoubt.


I believe this is the Cavalry of the Imperial Guardj ust North of the Great Redoubt... Chasseurs a Cheval, Grenadiers a Cheval, and the Chevau-Legers Lanciers Polonais. 


The ongoing meat grinder at the Fleches. 


Utitsa as seen from he Russian baseline.


Russian lines near the Hanging Woods. 


Panorama looking North from the Hanging Woods.


The Russian artillery defending the Great redoubt is badly battered, but does not break. 


Here's the situation in and around the Northern Woods. 


More or less impervious to the French cavalry, the French infantry is slowly grinding down the Russian squares. 


Kutusov commits the rest of his Reserves... all of them. They can not charge in their first appearance, but otherwise they enter on to the table up to 12:", and then dice for moves as usual. 


View of the Northern table from behind the French lines. 


Overviews of he table from the North...


and from the South.


Russian Heavy Cavalry to the Rescue near the Fleches!


The Russian defenders in the Great Redoubt are crumbling, but still control the objective!


The infantry of the Russian Guard enters the fray as well!


Kapsevitch and Lavarov battle the French to a bloody standstill around Utitsa. 


The French Salient is crumbling - note all the black markers!


The struggle around Utitsa from the French side. 


More fresh Russian troops enter he table. 


Battle lines at the Fleches. 


South of the Great Redoubt, the Russians have formed a sort of Divisional Square, pouring out fire all around into the flanks and rears of the French. 


Close up of this unique formation!


The Big Picture around the Great Redoubt. 


At the key moment, a true (?)Russian arrives wearing a Kalmnuck cap and playing Russian folk music to buoy the spirits of the warriors of the Tsar. "Save, oh God, thy people..."
I actually spent quite a bit of time with him later explaining the game etc, with a little gratuitous Napoleonic history thrown in, only to find that he teaches European History, LOL!


Russian Cuirassiers threaten to ride down Polish infantry near the Great Redoubt. 


Action South of the Redoubt again. 


The scene at Utitsa.


close up of fighting between Utitsa and the Fleches. 


Fierce fighting at the Fleches.


French positions in the North.


SCORE:  French 35, Russians 38 at the end of French Move 4,, Russian Move 3. The Russians have come roaring back!


The mood is somewhat tense as the French kick off their Move 5. It is now 3:30 PM. 


Pretty much everyone is in the thick of the action!


It's now or never - the French press the attack all along the line. 


at the Great Redoubt...


but the Russians hang on!


Near the Northwoods,  the Russian infantry hangs out grimly in their shaken squares. 


Bruyere and supporting troops launch a massive attack upon Utitsa. 


The Russians have the situation at the Hanging Woods well in hand.


The French have taken  two of the three Fleches! 


  Marshal Nay approaches Napoleon, begging for more troops to consolidate his success. 


The Emperor replies, "More Troops?!  And where do you expect me to get them? 
I am I supposed to paint them?!"


Situation at the end of French Turn 5; it is actually now 4:15 PM. With a Russian turn to come, and with them having plenty of  Fresh troops, it is doubtful that the French will be able to hold even the meager gains they have made (the + numbers are objective points). 
The battle is declared a Russian Victory, if not a decisive one. 


A little celebratory music for the Russian players;  "The Great Gate of Kiev",
from "Pictures at an Exhibition" by Modest Mussorgsky, as arranged for orchestra by Ravel.
This music was on the first album I ever bought!


--------------------------------------------------------------------------------------------------------------------

For those who have asked, here are the rules modifications that Jared and company used for this game, followed by the QRS:


Modifications to Black Powder:


- We play grand tactical Black Powder, meaning every unit is a regiment, every command is a division, and divisions are organized into corps.


- I decreased movement rates to 6 inches for infantry, 9 inches for cavalry, and reduced weapon ranges to feel a bit more accurate (and for 15mm figures with a 4 foot wide table - Peter) .


- To demonstrated the ability of light cav, horse arty, and columns to move faster, I gave all of them +1 to command checks.


- Regarding orders- I allow units to take at least one move even if they fail their command check.  This keeps things moving quicker.  That said, if a command is failed, we still use the rule that no other commands can be given to that division.


- We don’t use the blunder table.


- Other than charges, limbering and unlimbering, and forming square, we allow players to roll their command check first, and then decide what they want to do with their increments. 


- We allow disordered troops to receive orders at a -1 penalty.  Additionally, we allow them to declare charges.


- We allow shaken troops to receive orders at a -2 penalty.  Additionally, we allow them to declare charges, though if they take a single hit the charge is stopped as per rules as written.


- I streamlined all of the special rules, which can be overwhelming, and incorporated unit abilities into stat lines.  Thus, I simplified the whole process so the students wouldn’t need to look up special rules every 5 minutes.


- We don’t use any light infantry, but make the assumption that they are present in front of regiments.  To reflect the better French skirmishing, we have them fire at +1 from 0-3in whereas the Russians take a -1 penalty at 3-6in and receive no bonus for short range OR closing fire.


- I use a victory point system not included in the rules.  1 point scored for “shaking” a unit, 1 point scored for “destroying” a unit, with bonuses if you destroy guard units and negatives for militia and Cossacks.  (Peter: I believe this is 2 points each for shaking/destroying Guard Units, and 0.5 point for Shaking/destroying Militia/Cossack units)

-------------------------------------------------------------------------------------------------------

(Jared's version of the QRS has this nicely formatted with 2 columns per page, and it all fits on 2 page sides. I couldn't figure bout how to preserve that formatting for the blog post, so if you want a copy in PDF  format, just ask) 


Black Powder Quick Reference Sheet 


1) Sequence of Play:
A) Team A makes initiative moves, make command checks, and move all other troops.
B) Team A fires.
C) Team A carries out and resolves melee.
E) Team A removes disorders.
F) Repeat process for Team B


2) Command Chart-
Roll 2D6 to administer order.
Equal or 1 less than command rating= 1 segment
2 less= 2 segments
3 less or greater= 3 segments
FAIL- 1 segment- no more orders for that command
Assault Column, Light Cav, Horse Arty: +1 to command checks.
Divisional “Follow Me!”
Attach divisional commander to a single unit: +2 to command check


3) Movement Chart:
Infantry - 6in per segment
Limbered Arty- 6in per segment
Horse Arty- 9in per segment
Cavalry- 9in per segment
Commanders- 24in
Costs 1 segment to:
Change formation
Change facing
Column to Line= FREE


4) Shooting Ranges: in inches
Muskets- 0-3/3-6
Light Artillery- 0-12/12-24
Heavy Artillery- 0-16/16-32

5) Shooting Modifiers:
Base 4+ to hit
-1 shaken or disordered
-1 target is unlimbered artillery
-1 Russian muskets at long range
-1 shooter used 2 increments
-2 shooter used 3 increments
+1 French muskets at short range
+1 French closing fire
+1 artillery firing at 3in or less
+1 target is a square or column
Flank/Rear Shot= DOUBLE DICE
Formations + Shooting:
Assault Columns: Reduce to 1D6
Squares- 1D6 per facing up to maximum of 3D6 total shots.
 
Roll of “6” to hit = DISORDER
If the modified to hit is 7+, TWO “6s” cause ONE hit AND DISORDER.

6) Save Modifiers
+1 cover (against shooting only)
-1 hit by Light Artillery
-2 hit by Heavy Artillery


7) Close Combat Modifiers:
Base 4+ to hit
+1 Charging
+1 Locked in combat AND WON last round
-1 Shaken or disordered
-1 Engaged on flank or rear
Roll to hit and save as normal.
 
8) Combat Results:
Each side must determine their combat score.
Add the number of unsaved hits you caused +/- the following modifiers to determine total score.
+1 Defending an obstacle or cover
+1 Rear supported (max 2)
+1 Per flank supported (max 1 per flank)
+2 Infantry in assault column
+1 Cavalry vs infantry in assault column
+2 Cavalry vs infantry in line formation
+2 Infantry/cavalry vs artillery
+6 Square vs cavalry
Flank/Rear support=
Friendly unit facing same direction within 3 inches.
If winner is SHAKEN in combat, remove hits as if the unit just passed a break test.
Loser takes a break test!. Consult Break test chart.

Winner: No break test. May Sweeping Advance OR hold position. Cavalry may make a second charge.
Loser: Take a break test!. Consult Break test chart.
TIED COMBAT: Both sides take a break test IF SHAKEN AND TOOK AN EXTRA HIT, otherwise remain locked in melee.


9) Break Tests:
Break Test Modifiers:
-1 disordered
-1 shaken
-1 per excess hit past stamina
-1 unit hit by artillery this turn
-1 infantry in line defeated by cavalry in melee
-1 artillery defeated in melee
-1 unit shot at or in melee on flank or rear
Roll 2D6 +/- modifiers.  Consult chart to determine results.
Artillery:
7 or less- Unit destroyed.
8 or more- Unit holds ground.
Cavalry:
4 or less- Unit destroyed.
5- Unit retires 1 move.
6- From shooting- Unit holds ground.  From melee- Unit retires 1 move.
7 or more- From shooting- Unit holds ground.  From melee- Unit retires 1 move.
Infantry:
4 or less- Unit destroyed.
5- Unit retires 1 move.
6- From shooting- Unit holds ground.  From melee- Unit retires 1 move.
7 or more- Unit holds ground.