1809 Bavaria: Snappy Nappy SnapCon IX
by Russ Lockwood
Another year and another multi-table, multi-player Snappy Nappy Campaign-In-A-Day extravaganza put on by the Connecticut gaming group at The Portal in Manchester, CT. On October 14, 2023, the game store graciously allowed us the run of the back room with its multitude of tables.
.JPG) The
calm before the storm – so many tables that one shot couldn’t fit
them all in. This is the back room of The Portal. Photo by Mark.
The
calm before the storm – so many tables that one shot couldn’t fit
them all in. This is the back room of The Portal. Photo by Mark.For the record, I created Snappy Nappy and the Napoleonic rules are published by On Military Matters and also carried by Caliver Books in the UK and other FLGSs.
Peter, with help from James and Mark, set up 15 4x6-foot tables representing 1809 Bavaria, roughly the area from Ratisbon (Regensburg) to Landshut and from Ingolstadt to Landau. Each stand represented 1500 infantry, 600 cavalry, or 18 artillery guns.
Yes, that's the big scale of Snappy Nappy used in Campaign In A Day games. All players are playing in the same game, but quite often on different tables, so there is usually considerable movement until forces collide and battle is joined -- usually across multiple tables. The "campaign" concludes in one day's worth of gaming.
The key to keeping the game moving is that each table follows the Turn Sequence independently of other tables. If a player's troops leave the table via a road/deployment zone, the umpire escorts the player and his troops to the next table. These new troops adopt the turn sequence of the new table.
For fog of war, the "next" table is usually not the next physical table over, but across the room. Furthermore, table orientations (North, South, East, and West) are spun by table. Hence, North on one table might face the door, on another the window, on a third the wall, and so on. You'll know who is on your side, but at least at the start, not how your table connects to any given table. That all helps with fog of war.
The d10 rules are straightforward for firing, movement, morale, and so on. It all goes pretty quick and can be easily learned, although manipulating the units offers a bit of subtlety at times. Communications among players at the same table is allowed, although if you want to send a message to another player or the C-in-C at a different table, a written message goes through the umpire, who delays delivery depending on how many tables away the recipient is.
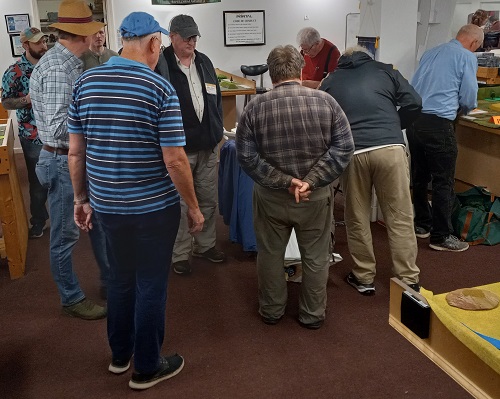 We
all head to the central table to pick up our badges.
Commands and Special Scenario Rules
Veteran Snappy Nappy (SN) umpire Peter offered both sides some options:
French Commands:
Napoleon I: Jim C. - Start: Ingolstadt
II Corps: Steve T. - Start: Au
III Corps: Mike S. - Start: Regensburg
III Corps: Kevin C. - Start: Regensburg
IV Corps: Sean S. - Start: Pfaffenhofen
IV Corps: James S. - Start: Pfaffenhofen
VII Corps: Karl N. - Start: Neustadt
Wurttemberg Corps: Steven C. - Start: Ingolstadt
Ad-hoc Corps: Mark M. - Start: Vohburg
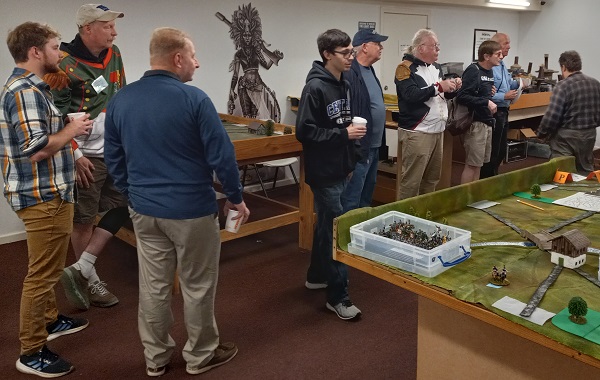 The
French players prepare for battle.
French Options
Note that none of these are guaranteed to succeed, and the attempt may result in some changes to the Austrian side as well! The French may choose one (or none) of the following options:
1) Napoleon arrives in the theater earlier
2) Davout's march on his own initiative towards Feking is not countermanded by Berthier
3) The Imperial Guard arrives earlier. Historically, they arrived after this phase of the campaign was over; if this succeeds they will show up fairly late in the day.
Austrian Commands:
Feldmarschal Erzherzog Karl: Brian C. - Start: Rohr
1 Armeekorps: Rob P. - Start: Bohemia
3 Armeekorps: B.G. Smith - Start: Rohr
4 Armeekorps: Brandon S. - Start: Langquaid
5 Armeekorps: Alex O. - Start: Halfway between Pfaffenhausen and Siegendorf
6 Armeekorps: Russ L. - Start: Mooseburg
1st Reservekorps: Frank N. - Start: Pfeffenhausen
2nd Reservekorps: Brian C. - Start: Landshut
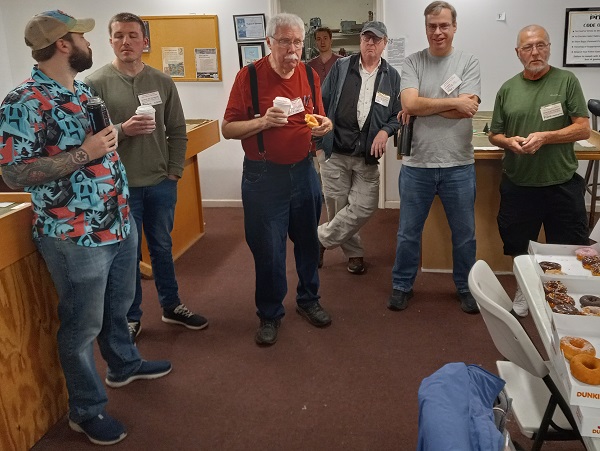 The
Austrian players prepare for battle.
Austrian Options:
Change the Axis of Attack
Attack Earlier
Attack Later
Starting forces and reinforcements would change depending on which option was chosen.
Austrian 6 Corps
As you can see from the list of commands, I was assigned 6 Corp by Archduke Charles. My command consisted of 18 units: four foot artillery units, one horse artillery unit, three cavalry units, and ten infantry units. Morale quality was quite good, mostly Veterans -- good for offense and defense -- and a couple of lower-rated Seasoned and Conscript troops:
2 stands IR Deutschmeister – Veteran 6+
6 stands Line - Seasoned 7+
8 stands Line Hungarian - Seasoned 7+
2 stands Vienna Volunteers - Conscript 8+
2 stands Grenzer – Seasoned 7+
2 stands Chevau-Legers) - Elite 5+
4 stands Hussars – Veteran 6+
3 x 6# Foot Battery - Veteran 7+
1 x 6# Cavalry Battery - Veteran 7+
1 x 12# Foot Battery - Veteran 7+
As for my tabletop commander, I was "Dashing" -- not quite up to snuff with "Genius" Napoleon and Davout, but better than your average commander. I started in and around Moosburg.
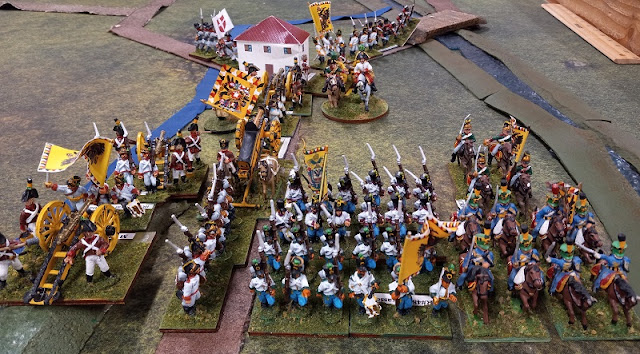 …And
deployed around Moosburg, ready to march off the table.
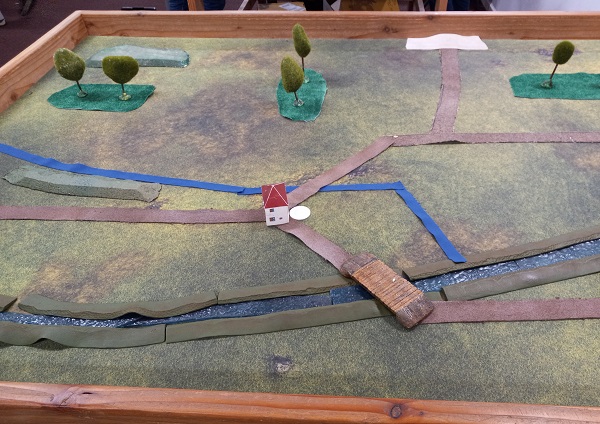 Table M - Moosburg, before the set up of troops. All troops had to start within 12" of the town.
The Moosburg Migration
Archduke Charles ordered me to Freising, so I dutifully headed west along the Isar river to the town. I was to guard the flank and if possible push a little northwards towards Pfaffenhofen and Au. If nothing else, that would scout out a possible route by the French.
It's a good thing Archuduke Charles decided to move early, for I bounded into the Freising without a problem and started to send cavalry up the northern roads.
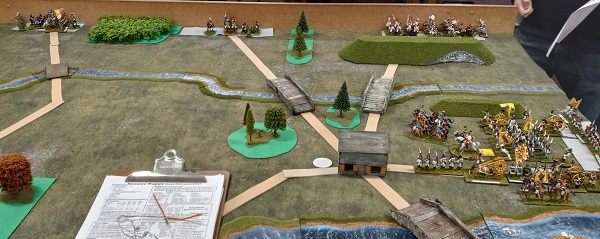 My
6th Corp enters the Freising table (from the right) as three French
columns also enter the table (from the top of photo). The Isar River
is along bottom of photo. Freising is at the crossroads. The white
chip denotes Austrian possession.
That's when three French columns entered on the three northern roads. I immediately halted any northern movement and began to form a defensive line in and around Freising.
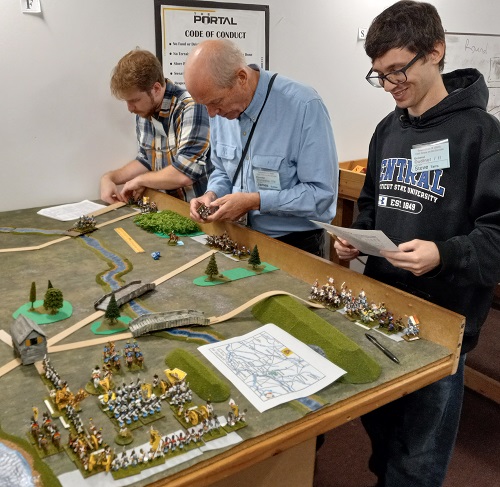 The
start of Turn 3 finds three French commanders leading troops onto the
Freising table: Sean (left), James (center), and Steve (right) enter
the Freising table. The 8.5x11-inch map shows how close the French
are to my flank.
Better Living Through Firepower
I had to do my share of tactical noodling when confronted on Turn 2 by three columns of French troops under James, Steve, and Sean. Taking on 1:3 odds is never a good idea, so I needed to maximize use of terrain. I also figured they contained quality troops equal or better than mine.
Fortunately, I had five batteries of artillery: one of heavy 12lbers, one of light 4lber horseguns, and the other three of medium 6lbers. Actually, looking over my OB to compile these memoirs, I found that the horse battery was actually composed of medium 6lbers. I shorted myself a die every time it fired. The fog of war sometimes intrudes on what a commander should know!
Unfortunately, my horse guns were at a great place for marching north and a wrong place for helping the defense of the town. With James bearing down on me, I had no time for the perfect line, but enough time for the line I created from the town back down the road.
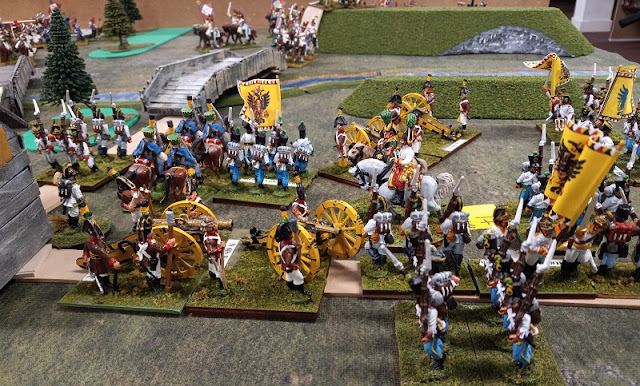 I
prepare a reception for Steve’s French cavalry should they want to
test their fate by crossing the river, but I am scrambling to put
together a defense.
On my right, across a stream and a couple hills, Steve showed up. This was near my entry spot to the table, so I was able to quickly turn a few units right and set up a line with a ridge shielding me from any of Steve's cannons.
Sean on my left had the farthest to advance, so I had some time to shove a few units, including my cavalry, behind Freising while I marched a couple infantry and artillery units to bend the line back to the Isar.
That left James in the center, who was rapidly deploying to get across the intervening stream.
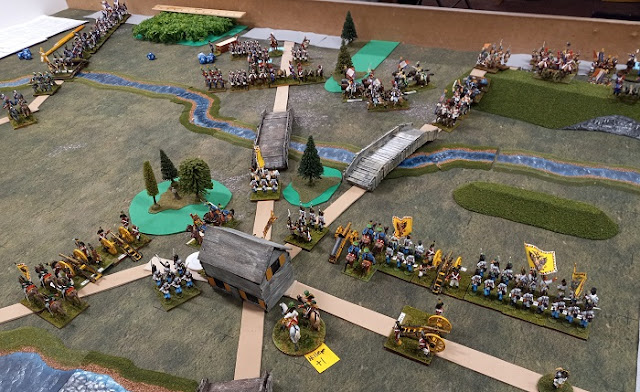 It
takes a couple turns, but I shake out my defensive ‘fishhook’
line. I still have a couple units out of position, but they are
moving as fast as they can.
I was set up in a fishhook with the long side from Freising to entry point and the short side curling from the town to the Isar River.
I was stretched pretty taut with minimal reserves -- call it the long thin white line...
French Deliberation
Here, the three French commanders paused as they secured their side of the stream and the bridge crossings. The French idea was to coordinate all three commands in one big attack rather than go in piecemeal. Cursed smart French players!
The flip side is that I would be able to hold Freising and the left flank for many turns if the dice odds remained reasonably odds-like. I was banking on the five artillery batteries to help blunt the French attack.
I left a cavalry regiment to cover the center bridge, but James easily swatted it away. I sent an infantry unit to face the bridge. French cannon took care of them, too. It bought time for me to shift units to the once empty short side.
So on the French came, shaking out into a line to cover the long side of my line, while Sean came on with a flanking force to push in the short side.
I could not have Sean's flanking force near me yet, so I rode out with a repositioned cavalry unit and charged the end of Sean's line. He made the roll for hasty square and bounced my cavalry backwards with casualties. No worries. I had another cavalry unit or two on that flank. But that sacrifice slowed his flanking movement to a crawl.
The exchange of artillery fire fell in my favor, in part because I had the heavy battery assisting the medium battery. I'm still eyeing the long odds against me, but help arrived and I started to advance from the short side.
 5th
Corp arrives (right), prompting me to execute a dangerous withdrawal
in the face of the French. It looks as chaotic as it was, but we
shuffled along.
The Long Thin White Line Thickens
About this time, Austrian Alex (aka Eerzherzog Ludwig) and his 5th Corp arrived on the battlefield. Well, well, well. Now it's 2:3, and better yet, because of the size of an Austrian Corps, it's more like parity.
Opposite Alex, Steve also sent away part of his French command, the cavalry, I believe, but there was a ridge in between us, so I'm not sure.
Anyway, now we could start expanding a bit -- starting with forward movement on the short side.
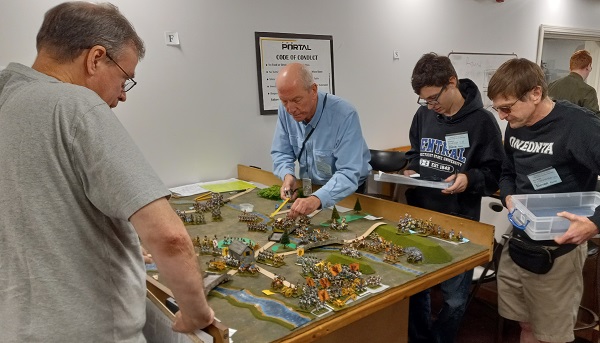 Alex
(left) and 5th Corp arrives a tad before Steve (right). James (center
left) and Steve (center right) press forward.
Next decision -- how to layer in Alex's corps? It was either pass him behind me or slot him in next to me. It is always better to keep your command concentrated, so my lads had to pull back and his lads stuck in on our right flank.
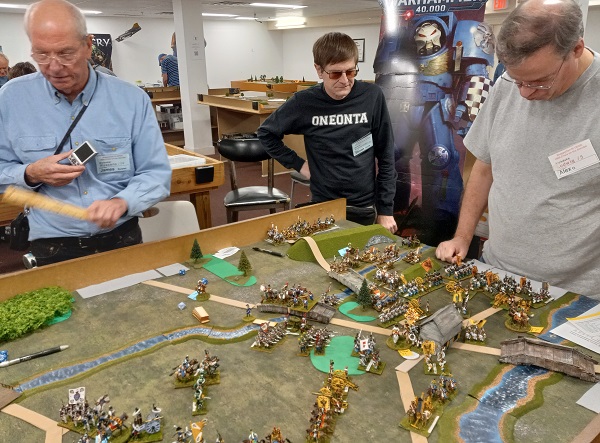 The
French push forward as Alex stands firm and I start to shift more and
more units to face Sean’s troops (bottom left).
This is not an easy maneuver to pull off in a historical battle. It is just as difficult to pull this off on a tabletop in Snappy Nappy. The danger from a French rush to attack is real, so you need a little finesse, right?
The resulting effort to pull back my troops definitely produced a maelstrom of confusion! I remarked that this would look as awful as an uncoordinated marching band at a Super Bowl halftime show!
Fortunately, Steve was far enough away that the deductions for about facing and moving slowly meant I was able to complete the transition without a problem from the French.
Also about this time, another French Steve showed up with his force. Oh great, just when we Austrians have parity, the French toss in another corp, so now it's 2:4, but more like 2:3 in actual stands. From my perspective, I also now had two artillery and three infantry units in reserve to plug any holes. Alex's full corp occupied basically half my original thin white line. We can definitely hold this place.
I thought I saw Napoleon himself make an appearance behind Steve on the ridge. If so, he was gone in a flash.
The Big French Push
On came James, Steve, and Steve, but Alex and I were ready. James came through the woods to avoid any artillery fire and Steve came over the ridge with Steve close behind. Sean took a look at the artillery and cavalry and decided to screen my short side force. Oh, I inched out here and there, but the short side was definitely more on defense than offense.
James stalemated in the woods, but tore away a support unit of mine next to the woods while losing one of his own.
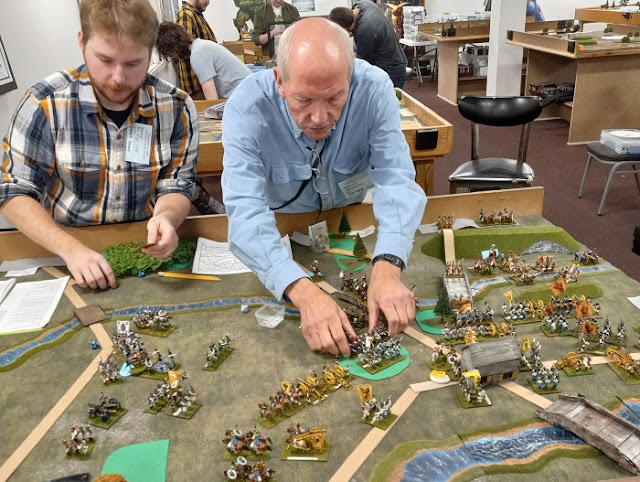 James
is pushing through the woods while crossing the bridge. Sean repelled
my cavalry (bottom middle with casualty rings), but I’m starting to
win the artillery duel and reserves are coming fast.
Steve sent his French conscripts straight into the teeth of Alex's artillery and infantry line. It was a magnificent charge, but left the quartet of units badly shot up and our Austrian line intact.
Until I could move some reserves to the short side, Sean and I stared at each other and traded some long-range cannon fire.
Impossible Orders
I had been on that Freising table all day, dazzling the French with the Austrian two-step: the first step was to create a line and the second step was to polish all the cannon barrels. What I didn't know was what was going on in the rest of the campaign. When you separate players on different tables, you have to trust the C-in-C to keep your flanks and supply lines open.
 Steve’s
French conscripts come over the ridge and charge Alex’s Austrian
line. It is not a success.
At one point in time, just as the French were forming up to attack and before Alex arrived, I received a message from Archduke Charles to abandon Freising and pull back to Moosburg.
I wrote back that such a maneuver was impossible. I'd lose half my corps trying to disengage from the fight and retreat down the road.
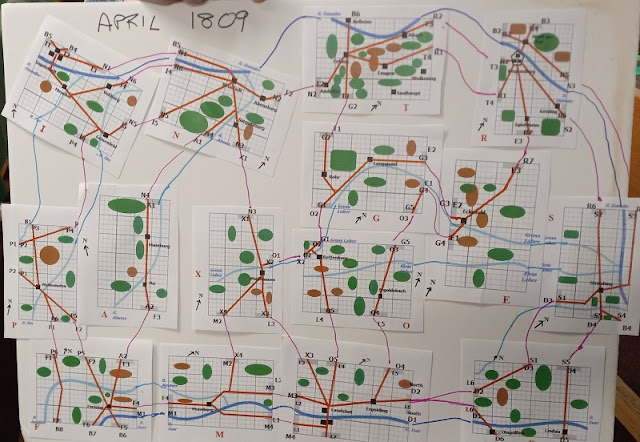 How
all the tables fit together. Freising is at bottom left. Moosburg is
next to it.
I was able to ignore the order because CT games do not use the "Orders" hierarchy in the SN rules. The idea is that you can obey or disobey orders because you're the player so you make the call and let the post-game discussions hash out any tabletop repercussions.
The "Orders" hierarchy is there to represent 19th century social mores of military authority. It's not perfect, and players can use the order given or the orders above or below on the ladder of hierarchy depending on national characteristics. Technically, if using Orders, Archduke Charles gave me a Maneuver Order. As the Austrians can go up or down one order level, I would convert that to the Defend order.
Since we weren't using Orders, I elected to stay, pinned as it was in combat.
I also knew, based on a previous SN C-in-a-Day game (1809 Italy) that I lost half my corp when ordered to do just about the same thing. Retreating in the face of an enemy is difficult. I suppose Archduke Charles could’ve ordered Alex and 5th Corp to hold Moosburg instead of helping me in Freiburg, but since I didn’t have the C-in-C’s information, I can’t make the call. That’s the beauty of the game: fog of war from playing on separate tables.
Austrian Surrender
Elsewhere in Bavaria, the French were able to bring two or more corps against a single Austrian corp, squash it, and rinse and repeat. Something about Napoleon on three tables and three battles won?
The French drove up the middle and captured Landshut, or at least put the Austrians in such an impossible position, Archuduke Charles asked for a parley to discuss terms.
Full Recap
The full story will unfold on Peter's Blunders on the Danube blog, which has a special Snappy Nappy section. Full table maps, campaign map, GM map, OOBs, and recaps from players will be there. The QRS is also available for download.
Another great SN outing for me, with tactical challenges appearing literally on Turn 2. Better yet, I laughed the whole game through with fellow gamers and that's a great day of gaming.
Thanks, all, for making the trip to game. And thanks to The Portal for making the space available to us. If you are ever in Manchester, CT, stop by the well-stocked Hillard Ave store.
Thanks to Mark for the donuts, coffee, and pizza. And a special thanks to Peter, Mark, and James for putting another great scenario and campaign in a day.
Report of FML Bellegarde's I Corps
My corps moved on Regensburg from the North, hoping to cross the Danube, but were blocked by French brigade strength elements strong enough to hold the newly fortified town & its bridge indefinitely. Poor planning by Bellegarde (for not anticipating this and having pontoniers ready to build an alternate crossing immediately) doomed any hope of crossing in time to effect any retreat by the French, or participate in battle further South. The bridging unit arrived and several turns later the bridge was nearing completion when the order was received to proceed South via Straubing, but it mattered not, as the day was decided elsewhere!

Interesting to read Russ's comments and the friction between the overall picture and the situation on the ground for the individual commander.
ReplyDeleteAs a Corps commander, you are very much focused on the situation in front of you, and how to deal with the order from that darned C-in-C that may make little sense from your perspective. !
DeleteWhat a grand adventure of a game!
ReplyDeleteThanks, Ray. I think it accomplished my objectives; there was significant fighting at Regensburg, Feking, Neustadt, Rohr, Pfaffenhausen, Freising, and Landshut over the course of the day.
DeleteEpic stuff with all these reports.
ReplyDeleteThe individual reports really help one get a sense of what it looked like "on the ground" at the level of the Corp Commanders.
DeleteSplendid write up a great sounding game/campaign!
ReplyDeleteBest Iain
Glad you enjoyed it, Iain!
DeleteI certainly expect we will likely do another one in October 2024 in Manchester, CT. Historicon 2025 is a possibility, but I don't thin either Mark or I could face another one at HCon 2024!
ReplyDeleteFor this solo gamer this looks like a heap of fun, not just the game but the camraderie of the players. Playing on different tables to represent the campaign is fantastic if you have the space and players and I love the way this was done. Additionally, motivation with doughnuts will have spurred the troops to action!
ReplyDeleteI've done my share of solo gaming, and still do, and it has its own attractions, but this is certainly far more social, plus with this many players, and tables, the fog of war is present throughout. With an emailing player for the C-in-C's on both sides, you could almost do something like this using them to do the orders, and tracking the troop movements and playing out the battles yourself. On the other hand, for something like that, I'd use Warplan 5/5.
DeleteGreat to get the campaign discussed from the Austrian perspective - as others have said, it seems like an excellent way to fight a large campaign in just a day (although I am sure it takes many weeks of planning to bring it to fruition!)
ReplyDeleteThanks, Keith. Planning one of these (theater map, OOB's, table maps, start positions, etc. is probably at least 30 hours work. Pulling and organizing the troops takes about 4 hours, and setting up the tables probably takes 30 - 40 minutes per table, Still, it generated about 90 player hours of gaming, not to mention the player planning and discussions before the event.
Delete