Sunday, February 7, 2016

Hussite Wars Part 4:War Wagons!

    In January 1420, the town of Sezimovo Usti was controlled by a noble family that was divided over Hussitism. Ulrich, a prominent noble of that area, tried to quiash the new beliefs, but wound up being defeated instead bu the large number of Huissiote followers. The town itself was poorly situated for defensive purposes, but a nearby abandoned fortress known as Hradiste seemed much more promising.  It was located on a steep hill;, with the river Luznice and one of its tributaries surrounding it on three sides. The fortress belonged to another ant- Hussite Nobleman, who had begun to restore it. In January and February, the pro Husite townspeople, aided, by the noble's own pro-Hussite brother seized control of the fortress. They burned their old town to the ground and related to the fortress, and renamed it "Tabor", with the intent, which was realized, that it would become a new center of of the Hussite movement. 

   Back in Pilsen, Jan Ziska was finding himself increasingly in conflict with the local Hussite cleric, Koranda, who had effectively established a theocratic dictatorship there. Koranda issued orders destroying churches and monasteries built in honor of saints, whose veneration was prohibited by Hussite teachings. Ziska, feeling that war should be conducted by soldiers and that clerics should stick to religious matters wrote to the University masters in Prague. They replied that under no circumstances could priests fight in battles, but that laymen could fight a purely defensive war to defend their creed. Koranda's excesses alienated the more conservative elements in Pilsen, and when a preached second coming of Christ fvailed to materialize, , even Koranda's supporters started to lose faith. Meanwhil;e, the city was invested by the Royalists under Wenceslaus of Duba. The citizens of Tabor had earlier invited Ziska to become their military leader, but he had declined. With the situation in Pilsen deteriorating, Ziska's friends convinced him to transfer his services to Tabor. Ziska negotiated a capitulation of Pilsen , when was finalized on March 20, 1420. Under it terms, the Royalist forces avoided a costly assault, while the Pilseners were granted the right to take communion in both kinds, and any who wanted to leave the city could. While most stayed, Ziska, along with Koranda and some 400 followers left. The agreement was to be binding on all Royalist forces. 

    However, Sigismund, alerted by members of the anti Hussite contingent in Pilze, promptly violated the agreement by ordering several Royalist barons and their men to intercept Ziska. These forces , totaling about 2,000 men, mostly heavily armored k nights and their retainers, established themselves in Pisek, through which Ziska and his men would have to pass. As Ziska and his men passed by the village of Suidomer on March 25, 1420, they saw approaching Royalists forces, which outnumbered them about 5:1. With their being  no hills or woods for cover being available nearby, Ziska used the empty fishponds in the area, anchoring one flank on a dam, and the other  flank and his rear with 12 War Wagons. His infantry were deployed in between,  using a narrow front and a deep formation. Several mounted charges failed, whereupon the knight dismounted and attacked on foot. The Royalists were able to severely damage some of the wagons and nearly penetrated the Hussite lines. However, as the Royalists tired from their multiple attacks, darkness descended quite abruptly, and the heavily encumbered knights became confused and disordered, ultimately withdrawing with heavy losses. 
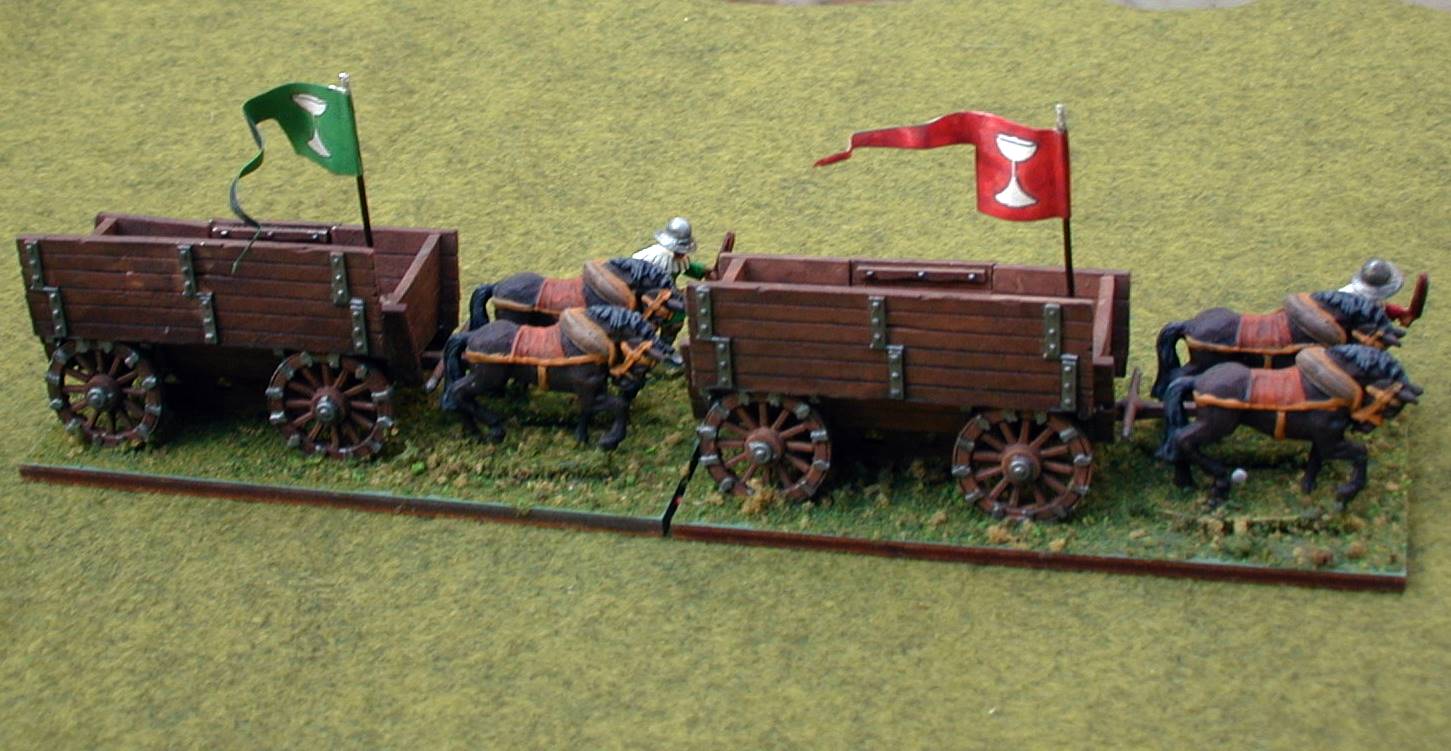

Hussite War Wagons. These came to be made to a standard design, and were basically 4 wheeled heavy farm carts, which had extra boards added to them to provide protection for the men who fought in and around them. 

On one side of the wagons there was a narrow door which could be dropped to form a ramp up into the wagon. 


Underneath the wagons there was often a loopholed plank which could lowered to provide cover for additional shooters. 


The sides pf the wagons sloped outwards, which helped protect the wheels, which might be additionally protected with heaped up earth, as well as a ditch dug in front of the wagons, when time allowed. . Each wagion held rocks for throwing as well as shovels, picks, and axes to help strengthen the Wagenburg. 
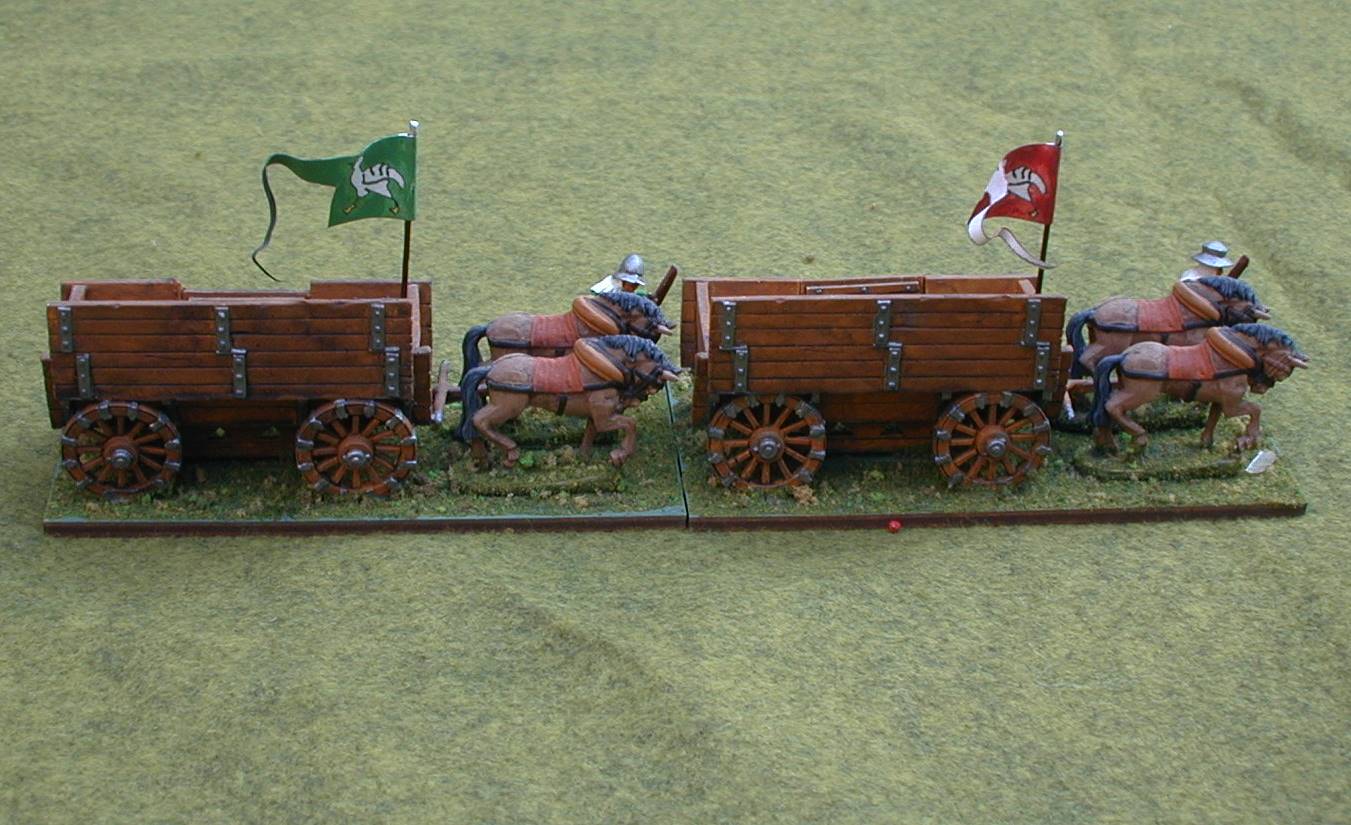

Each wagon flew a banner, usually either bearing the Chalice or a Goose (the later was a play on words - in Czech, "Huss" means "goose". These msay have been used for signally when the wagons were under way. 


The complement of a War Wagon was eventually fixed (officially) at
16-22 soldiers: 4-8 crossbowmen, 2 handgunners, 6-8 soldiers equipped with polearms or flails (the flail was the Hussite "national weapon"), 2 pavisers and 2 drivers. The carts were typically drawn by a four horse team.

Of this complement, probably only the Crossbowmen and handgunners (the numbers of the later increased as the Hussite Wars progressed) fought from within or under the Wagons, with the Pavisers guarding the gaps between the chained-together wagons,, the drovers tending the horses, and the Flail men in reserve ready to strengthen the defenses or contain any breeches.  


Other War Wagons had light artillery pieces mounted directly upon them, as seen above. 


These gin wagons would still have a supporting contingent of crossbowmen, handgunners, Fl;ail; men, etc. 


The wagons would also carry the necessary supplied of gunpowder, etc. 


All of my War Wagons are by Old Glory - very fine models at a reasonable price!


Reproduction of a Hussite War Wagon, from the Hussite museum in Tabor, Czech Republic


Another view of the Reproduction wagon. Note the boxes for rocks - both for throwing and probably additional weight to make the wagon more difficult to tip over in battle. 


Re-enactors demonstrating a Hussite War Wagon, with the protective features deployed. . 


Another view of the wagon, now seen on the move. 

Friday, February 5, 2016

To the Strongest - Expanded Summary Sheet

Although the summary sheet/QRS that comes with To the Strongest is adequate, both Barry and I felt it could be more comprehensive and yet still occupy no more than 2 sides of a sheet of paper. I also like my sheets color coded by section. Here then is my attempt; I was able to fit it onto 2 pages in MSWord format. I'll be using these for my games on Saturday at Portal Con.

To the Strongest! Version 1.1 (c) Simon Miller/Big Red Bat ventures 2015
ACTIVATION AND MOVEMENT     (Remember Zone of Control!)
Easy Activations
Either MOVE or CHARGE 1 box straight ahead, 2 boxes if Mounted
MOVE 1 box straight ahead, then SHOOT (Javelin armed Light Inf/Cavalry/Chariots/Camelry only)
SHOOT, then MOVE backwards 1 box, facing same or opposite direction (Non Javelin armed Light Infantry/Cavalry/Chariots/Camely only)
SHOOT (Bowmen [not LI] and Organ Guns may shoot twice if neither Disordered or in Difficult terrain)
REPLENISH one Ammo marker from reserves
Attempt to RALLY (still requires successful “Save” test)
Difficult Activations    Deep units = Doubly Difficult!
*Activations are never Difficult for Light troops, nor do they go Out of Command
Either MOVE or CHARGE 1 box diagonally ahead, maintaining facing. Mounted units may either MOVE or CHARGE 1 box further straight ahead.
MOVE 1 box sideways, maintaining facing
MOVE backwards 1 box (or 2 if mounted), facing the same or opposite direction
CHANGE facing direction or EXCHANGE positions within a box. After that, mounted units may MOVE 1 box straight ahead
Either MOVE or CHARGE into or out of Rough Terrain (e.g. Woods, Marsh)


EVADING CHARGES (mandatory for Light units in open charged by non-light units)  see pg 43
Need 3+ if mounted in open evading foot, or if foot in rough terrain evading any enemy
Need 5+ if mounted in the open evading mounted, or foot in the open evading foot
Need 7+ if foot in open evading mounted


SHOOTING     All need 8+ to Hit, then the target attempts to SAVE; modify as below
Foot (except Elephants) in field fortifications, except when shot at by Artillery/handguns
+2
Cataphracts, dismounted Knights,/Later Knights except when shot at by Arty/handgun
+1
Later Knights, Shield Wall, War Wagons, and any units in cover, testudo, or behind pavises, except when shot at by Artillery or Handguns
+1
Light Infantry, Light Cavalry/Camelry/Chariotry, or Artillery
+1
Units in a Demoralized command
-1
Units hit from behind a Flank or Rear
-1
# Cannons activating to Shoot that play an Ace must save or they explode (lost), and all units and Generals in the same box must then also save against a Shooting hit!


Cannon


Cannon


Catapults


Cross
Bows
and
Long
Bows


Bows
Slings
Handguns and
Organ
Guns


Javelin
Javelins, and Overhead fire
Javelin


Must shoot at closest unit
SHOOTERS
Count diagonals as 1.5


MELEE: 6+ to hit for all, except Disordered troops, Light Troops, Artillery, Bowmen, Crossbowmen, Longbowmen and Mobs, which require 8+ to hit.               SAVE modifiers:
Light Infantry in Rough Ground, when charged by any except Light Infantry
+2
Foot (except Elephants) when charged across Fortifications
+2
Foot (except Elephants) when Charged Uphill
+1
Foot (except Elephants or Pikemen) in Rough terrain, charged by Mounted or Pikemen
+1
Foot (except Elephants) behind stakes and receiving a frontal mounted charge
+1
Any defending against a charge across a stream, bridge, shoreline
+1
Pikemen or Spearmen receiving a frontal Mounted charge
+1
Foot (except Elephants and Light Infantry) who are  not Disordered and are receiving a frontal mounted charge; War Wagons receiving a mounted charge
+1
Cataphracts or Later Knights, Mounted or Dismounted
+1
Charged by Billmen or any armed with 2 handed cutting weapons
-1
Light Infantry charged by Mounted in Open terrain
-1
Mounted unfamiliar with Camels/Elephants, and charging or charged by same, OR
attacking into or out of Rough terrain
-1
Units in a Demoralized command
-1
Bonus to Hit Card: Flank/Rear Attackers, One time for Elephants and Lance armed mounted, and any time scythed chariots are charging 2 boxes.
Replay Hit Card: Hero or Heroic General with unit
*Units which are hit in Flank/Rear, Lost#, or failed an evasion attempt do not strike back
# Small Roman units in the same box as one which was lost in melee may strike back!
Camelry/Light Camelry that play an Ace when attempting a Charge activation fail and take 1 hit


RALLY:  Make a successful save after a “rally” activation    
Modifier
A General is present in the Box
+1
For each enemy unit in a position from which it could charge the testing unit
-1
Units in a Demoralized Command
-1


RISK to GENERAL: Save 2+, 3+ if Heroic. If fail to save, play a 2nd card to determine fate
Must save if unattached and in a box with a unit that is hit, or attached and its unit is hit.  If attached and their unit is lost, displace to any other init in their command; if none remain, General is lost.  
1-5 Lt Wound, continue, Lost if 2nd wound; 6-8 serious wound (Lost); 9+ Killed (Lost)

Tuesday, February 2, 2016

Wennefer? Nefermaat!

I just finished up the new Egyptian figures I got during the Black Tree Designs sale last month; the rest will come in time, which is fine as there is no rush. In the process, I decided that my Egyptian Generals and Heroes needed some decent names, so I grabbed a bunch of historical ones on line, trying to avoid those of Pharaohs as much as possible, especially the more famous ones,. and looking for those with some bad joke potential in particular.


These are BTD "Egyptian Monks" A bit "Kung-Fu" inspired, perhaps?


They will function as "Heroes" in "To the Strongest".


Here we have Amenhotep (red), Bakenrenef (yellow), Cephren (green), and Dedumose (blue).


Can't you just hear Yoda saying "When the Force it leaves you, Dedumose be!"


These are BTD Egyptian Sword Masters, plus an officer from a Command set.


The Swordsmen have the classic Egyptian "Kopesh" curved bronze swords.  The dropped yellow shield was after three attempt to crazy glue it on all resulted in it falling off upon minimal handling.  I had to go back and scrape all the glue and paint and primer off the join; hopefully the last attempt succeeds in making a better adhesion than the first three!


This group includes Hunefer, Imhotep, Kheti. and Merenptah. 


Hunefer was known for his Playmummy mansion, while Kheti was later made famous by The Big Bang Theory. You know, "Soft Kheti, warm Kheti...


This is a unit of BTD swordsmen. once again armed with the classic Kopesh, augmented by a command figure (hornist) and a Swordmaster or two. 


Their yellow accessories marks them as belonging to Division Ra in my scheme. 


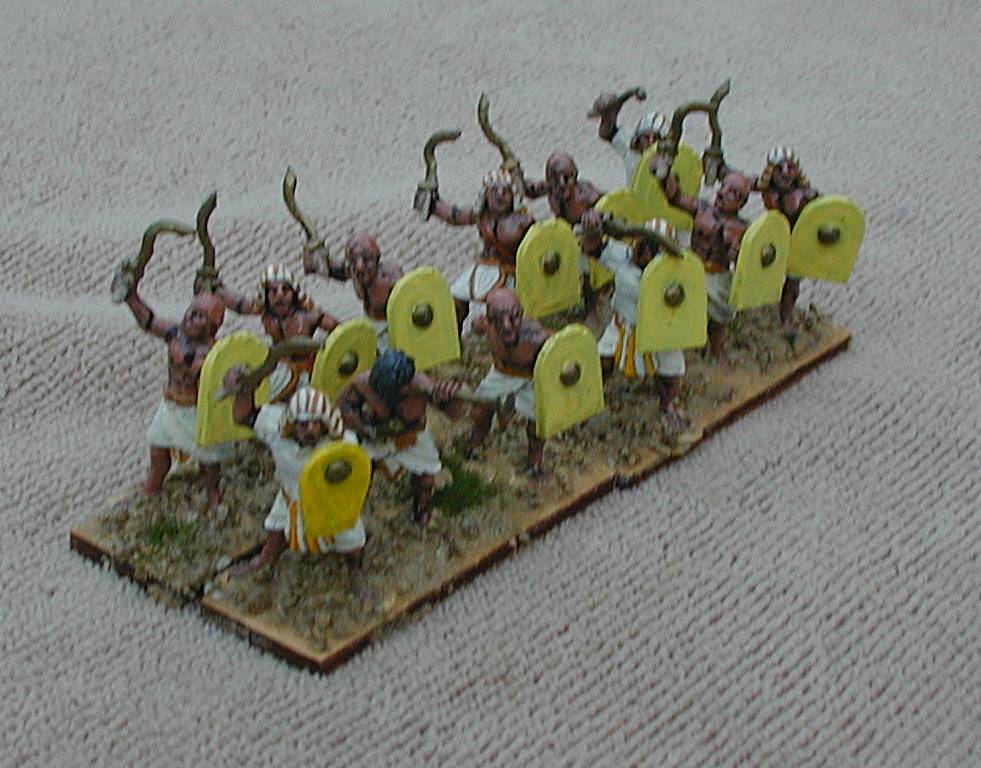
Other historical names I'm borrowing for my previously painted heroes and generals include Nefermaat, Pensekhemet, Rekmire, Senenmut (sounds kinda dirty, doesn't it), Osorkon (the Orc counter to Historicon, doubtless), Useramen, and Wennefer ("Wennefer-U need me, I'll be there"). 


Like all Ancient Egyptians, it seems, these guys appear to have been serious gym rats, LOL! In any event, they should be on the table for a TtS game at Portal Con in Manchester, CT this Saturday.