I finally had time to play out the first turn of the scenario that I adapted for FoB3. I was very eager to see how the ECW modifications would work out on the tabletop.

Plan of the First battle of Newbury (from Wikipedia).
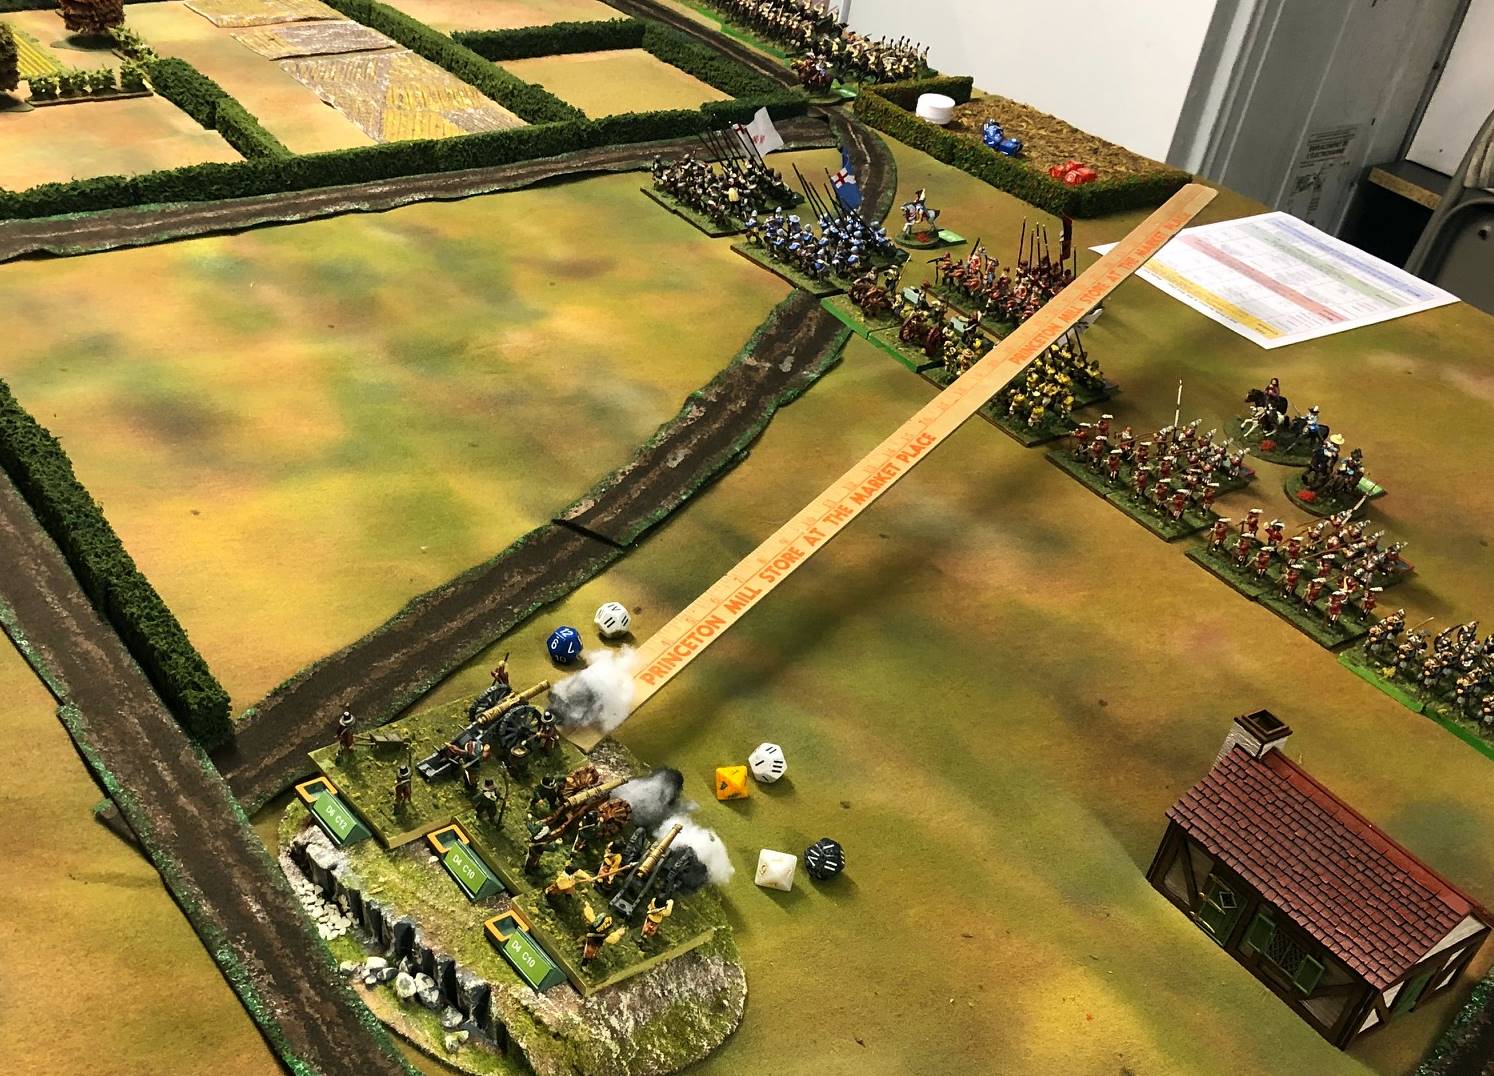
Perhaps surprisingly, the Earl of Essex won the first initiative roll, despite having a Leadership Die of D8 (worst possible) as opposed to the best possible LD 12+1 for King Charles. In fact he won by 5 pips! Unfortunately, the first cards he turned were of no use early in the game - LEADERSHIP, then MELEE, then TACTICAL ADVANTAGE (saved for later use), then INFANTRY FIRE. The final card was ARTILLERY FIRE, however. According to the scenario, the Parliamentary artillery was very advantageously positioned ahead of their main lines, atop Falk's Hill. The Roundhead gunners had obviously sited their guns with care, as between the three of them they scared 4 hits on the raw, yellowcoated regiment of Henry Talbot, part of Jacob Astley's "Red" brigade.

In FoB3's ECW period rules, a unit of Foote a can take 4 hits (Unit Integrity losses) , and there is no more requirement to hit -1 UI to remove a unit any longer. Talbots men are dispersed by the heavy bombardment, and removed from the field, along with the loss of 4 precious Cavalier Army Morale Points. Alas, poor Talbots, we barely knew ye! I was a bit taken aback by such heavy losses, but then realized that 4 batteries is really a lot of Guns for an ECW battle, and they should really have TWO stands per battery instead of 1 each. I blame the scenario designer (err, me)! Actually, the guns also rolled really well despite being DOWN 1 for firing at Medium range (the FOB3 ECW specific summary sheet has no UP 1 range for artillery, to say nothing of the UP 2 for very short range (canister) fire of Napoleonic artillery. Of course, any time you can shoot at a target with a D4 defense die (worst possible), you take it!

The initiative then passed to the King, and the first card turned was Move 1 Command. Shocked by the effectiveness of the Roundhead roundshot, the rest of Astley's Brigade, composed of the King's best infantry, 2 units of his Lifeguards moved forward 1 segment to attempt to overwhelm the annoying cannoneers. This brings us to another ECW specific rule adjustments; Foot units only move 6" instead of the usual 8' (dismounted Dragoons and commanded Shot move the usual 8", though). The next Royalist card is MELEE, which was of no use given the distance between the armies at present.

The 3rd Royalist card is MOVE. The far right flank "grey" brigade of the Earl of Caernarvon acts first, rolling a Triple Magic Move. They actually enter from the very edge of the table, however, so the effect is less dramatic than it might otherwise have been.

That, and there is the matter of the extensive hedgerows in this part of the field near Newbury proper, known as "The Commons". Still, a good lead off for the Brigade!

Next the Green brigade of William Vavasour enters 1 segment of movement (12" for Horse) onto the Field of Battle.

The resulting situation on the Cavalier Right.

Whether fatigued from their earlier MOVE, or cowed by the deadly artillery opposite them, this time Astley's brigade balks at moving further forward at this time.

To their right, Lord Henry Percy's brigade rolls up a single segment of Movement...

Resulting in the situation seen here. All three Foot regiments of this brigade are raw (ugh!). It includes 2 units of Royalist Guns as well. As expected. the mobility of ECW artillery is very poor. When limbered they only move 4" per segment, and once they unlimber, they cannot move for the rest of the game, other than to change facing. No wonder the guns started the game unlimbered!

Proceeding to their Left, Colonel John Belasye (a LD 12+1 commander) rolls up a triple magic move, and his yellow brigade takes over the environs of the Falkland Farm.

Completing the Royalist moves in the Center, Lord Byron's white brigade moves one segment towards the as yet unoccupied hill to their front.

In FoB3, a commander that rolls a 1 or a 2 on his D20 rating roll is vacillating, and after the battle commences, his quality must be rolled for again the first time it needs to be known (the rules say after set up, but delaying the reveal even further makes sense to me). As it turns out, both of the right flank Cavalier cavalry commanders are vacillating. Lord Wilmot flubs this roll with another "2", giving him a poor LD8 rating.

Wilmot uses his single segment to advance his brown brigade, the Dragoons sheltering behind some hedgerows.

Prince Rupert, rated as Skilled, does better, and the D20 roll of 17 is good for a LD12 leadership rating.

Rolling up a single segment of movement, the Prince Palatinate stands pat for the present.

Overview of the filed after the Royalist MOVE is completed. The next 2 cards turned were one LEADERSHIP after another. With no troops to rally, no troops that need to change facing or formation, and no units that have suffered Movement Disorder, the cards go to waste, and the first initiative of the game is over.

Not surprisingly, Charles won the next toss by 4 pips. His first card was ARMY MORALE, which counted as he had already suffered the loss of Talbot's regiment. The only 2 commanders who needed to check for loss were fine. The next card was ARTILLERY FIRE. The light and heavy guns by the Falkland farm belched forth smoke and shotte, and managed to drive back Lod Say and Sele's regiment with loss. The remaining Royal Artillery had no target except the pesky Parliamentary guns on Falkland Crest; with the Down 2 for long range, the Down 2 for counter battery fire (another ECW specific modifier), and the Down 1 for firing at a target uphill from them, they fulfill expectations, having no discernible effect on the enemy artillery. A second ARMY MORALE card had no effect, and an INFANTRY FIRE card found everyone still out of musket range.

ESSEX began with a MOVE Card, and commenced with the green brigade of . of Sir Samuel Luke. They got 2 segments of movement, but as dour Puritans, no fancy stuff was allowed. It was enough, however, to position the Dragons well on the hilltop, and advance his cavalry with their flanks protected (?) by said Dragoons.

Philip Stapleton's yellow brigade rolled up a 1 segment move, but it was all they really needed anyway to conform top the rest of the Roundhead right wing mounted forces.

The Earl of Wessex asks his men to advance top support the Horse. "If it's all the same to you, Guv, we'll just rest our weary feet here and bide a while".

The Roundheads move on to Lord Robarte's grey brigade, who roll up a natty triple move, but... no frippery, please!

At 6" a segment for Foote, even a triple move isn't exactly a mad dash!

After a 1 segment move for Skippon's orange brigade, Mainwaring' blue brigade scores three segments (with no macaroni once again); they move forwards even with the hedgerow lining Skippon's greenway.

On the Parliamentary Left, both Cromwell's black brigade and Middleton's white brigades of mounted troops move into the maze of hedgerows known as The Commons. The next three cards prove to be of little use. On a LEADERSHIP card, the attempt to rally off the only losses thus far from Lord Saye and Sele's regiment fails, and no units can make use of the MELEE card that follows. A brief LULL then descends upon the field, but Charles is unable to seize the initiative . Thus ended the second Initiative of the battle.

Charles wins big on the 3rd initiative - 9 pips! He of course chooses to act first. The results are... disappointing. The LULL continues, whilst the King takes a glass of claret, but Essex is also unable to take control the flow of the battle. The Cavaliers display superb LEADERSHIP with 2 cards in a row, but are unable to do anything with it, and save a TACTICAL ADVANTAGE for later use.

Twisted knickers! The rest of the grand run proves equally uninspiring, with an unusable INFANTRY FIRE card, followed by another no effect ARMY MORALE, and then an unusable MELEE, another saved TAXCTICAL ADVANTAGE, before finally turning the sought after MOVE card.

Caernarvon's grey brigade uses its 1 segment move to cross the hedgerow, emerging on the other side; all remaining movement is lost for that segment. . FoB3 includes new specific rules for hedgerows, doubtless inspired by their widespread appearance on ECW battlefields. Immediately to their left, Vavasour's green brigade of Horse rolls up a triple move, and leaps the hedges before than, and advances across The Commons to the next thicket of hedges.

Percy's black brigade of Foote moves up in support. Percy struggles to keep all of his forces in command. Another ECW specific rule is that the command radius is the same as the LD type (instead of twice the LD type as in later periods).

Meanwhile the King's Lifeguard of Foote presses the advance upon the Parliamentary gun line.

Colonel Belasyse's yellow brigade uses it's single move to filter through the vegetable gardens and pig stys of the Falkland Farm.

Lord Byron's white brigade will trundle forwards 6".

Lord Wilmot's boys decide they rather fancy the view of their infantry colleague's bums, and decide to stay put.

Rupert's blue brigade Horse gains but a single segment. Uncharacteristically, he decides that discretion is the better part of valor, and declines to move forward beyond his supports, but does bring up the heavily armored Gentlemen Pensioners in support of his front line.

Overview of the action at the conclusion of the Royalist 3rd initiative.

The first Parliamentary card (of 8) is a MOVE! Middleton's white brigade of Horse moves 2 segments, reaching the next hedgerow of the Commons.

Cromwell's black brigade rolled up a double magic move. While there are no enemy in charge range, it is enough to clear the hedgerow and proceed across The Commons.

Mainwaring's Blue Brigade gets a double move, and presses the advance of his two crack units of Trained bands against the raw royalist regiments opposing them. This triggers off the first infantry fire of the game. Once again, there are some changes for the ECW. Short range fire is no change (as opposed to Up 1 as usual), and extends to 4". Medium range extends to 8", and there is no long range. Also, infantry units must fire straight ahead only, although if any part of the target is within that zone, it is a valid shot. All four units here are deployed Shot Forward, which is optimized for shooting. There is NO first fire bonus for infantry, either, nor are there any target modifiers for shooting, except the aforementioned counter battery fire. As they were advanced upon, the Opportunity fire by the Cavaliers takes place first; it is over 4" so medium range. Fitton's firing fails to effect its target, but that of Ballard's boys forces back its target 1" in Disorder, but without inflicting any losses. The Trained Bands could fire now, but opt to hold it for future use.

Skippon's orange brigade uses a double move to cross the hedgerows of the Greenway, and move up in close support of their guns.

Lord Robarte's grey brigade uses a double move to occupy the low ground before the Falkland Farm. All of his units are raw.

Wessex's red brigade bestirs themselves enough to move forwards one segment to the ridge line.

Luke's green brigade rolls up a triple move, but with no witchery (magic is forbidden to good Puritans, after all), they resist the temptation to gallop forwards.

Stapleton's yellow brigade of Horse does manage a triple magic move, but without Sir Sammuel's brigade in support, and with no tempting targets to charge. they hold their ground. Another ECW specific rule - only Foote, Commanded Pike, and Galloper Horse may immediate melee on a won even move. His front units are gallopers, but the Earl of Denbigh's Horse (grey coats) are trotters.

View of the battle after the Parliamentary MOVE.

The second Roundhead card is ARTILLERY FIRE. Can you say "target rich environment"?
Whilst only one of the three batteries hits home, it is enough, scoring 3 hits and routing a unit of the crack Lifeguards! Bloody hell!

The ignominious rout of the Lifeguards...

The light gun in the Falklands dell fires as well but to nary any effect. The third Card is ARMY MORALE. Checks are conducted, but no Roundhead commanders are struck.

Next is a TACTICAL ADVANTAGE card. At this juncture, the Trained bands decide to fire upon the unloaded regiments before them, the near unit having found some low fences to steady their muskets upon. They had trouble keeping their matches lit, however, and in consequence the combined firing inflicted light losses upon Bard's greycoats only.

A MOVE ONE COMMAND card sees a double move for Wessex's red brigade, which allows them to seize control of the ridge to their front, , as well as aligning themselves with the rest of the army. The sixth card is another TACTICAL ADVANTAGE, which is held. Another ARMY MORALE card follows, which has no effect, whereupon the final card of the imitative is turned... ARTILLERY FIRE.

Fouled with powder, the light gun's fire still manages to throw its target into Disorder.

The main group of three Roundhead batteries fires upon the second unit of Lifeguards, but even with one of the medium guns laid by an expert gunner from the Continent, this time they only mange to inflict a single hit, although the target is driven back 3" in disarray as well.

Aftermath of the fire of the Parliamentary guns.

The final Roundhead card of the initiative is INFANTRY FIRE. The Trained bands shoot again, this time one of them inflicting serious losses on the cavaliers to their front. Over at the right center, Wessex's brigade shots at the opposing Royalists, but to little effect. They in turn hold their fire.

The King wins the 4th initiative by 3 pips and closes to act first. A MELEE card finds no units close enough to engage with the enemy, but he is happy to see an ARTILLERY FIRE card next. he orders up 2 kegs of especially finely made gunpowder form the Royal Armoury to supply the cannons, and they respond by routing Potley's raw unit of yellowcoats with heavy losses.

Mayhem in the Middle! Note that, unlike ECW infantry, guns may still fire within 45 degrees of their facing.

The Cavalier medium cannons both shoot at one of the units of Essex's Foote. Heavy losses are suffered, but the orange clad men hold their ground despite it.

The final card for the Royalists this initiative is INFANTRY FIRE. Fitton's and Ballard's men reload, but, being at considerable disadvantage, decline to fire at the opposing Trained bands at this time (which would trigger their simultaneous return fire, no doubt).

Over on the Royalist left center, the men of Byron's white brigade suffer from no such inhibitions, and all four units shoot. They mange to inflict heavy losses on one of the Earl of Stamford's units, but fail to drive it back.

Three units of the Roundheads return fire (which counts as simultaneous) . One inflicts light losses upon one of the Earl of Norwich's Foote, causing it to Fall back in Disorder.

Overview at the end of the Royalist 4th initiative.

The Parliamentary Initiative commences with a MOVE, and Middleton's white brigade rolls up a Blessed triple move. His entire command presses forward. Only Northampton's greencoated Horse are gallopers, but they take advantage of the opportunity to practice a bit of steeplechase, vaulting over the hedgerow and plunging into the mortified Royalist dragoons. The left hand dragoon unit drives back its opposing Roundhead number in disorder.

The other Dragoon unit is less fortunate. Their weak fire fails to impress the crack horse, and their charge hits home!

First round of melee edge to the Horse (who are rolling a D12+2!). More ECW specific FoB3 modifiers: Dragoons in Melee are Down 1. This is the same as Foote in Shot forward, whilst Commanded Shot are both Down 2, and Mounted vs Shot are Up 2. Presumably this is not an error, and accounts for the ability of the Dragoons to mount up and pull back?

The second round goes more as expected, with the Dragoons routed with the loss of 2 UI (they can only take 3 before they are eliminated).

Cromwell's black brigade moves forward one segment across The Commons.

Mainwaring's blue brigade rolls up a single, unadorned segment, and he decides to have the Trained Bands hold position while the raw regiment of Sir Thomas Grantham move up across the hedgerow of the Greenway in support.

Skippon's orange brigade advances 1 segment as well.

Potley's routers stream to the rear. while the rest of Lord Robarte's grey brigade repositions itself.

Wessex's red brigade gets a single segment, and decides that it is well positioned as it stands.

Both right flank mounted commands roll a "1"; "We're quite comfy here, thank ye, Milord!"

The second Roundhead card is MELEE! the Parliamentary Horse in the Commons plunge into action. Some of the Trotters mange to fire their pistols to effect along the way. (Another ECW special rule for the ECW- Trotters in Melee roll their DD against the DD of the opposing unit; if they roll higher, they get an UP 1 in the Melee to represent the effect of their pistol fire.

The opening rounds of the three meeles see both sides share the honours, with one unit on each side thrown back with loss in Disorder.
.

The second round sees the last melee resolved in favour of the Cavaliers!

Situation around The Commons at the conclusion of the cavalry melees. The third card is ARMY MORALE; this time many Roundhead commanders must test for survival (don't roll a "1" on a D12); in the end, none succumb! The fourth initiative of the turn is over.


Charles wins the final initiative of Turn 1 by 5, but both sides have but 2 cards remaining. His fist card is MOVE. Caernarvon's grey brigade uses its one segment to pull back most its battered forces, whilst blocking the victorious troop of Northampton.

The resulting situation in The Commons.

A single, no frills move sees Vavasour's troopers re-establish contact with the Roundhead Horse.

With a sing;e segment rolled. Percy's black brigade stands its ground.

Routers gotta rout, and the other unit of Lifeguards decides to pull back from the deadly Parliamentary artillery!

Both of Gerard's regiments advance out of the farmyards and encounter Ballards greycoats. The recently raised regiment fires wildly, causing no discernible effect upon the experienced men of Gerard'/s units. Their return fire is devastating, routing Ballard's men with extreme losses!

Another ECW specific rule; Foote in Shot Forward formation can issue "salvee" fire at close range, gaining them an Up 1 modifier. No further explanation is given. I decided that regular and crack Foote could use salvee fire, but that raw regiments lacked sufficient training and discipline to do so.

Lord Byron's white brigade rolls up a double move, with all the pomp and circumstance!

Seeing this, the Royalist artillery opens up effective preparatory fire upon Stamford's Foote on the ridge, driving one unit back in Disorder with loss.

One of Col. Henry Tillier's greencoat regiments closes on the Earl of Stamford's battered regiment; it shoots as the Cavilers closed, but, unnerved by the cannonade it just received, its fire fails to impact the enemy.

Two more Royalist regiments close to close range, and issue devastating salvee fire!

The results of the musketry, and 2 melees that go Parliament's way! One Royalist unit is driven back in Disorder with loss, and the other falters in the first round of its melee.

In the second round, though, Tillier's greencoats prevail, driving back Stamford's bluecoats again.

Situation in the Parliamentary left center... total collapse is threatened!

A double move without flourishes allows Wilmot's Horse and Dragoons to move up to support Lord Byron's Foote.

Prince Rupert's blue brigade rolls the long awaited triple magic move! Tally ho!

Their pants being extremely fancy this day, all four units of gallopers are able to charge the enemy Horse and Dragoons!

"See 'ere, 'ows about our defensive fire, chappies?"
The Dragoons on the hill fire to some effect on one of Ruperts squadrons, but fails to halt their charge.

Melees galore! Left to right, 1) the Royalist Horse rides down the opposition, scoring three hits, 20 Royalist troopers throw back Dragoons on the hill with loss, 3), Parliamentary Dragoons prevail, throwing back the Royalist Horse with loss, and 4) The Gentlemen Pensioners Cuirassier armor allows them to drive off the Parliamentary gallopers with loss.

Aftermath of Rupert's Rumble; with three UI lost, the mangled unit of Horse is at zero UI and disperses! (Another E\CW specific rule; in FoB3, cavalry have 4 UI instead of the previous 3 UI, but in this era, Horse still have only 3 UI and thus less discipline/staying power.) Similarly, Dragoons and Commanded Shot also only have 3 UI, while artillery are back to just 2 UI per unit in this era. The Foote regiments still have 4 UI and thus the most staying power, however.

View of the battlefield after the grand charge!

The other half of the field.

The fifth and last Royalist initiative of Turn 1 concludes with ARTILLERY FIRE. With no good targets, these guns quietly reload.

The remaining Royalist guns fire, inflicting some loss on the Foote to their front.

Essex, for his two cards turns first a LULL. As the king has exhausted his deck, there can be no effect from this card regardless. He then turns a badly needed LEADERSHIP, which offers the chance to rally some of his newly battered troops!

Middleton restores Order to many of his troops, but no losses are regained. Another ECW specific rule - if a "1" is rolled for a uinit of Horse that is attempting to rally, they both fail and lose 1 UI (but no army morale points). Effectively, they failed to recall pursuers. Elegant; I like it!

Cromwell too succeeds in restoring order but no losses are recovered. Both commanders decline performing any potentially deadly Daring Deeds to inspire their men.

No luck here!

No... just NO!

Once again, some order is restored, but the Roundheads are unable to regain any lost UI!

Cromwell's exhortations fall on deaf ears as well. Turn 1 of the battle of Newbury is over! (For those not familiar with Field of Battle, a "Turn" can be a LOT of fighting, representing up to three hours of combat).
To be continued...
Field of Battle, 3rd edition, © 2020, Brent Oman English Civil War 1642 - 1651
My slightly customized version of the ECW QRS provided with the FoB3 rules.
Quoting the earl of Manchester from the movie Cromwell: "Damn me, they've got a lot of fellows over there!"
ReplyDeleteThat's 95+ percent of the ECW collection on the table for sure!
DeleteVery impressive set-up!
ReplyDeleteGlad you like it!
DeleteVery cool!!
ReplyDeleteThanks, Ivan!
DeleteThank you, Ivan!
ReplyDeleteExcellent just excellent
ReplyDeleteGlad you liked it Gary; I have to review your own recent 7YW write up.
DeleteMine pale in comparison, but I do get 'frequent flyer miles' :-)
DeleteYour output of games and posts is indeed impressive, Gary!
DeleteSplendid looking game! I like the ECW specific adaptations, they make sense I think!
ReplyDeleteBest Iain
So far they seem to be working well!
DeleteJust a fabulous looking table and report
ReplyDeleteCheers
Matt
Thank you, Matt!
DeleteSpectacular table display and action, Peter! You are so right in that a LOT can happen in one turn. This was only one turn? Hard to believe. I am exhausted!
ReplyDeleteLOL! A "Turn" in FoB, if not terminated early due to duplicate initiative rolls, probably represents about 3 hours of fighting. It is rare to have more than 2 turns unless so ended.
DeleteWow, very detailed report, Peter. I will need to review it again when my ECW troops are ready.
ReplyDeleteI am being pretty detailed here (not as much as my Caldiero report, though) to illustrate how the ECW modifications work with FoB3. This is an entirely new era for the rules. The core mechanics of FoB3 remain the same, but there are a number of tweaks as covered in the report. We haven't quite encountered all of them yet.
DeleteI should note that FoB3 does have optional pursuit rules, above and beyond a clever twist to the rallying rule for this era. They are probably more appropriate to use in the ECW than any other era. However, I hate pursuit rules and thus have ignored them. Perhaps I will illustrate them as part of the action in Turn 2!
I'm loving the new terrain on your ECW tables Peter. It all looks great. How long do you think a turn like this would take to play between a group of, say, four players?
ReplyDeleteGood question and one wondered too!
DeleteThere are 8 commands on each side - 2 cavalry commands on each flank, and 4 Infantry/Artillery commands in the center. If I were running this as a convention game, I'd aim for 3 players a side, each with 2 commands, but 2 players a side, each with 2 Horse and 2 Foote commands would work pretty well also. FoB actually plays quite quickly. I would estimate it would take about 2 hours to play to this point with 2 players per side. There is no need to wait for the other guy to act, except when you yourself have completed all actions on a card with all of your commands.
Delete... aim for *4* players a side for a Convention game.
DeleteIf we are indeed able to have convention games again [some promising news on the vaccine candidates leads to some hope that might be possible by Historicon (July 2020)], I'd very much have in mind to run this or some other large ECW battle twice, once with FoB3, and once with FK&P.
Great game and battle report!
ReplyDeleteNeil
Re-reading for details, this is a busy "First" turn!
ReplyDeleteSee the comments above; a "TURN" in FoB is a LOT of action, especially if the deck is played all the way through. About equal to 3 hour's fighting or more, I usually figure. Each deck has 3 MOVE cards, 1 MOVE 1 COMMAND, 3 MELEE cards, 3 each INFANTRY and ARTILLERY FIRE cards, 1-3 LEADERSHIP cards, 2 TACTICAL ADVANTAGE cards and 1-3 LULL cards!
Delete