Readers might recall that I backed the Lodestone Kickstarter back in April of 2018. I thought the idea was very clever and had great promise, so I went all in for the "Village" pledge. Delivery was anticipated in May, and I received mine in late July, which is very good for what really was a major undertaking. The Lodestone Team (Collin, Rich, and Nick) were excellent about keeping the backers updated regularly throughout the process. The orders were professionally shiopped by a second party contractor.


The project was delivered in a large, very securely taped and pretty much waterproof package. After removing the outer materials, there were nine boxes inside,each of them pretty waterproof as well.

Removing the second layer of packing revealed the individual Lodestone cartons, one for each of the nine buildings in the Village set.

Some may get a bit tired of Lodestone posts for the next month or so,m as I am going to take you through each of the buildings, one by one. Please feel free to skim though them or skip them if they aren't of particular interest, but I continue to think this is a superb idea, and very well executed. Anyway, I am going to start with one of the simplest buildings, the Single Storey House.

Opening the carton, here are the components, all packed with great care!

All removed and and unpacked, there is a Medium Basic Box (upper right); these boxes, with there inserted rare earth magnets, are the key to the whole Lodestone concept. They form the basis of the structures, to which the outsides or "skins" of the buildings are attached, using said magnets. This being one of the smaller buildings, the Lodestone guys used the extra space in the carton for some, well, extras - two chimneys, some alternate "storefront" skins, and a small envelope containing parts for shutters, made from greyboard.

The skins themselves are made of MDF, with a bonded white "stucco" pattern attached, and overlaid with wooden "timbering"; other details are made of greyboard. Note especially the quite exquisite detailing of the "leaded" windows! The skins attach with great ease; even the first time, it takes less than a minute to assemble a building!
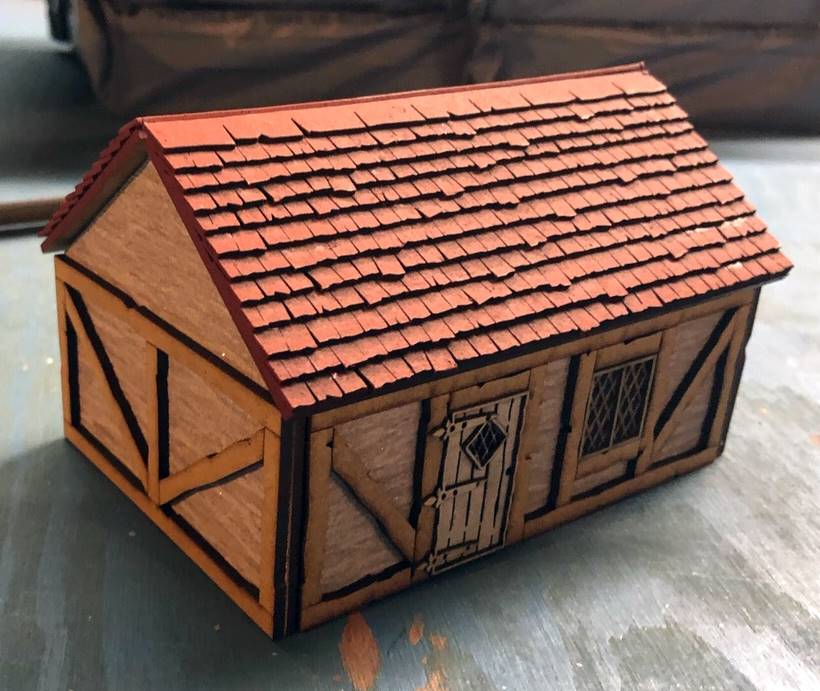
Lookin' good already!

When in doubt, "green" sides always attach to "red" sides, and vice versa!

Done!

Additional view.

With the optional chimney attached, once again, magnetically!

The leftover parts are the mentioned extras for a few other larger buildings. We will come back to them later!

The buildings look pretty darned good just as assembled right out of the carton, but... I decided tio paint the wood work dark brown, using this building as a trial case.

Yep, even better; by the way, I used very inexpensive Craftsmart paint from Michaels, their dark brown, "Expresso", which is a bit thin on pigment intensity, but perfect here as it acts almost like a stain. It also happens to be a very close match for the dark brown color of the laser cut edges of the skins and the "timbers", so I don't have to paint those at all, really.

Yep, definitely worthwhile; I will be painting the woodwork on all the buildings in a similar fashion.

Very effective, I think.

Works fine with the chimney added, too.

How about them shutters? I was a bit uncertain as to how to assemble them (each has a frame and the shutter itself), and where and how to attach them. A question on the Lodestone Kickstarter site brought not just an answer, but a video illustrating the construction in less than 24 hours! Here they all are assembled, which took as couple of hours at most to do them for all nine buildings.

Being very pleased with the results of painting the timbers, I painted the doors and shutters, in this case with Delta CC "Seminole Green". No way am, I touching the lattice work on the windows, but frankly, I think it would be hard to improve on how they l;ook as is anyway.

Another side with a different door; the light grey base color of these parts helps tone down the color applied over it.

And yet a third style of door - lots out of escape routes from this cottage!I may give these green and brass parts a black was to further mute the colors and bring out some of the details.

Here's the whole village as assembled in less than an hour.

This is how they all look without adding many paint or shutters.

Very table ready without any additional work just like they are here!

Note the sign on the two storey building; this will become a suitable pub sign

The detailing of the roofs is especially nice (I chose red, but they also come in grey and green). The roofs can be a bit fragile if dropped (chipping).,

Thus, when all of the painting is done, each building will get a good coat of matt spray varnish.

Overall, I am very pleased with both the innovative concept behind these buildings, and the execution of the product itself; first class all around!

There will be quite a few more Lodestone posts in the next month or so. The team is planning to open a web store soon, as well as a second Kickstarter. As the line expands, I hope to see them include Mediterranean/Spanish skins, Northern European skins, Middle Eastern Skins. Heck, why not ACW, Wild West, Roman and Oriental skins as well/? How about Castle or Fortress Skins?! I am sure there are plenty more possibilities. The first KS included Sci Fi skins as an alternate/addition to the ones seen here. Stay tuned!
Very nice indeed. I'll have to look these up!
ReplyDeleteHere's their FB page; web store is due soon.
Deletehttps://www.facebook.com/theLodestone.co.uk/
They look really nice Gonsalvo, and I get the ease of construction modularity aspect, but how do you rate them against 3D printed stuff for instance?
ReplyDeleteAs I don't do or own any 3-D printed items, I really cannot comment. These are quite solid without being heavy. The multistory buildings you do need to remember to lift them from the BOTTOM if you move them around (otherwise the stories will separate, although no big deal to pop them back together again). .
DeleteThese look really excellent, incredible to think they come ready painted & are so easy to assemble apparently!
ReplyDeleteHave fun with these, I'll follow your progress with interest.
Best wishes,
Jeremy
Hi Jeremy; they literally snap together in less than a minute. The add on shutters do require assembly with gluing. Additional painting optional... but really quite easy to do as you snap the panels off to paiot, and snap them back on again when done ("slap" might even be a better description than snap, as their are no fasteners aside from the magnets themselves).
DeleteThese buildings look great!
ReplyDeleteThey really do, especially when you take the extra time to paint the greyboard items, as I have done here.
DeleteThese look vey nice, I am sorry I missed the original kickstarter. I may need to get in on the next one. Thanks for posting these.
ReplyDeleteThey are planning another KS soon...
DeleteWell done! Great looking buildings, I am glad the K-S worked out for you.
ReplyDeleteThanks, Joe; it did. I look forward to them leveraging the concept over time.
DeleteThey look great and that additional bit of painting you have done is well worth the effort as it gives that extra lift to what are already very nice models.
ReplyDeleteThanks, Lawrence; I think it is well worth the effort to paint the beams, ad the shutters, and paint those and the doors. I'll be showing lots more finished buildings shortly.
DeleteI think they look excellent as they are but a little paint helps, might they benefit from a dry brush of terracotta on the tiles to just tone down the redness? But really good and nice to see a Kickstarter deliver and keep everyone updated as well!
ReplyDeleteBest Iain
I think the roofs look great as they are, but non reason you can't do even more with them!
Delete