The second battle the Hofkreigsrat developed for Historicon 2009 was Raszyn, fought between Poniatowski and the still forming army of the young Grand Duchy of Warsaw, with some Saxon support, against Erzherzog Ferdinand's invading Austrian Corps. Poniatowski, who was significantly outnumbered, chose a strong defensive position behind the Mrowa; it's marshy banks made the river impassable except at the bridges, which in reality were more like causeways. Although the Poles had the support of a few Saxons, there were no French troops present whatsoever. We playtested this battle twice and ran it at Historicon once, on Thursday afternoon, with Barry as the "Rat" acting as GM. The first pictures are taken from the play test games. The scenario, which was adapted from that by Keith McNelly for Volley and Bayonet, will be in the scenario booklet.

Because of the nature of the battlefield, this scenario usually results in some initial delaying actions by the Poles, and then becomes three inter-related efforts to force the crossings at Jaworowo, Falenty/Raszyn, and Michalowice on the Austrian right, center, and left respectively. The Austrian attackers arrive on the scene first opposite Jaworowo, then Raszyn, and finally Michalowicz.

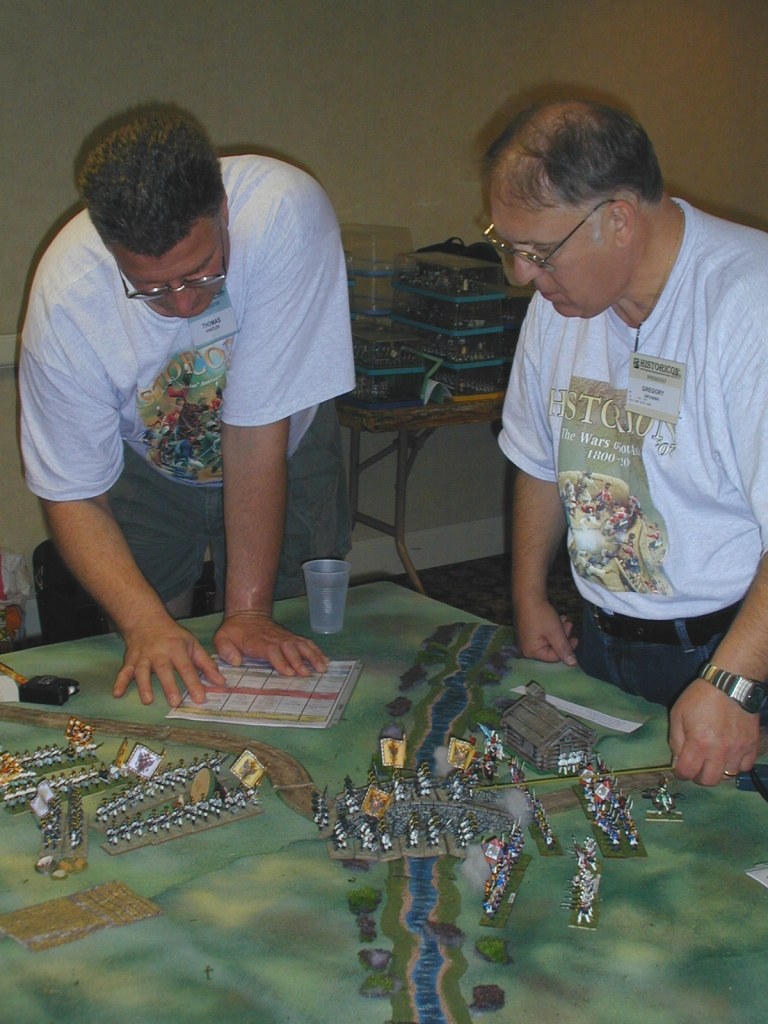
View from Jaworowo towards the Austrian assailants. The 13th Polish Line regiment (with light blue flag on the reverse) was unique in having white uniforms with light blue facings - generously supplied from captured Austrian stores!


At Michalowice, artillery batteries stand off at the causeway. We didn't have enough Poles for all the units in this one then (we do now!), so some French (by Foundry) had to stand in.

Austrian attackers converge on Falenty in the Center; Saxon reserves guard the bridge and the village of Raszyn beyond.


**********************************************************************************
The final six pictures are from the Thursday afternoon game run at Historicon 2009, Barry Frandsen being the presiding HK-Rat for the game.

Early in the game the Polish lancers have routed an Austrian battalion (seen retreating in the background before themselves being routed by the Austrian Hussars. Still, their antics have diverted Austrian units from advancing upon the river Mrowa. The marker with three "rocks" on it indicates the cavalry have lost 3 Unit Integrity; as cavalry units in Field of Battle generally only have 3UI, that reduces them to zero UI and any unit reduced to zero UI immediately routs (they are removed outright if they reach -1 UI).


HK-Rat Thomas Kinstler assists a player in figuring out the results of combat, referring to the FoB Summary sheet. The whitecoats launch a determined if somewhat impetuous assault upon the bridge on their far left flank at Michalowice.

How a game of Field of Battle often ends - turning THIS card when your army is out of Morale Points is NOT a good thing! This is not an easy scenario for the Austrians to win - they have to advance aggressively, something their relatively poor command system doesn't make easy, and yet avoid taking excessive casualties. That usually means trying to get their superior artillery into the action to soften up the outnumbered Polish defenders - but that often spurs Polish action to disrupt the deployment of the guns. This is an excellent scenario for 3 players on each side.
It's been a little long between posts, but I spent much of this past weekend finishing all the text and the final maps for the Blunders scenario book; now just needs final editing, then layout and printing. In print - maybe July 2011?
Good gaming!
Peter
Great post, very nice photo's and figures.
ReplyDeleteVery nice report, great looking photos.
ReplyDeleteJohn
Thank, Ray and John! We had fun with this action each of the three times we ran it. Now I'm painting Polish Chasseurs and Vistula Legion for our 1812 Borodino project!
ReplyDeletePeter
Hi Peter,
ReplyDeleteNice game! I don't know why, but in my games, the Army Morale card all too often does nothing to end the game. Probably more than 50% of the time and maybe much more, the card is turned and an army with half of its units gone and several more routing wins the challenge and plays on like nothing is the matter. Maybe I'm doing something wrong but this is one FOB mechanism that hasn't been working for me.
Ron, it is a test rather than an automatic game ender - for that mechanism you'll need Die Fighting! :-)
ReplyDeleteWith a LD 8 C-in-C, which isn't rare with Austrians,odds of passing are only 19.4%; LD 10 = 31.3%, LD 12 = 45.1 %, and LD 12+1 is 52.1%. Of course, missing the roll by a pip or two may not be enough to end the game as it is written now. An as yet unannounced 2nd edition of FoB is due out concurrently with "Blunders", and in that a failed AMC will now end the game, period... or so I am lead to believe!
Leadership 8 is quite common for the French during the WSS too. I'm not much of an odds maker and really don't like thinking in those terms so I'll take your word for the percentages. All I can say is those D-8 French CnCs have been beating the D-12 with nauseating frequency and doing it with an army in tatters, all morale chips long gone.
ReplyDeleteApparently they are beating some long odds!
Actually, I redid the calculations as I'd gotten the numerator right but forgot to adjust the denominator for the various die types. Thus the correct numbers are:
ReplyDeleteD8 1+2+3+4+5+6+7 = 28/96 (8 * 12) = 28.2%
D10 1+2+3+4+5+6+7+8+9 = 45/120 (10 * 12) = 37.5%
D12 1+2+3+4+5+6+7+8+9+10+11 = 66/144 (12 *12)
= 45.8%
D12+1 1+2+3+4+5+6+7+8+9+10+11+12/144 = 78/144
= 54.2%
Still pretty low odds with a D8; and yet, that the thing about a die roll instead of a automatic - it buiolds tension and drama into the game. In many ways, social wargaming is perhaps more akin to theater than simulation, although that depends of course on your own preferences.
I see your point but testing an army for morale when it has nothing left to fight with and literally cannot win, seems to be adding process to no purpose. What's more that process can mask the real outcome of a game,giving the winner an unnecessarily hollow victory.
ReplyDeletePerhaps my take on this will be to assume a passed test with an otherwise shattered army just indicates the leadership managed to pull the remnants together and retreat in a semblance of order. Failure of the test means the retreating units were badly mauled by pursuers.