The Lusignan Lunge: Mantua 1799 Campaign
by Russ Lockwood
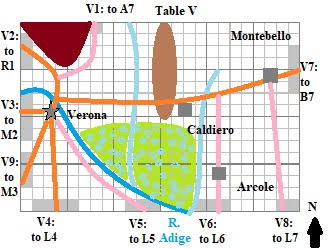
A goodly part of the Austrian Army, three divisions strong, concentrated at Trente in preparation to drive the French out of northern Italy and relieve the brave Austrian garrison at Mantua. Alps being alps, the most direct road would be a bottleneck for all three, so two headed directly south on the most direct line to Rivoli and Verona, while I, General Major Lusignan, flared eastward via Bassano and then southward through Vicenza.
Our FZM (Feldzeugmeister) Alvincy orderd two other divisions, one in Bassano and the other in Padua, to head south and west towards Legnago. We weren't sure where the French were, but expected to run into them somewhere north and east of Mantua.
I had expressed concern about our westernmost flank to the west of Lake Garda, but was assured it would be taken care of by one force or another. Why the concern? Supply.
Supply Rules
Umpire Peter adds a simple supply rule that all forces must be able to trace a line of supply back to some point, or else suffer morale checks. Garrisons of towns, cities, and fortresses are exempt, although size limits apply.
So, I wouldn't want a French 'sneaky repo, grab my depot' arrive at Trente and put some of us out of supply. It would consume a French command and the supply line could shift to other routes, but it was possible.
It was taken care of and in any case, I did not hear of French troops taking the gamble and launching a force across many Alpen tables.
Many Tables in Real Time
As we have more than a half-dozen times before, we used the Snappy Nappy rules and the "Campaign in a Day" concept of spreading many players across many tables. That way, as historically, you don't know what's going on elsewhere in the campaign area other than on your specific table. If you want to communicate, you write a note and hand it to the umpire, who passes it along to the recipient after a certain period of time, usually 10 or 15 minutes, depending on the number of tables in between sender and recipient.
So, how can you coordinate the sequence of play?
For the first two turns, every player on every table follows the sequence of play phases. That way, new players get an idea how far a unit can move and no player gains an advantage.
On the third turn, each table controls its own sequence of play. When players arrive on a new table (the umpire walks them across), they adopt the phase on the new table, regardless of where they were in the sequence of play on the old table.
A few "Campaigns" ago, James came up with the brilliant Zone of Deployment. Newly arriving units get placed in the ZoD (the size of the ZoD defines how many units per turn) and cannot attack or be attacked. The opposing player on the new table gets one full turn before the units in the ZoD can enter the new table or bounce back to the old table.
James runs a pre-game briefing about the mechanics to refresh us (and it has been a while since we gamed) and help new players. Snappy Nappy is relatively simple to pick up.
The biggest difference with other rules is when rolling unit saving rolls, player roll until the unit passes its morale check or the unit routs out of the game. Yes, players complain about their elite unit routing from a single hit due to a string of lousy die rolls, but it cuts both ways. And, I love to point out, no one ever complains when their Conscript units withstand shot and shell for multiple turns!
That said, better quality units deal more damage and stick around longer than lesser quality units.
With all that, players started to move units around 11:30 or so and it wasn't long, oh, about a half hour or so including the initial two sequence-coordinating turns, until opposing forces started to bump into each other.
Lusignan Via Vicenza
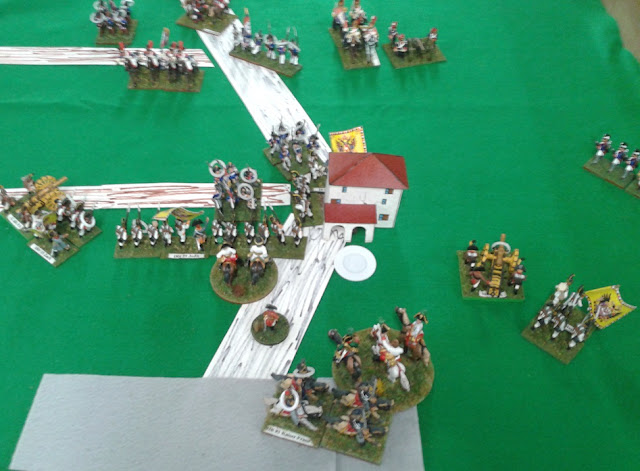
My troops swung eastwards from Trente through Levico and Borgo, and off the first table. My cavalry arrived at the new table at Bassano, followed by infantry and artillery, in a long march column. I was pleased to see that the town of Vicenza garrisoned by Bajalich (James) and a cavalry unit protecting the road leading to Montebello. A French cavalry unit poked it nose into the ZoD, but thought better about tangling with Bajalich's troops and departed with information that my full force was heading towards Vicenza. Of course, I could turn off on the road to Padua, but if I were the French, I'd figure that force was a heading towards Montebello.
On turn 8, I poked more than cavalry noses onto the ZoD on the Montebello table. Actually, Verona was at the far end of the table, so it should properly be called the Verona Table, but Montebello was near me and where my battle began, so my memoirs call it the Montebello table. I'll let future historians worry about table nomenclature.
I saw a French division arrayed against my arriving two cavalry units, two infantry units, and one artillery unit.
Zone of Deployment (ZoD)
Remember, the Zone of Deployment (ZoD) is only so wide, so only a certain number of units can arrive at once. From a twisty secondary mountain road, the ZoD is usually only one unit wide. For a main road on a flat plan, like my spot, I could bring in five units.
Also remember that my units are strung out in march column, so only a certain number of units can mkae the move off table per turn. My division would take several turns to transition from one table to another.
Also remember that the opposing force gets full movement/fire phases before my units can exit the ZoD. The French player, General de Division Massena (Kevin), used that time well to garrison the town and bring up supporting cavalry and infantry.
Battle of Montebello
Montebello sits close to the ZoD, so I only had limited maneuver room. I used one infantry to screen the town, another infantry and the artillery to hold my left flank, and sent my two cavalry units (Dragoon and Hussar) to face off against Massena's two cavalry units -- one a Cuirassier unit and the other a Hussar.
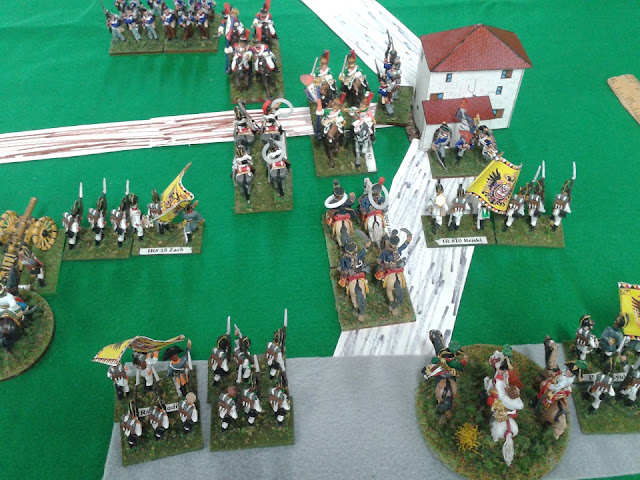
Battle is joined at Montebello!
(the grey felt is the Deployment Zone for this road entry/exit).
The cavalry battle was short with both my units suffering minor defeats and withdrawing a tad. The other firefights were inconclusive.
That didn't stop us from bringing in reinforcements. I brought in three more infantry units and to my surprise, FZM Alvincy himself arrived to assess the situation. From time to time, he'd head off between the Battle of Montebello and the nearby Battle of Este.
The cavalry clash renewed and my horse was bested again, with the dragoons high-tailing it back to Vicenza and the lights cowering in the ZoD. I headed back to rally them.
At some point in time, FZM Alvincy reappeared and asked "Are those your dragoons hanging around Vicenza in a panic?"
"Why, yes they are."
"Should I rally them?" he asked.
"If the Feldzeugmeister would be so kind and spare the time, I would appreciate it."
Off went the FZM and a couple turns later, he returned and noted they were ready to re-enter to the fight.
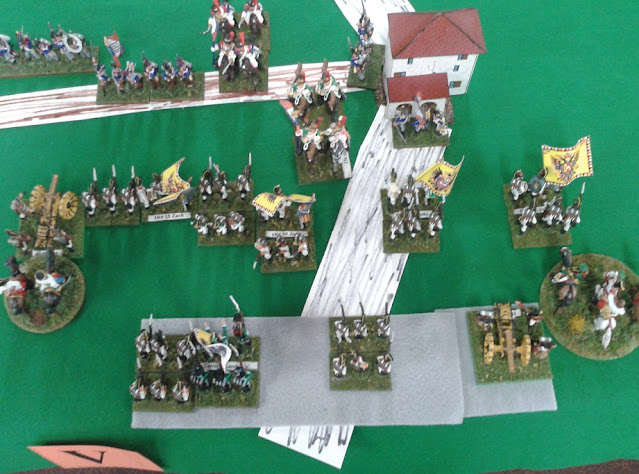
Montebello Captured
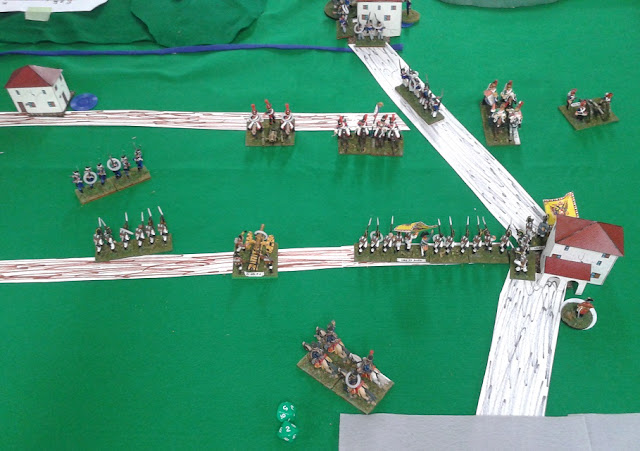
Massena, scenting blood, formed a line opposing the gap in the center of my line and also pulled the garrison out of Montebello and formed up against my right.
My reinforcing infantry plugged the gap and faced the French cavalry. More infantry countered his advance from the town. Massena did not hesitate -- he charged his cavalry and initiated firefights along the line.
My troops hung on. It wasn't easy or cheap, but after the smoke cleared and the losses tallied, the line held. The French cavalry withdrew and we both moved to rally some lads.
That's when I noticed that the French had left Montebello ungarrisoned. I had an extra infantry unit and so marched into the town and took it. I moved up my infantry to square off against his and started troops heading off my left flank -- although a French infantry unit and later a Cavalry unit countered my flanking efforts.

Lusignan's push captures Montebello!
By this time, I was bringing on most of my force, including the all-important second artillery battery on the open right flank. Mind you, this artillery, although rated veteran, proved to be worse than militia. I rolled two dice on an encroaching French infantry unit and roll two 1s, or a 1 and 2, and the very occasional 6+ that I needed to hit. I screamed at Pierre and Jean to load the powder first and then the cannon ball, but to little effect.
I charged the French line in an infantry vs infantry battle that see-sawed away as die rolls did what die rolls do. The French were slightly better quality wise, but as the battle went on, I kept adding troops because that magic quantity is a quality of its own.
Rey Arrives...Then Napoleon?
Somewhere in this tangle of firefights and melees, French General de Division Rey (Mark) arrived at the far end of the Montebello table at Verona, marching towards Rivoli. He saw the tight battle at Montebello and detached some units towards Montebello to aid Massena.
All of a sudden, my vision about quantity diminished as some of Rey's troops marched towards the sound of the guns. Verdammt!
If that wasn't bad enough, out of a side road popped Napoleon and cavalry marching through Arcole!
No doubt that was just the lead unit of another command of troops and it was close to my left flank. Double Verdammt!
I trembled, thoughts racing about how I was going to defend against two and a half French commands. How? How?
Rey's cannon and cavalry were heading to my right flank at Montebello, although I had a few turns before they arrived. Yet no wonder he only sent four units, because Napoleon was on the field and his cavalry was within two turns of contacting my left flank.
Ah-ha! Austrian Flanking Force
At this point, Austrian troops arrived deep in the French rear near Verona. It was Ocksay (Sean), come to save the day and Lusignan's (that's me) battered command.
Alas, it was only a single Austrian unit in the ZoD, but obviously the first of many.
Rey (Mark) reacted immediately and turned the remaining two thirds of his command to face the oncoming Austrians. Had Rey not been there, the consternation of Massena would be intense, caught between two forces.
Alas, Napoleon (Rob) must have divined something and Rey arrived in plenty of time to counter. That, by the way, is good strategic vision or plain ol' fortuitous timing -- my guess is that Napoleon's Bulletin will extol the former.
Ocksay, seeing the odds and the slow buildup of the small ZoD, withdrew from the table. Yet Ocksay's foray onto the Montebello table also delayed Rey from marching through to Rivoli. Indeed, Rey turned his force to the defensive to cover the main road. There he sat for a couple turns, until finding no Austrian advance, Rey packed up and headed to Rivoli.
Firefight Interrupted
Meanwhile, Massena's line held despite turn after turn of firefights. Then, just to the side of Montebello, a strange situation developed. Both our central infantry forces suffered ever escalating levels of disruption and neither one of us wanted to engage the other from fear of losing firefights and melees and leaving a hole in our line.
I could have charged out of the town in a perfect flank melee, although that would leave me open to a flank melee and leave the town uncovered. As it was, two French infantry units closed in on the town, but the stout walls turned aside all musketry.
By this time, both our reinforcements were a tad on the thin side. The fighting would progress on the flanks and sadly, I was seeing a massing of Rey and Napoleon troops in my future.
I sent a message to Bajalich seeking reinforcements via Vicenza, but the reply came that he could spare no men. It was looking grim.
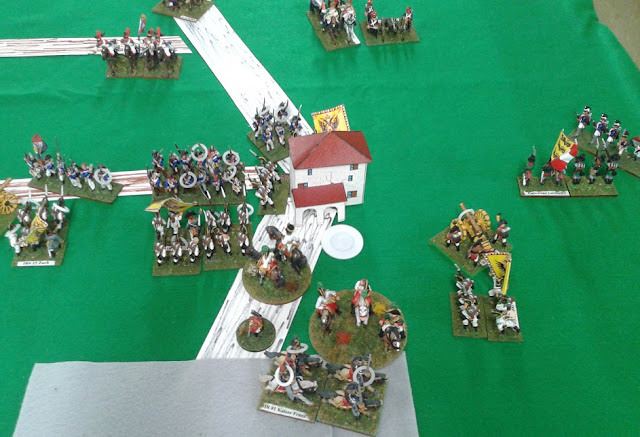
At about this time, FZM Alvincy returned and helped rally many of my units. If I was not whole, I was as close to it as I could be. (In Snappy Nappy, commanders can rally troops, but the troops cannot rally back to their pristine "Bold" status, only their "Firm" status. The only way to get back to bold is to be Firm and rout a unit in melee).
Rally Ho! Alvinczy contributes his charisma to the Austrian cause, whilst Massena pulls back for a breather.
A Fortuitous Reprieve
About this time, John and Adam appeared at tableside. They weren't playing, just stopping by the Portal, the wonderful game store whose tables we were using this day, as we have in all other Snappy Nappy Campaign in a Day events.
I chatted with them, explaining the Campaign in a Day idea, basic SN mechanics, and the situation on the table.
And then my so-so die rolls, including those for that loser of a right flank artillery unit, started to grind out multiple hits. The French started to roll poorly for their morale checks (saving rolls). Many a French infantry fled the line. It convinced Massena to pull back.
It was a bit maddening to see French units run because many only needed one more failed morale check and the unit would be routed off table and out of the game. Yet, that was better than them staying in the line. Oh, my most miserable units, the "Landwehr" (actually FreiKorps, but labeled Landwehr on the base) conscripts usually didn't stick around too long, routing away. Indeed, the French 12-pounder artillery unit on my right flank sent two of 'em packing back to Trente.
But Massena couldn't be everywhere to rally and slowly the French line collapsed and my troops, especially on the left flank, advanced. Napoleon had only brought that one cavalry unit. My fears dissipated with the near rout of Napoleon's cavalry back to Verona.
I curled my left around the French flank, sending infantry, cavalry, and artillery towards Arcole, which had been garrisoned. Massena had been pulling back his infantry to the town of Caldiero, about half way between Montebello and Verona. He and Napoleon tag-teamed rallying the troops just as I and Alvincy had, and spread them out on the hill in defense. That position would be tough to crack in my weakened state.
At about this time, Rey came marching back from Rivoli area, passed through Verona, and headed back to Legnago area.
At about this time, John and Adam left my table for a different table. Oh, no!
In My Finest Hour...
And just as my troops advanced, overran the French infantry rearguard, and my cavalry was poised to head off to the Legnago table, a stray ball from a French horse artillery battery killed my horse from under me. I fell to the ground, wounded. My aides rushed me back to Montebello so a doctor could tend my wounds. I was out of the battle.
GM Lusignan being seriously wounded, a lesser light takes over command of the Austrian Division.
Commander Casualties
In Snappy Nappy terms, when a unit with a Leader attached rolls the d10 for morale and rolls a natural 1, the Leader Loss Table is consulted. Another d10 roll determines the fate of the commander. I rolled "Wounded: Remove," which means the commander is removed from play for a turn and replaced with a commander rated as "0" -- providing no bonus for morale checks and rally rolls.
Alvincy survived a Leader Loss roll with nothing more than a hole in his coat.
Game End
Time was called at 4:30, so call it five hours (11:30 to 4:30) of actual troop pushing and die rolling.
I had no idea what was happening on other tables, which is how it should be -- you never know what's coming on table on your flank. I suspect Ocksay's arrival near Verona came as a surprise to Massena and Rey just as Napoleon's arrival at Arcole came as a surprise to me. I also suspect Ocksay's one peek did more to disrupt the French than Napoleon's one cavalry unit did to me.
I held the field at Montebello and was driving towards Caldiero, so I consider that a narrow Austrian tactical victory. I had lost all three Landwehr (FreiKorps) infantry units (conscripts), one regular infantry unit (Seasoned), and one Hussar cavalry unit (Veteran). Three of the six remaining regular infantry units had rallied, but were one level down (Firm) from their original pristine (Bold) condition.
Oh yeah, and I, Lusignan, was reclining in Montebello, wounded and out of the fight.
From the debrief, the Austrians squirted out a narrow victory, but I will wait upon Umpire Peter's all-encompassing overview of the Campaign in a Day.
I had a blast, gamed with some new gamers, met some new gamers, and as always, was definitely worth the trip.
Sounds like you all had a great time and the whole campaign in a day is a brilliant idea.
ReplyDeleteMore to come, but yes, we had a great time, and these events are special! This is our 7th time running one, so at this point we have the process pretty well down.
DeleteAs you say Peter, you have these running like clockwork now. Always an entertaining read.
ReplyDeletePerhaps not clockwork for sure, but the basic principles and method are now well established.
DeleteMassive amount of work and an awesome read!
ReplyDeleteBest Iain
Glad you enjoyed it!
Delete