Rheinbund and Polish Infantry advance a little more cautiously. There area LOT of Spanish infantry opposing them, supported by batteries.
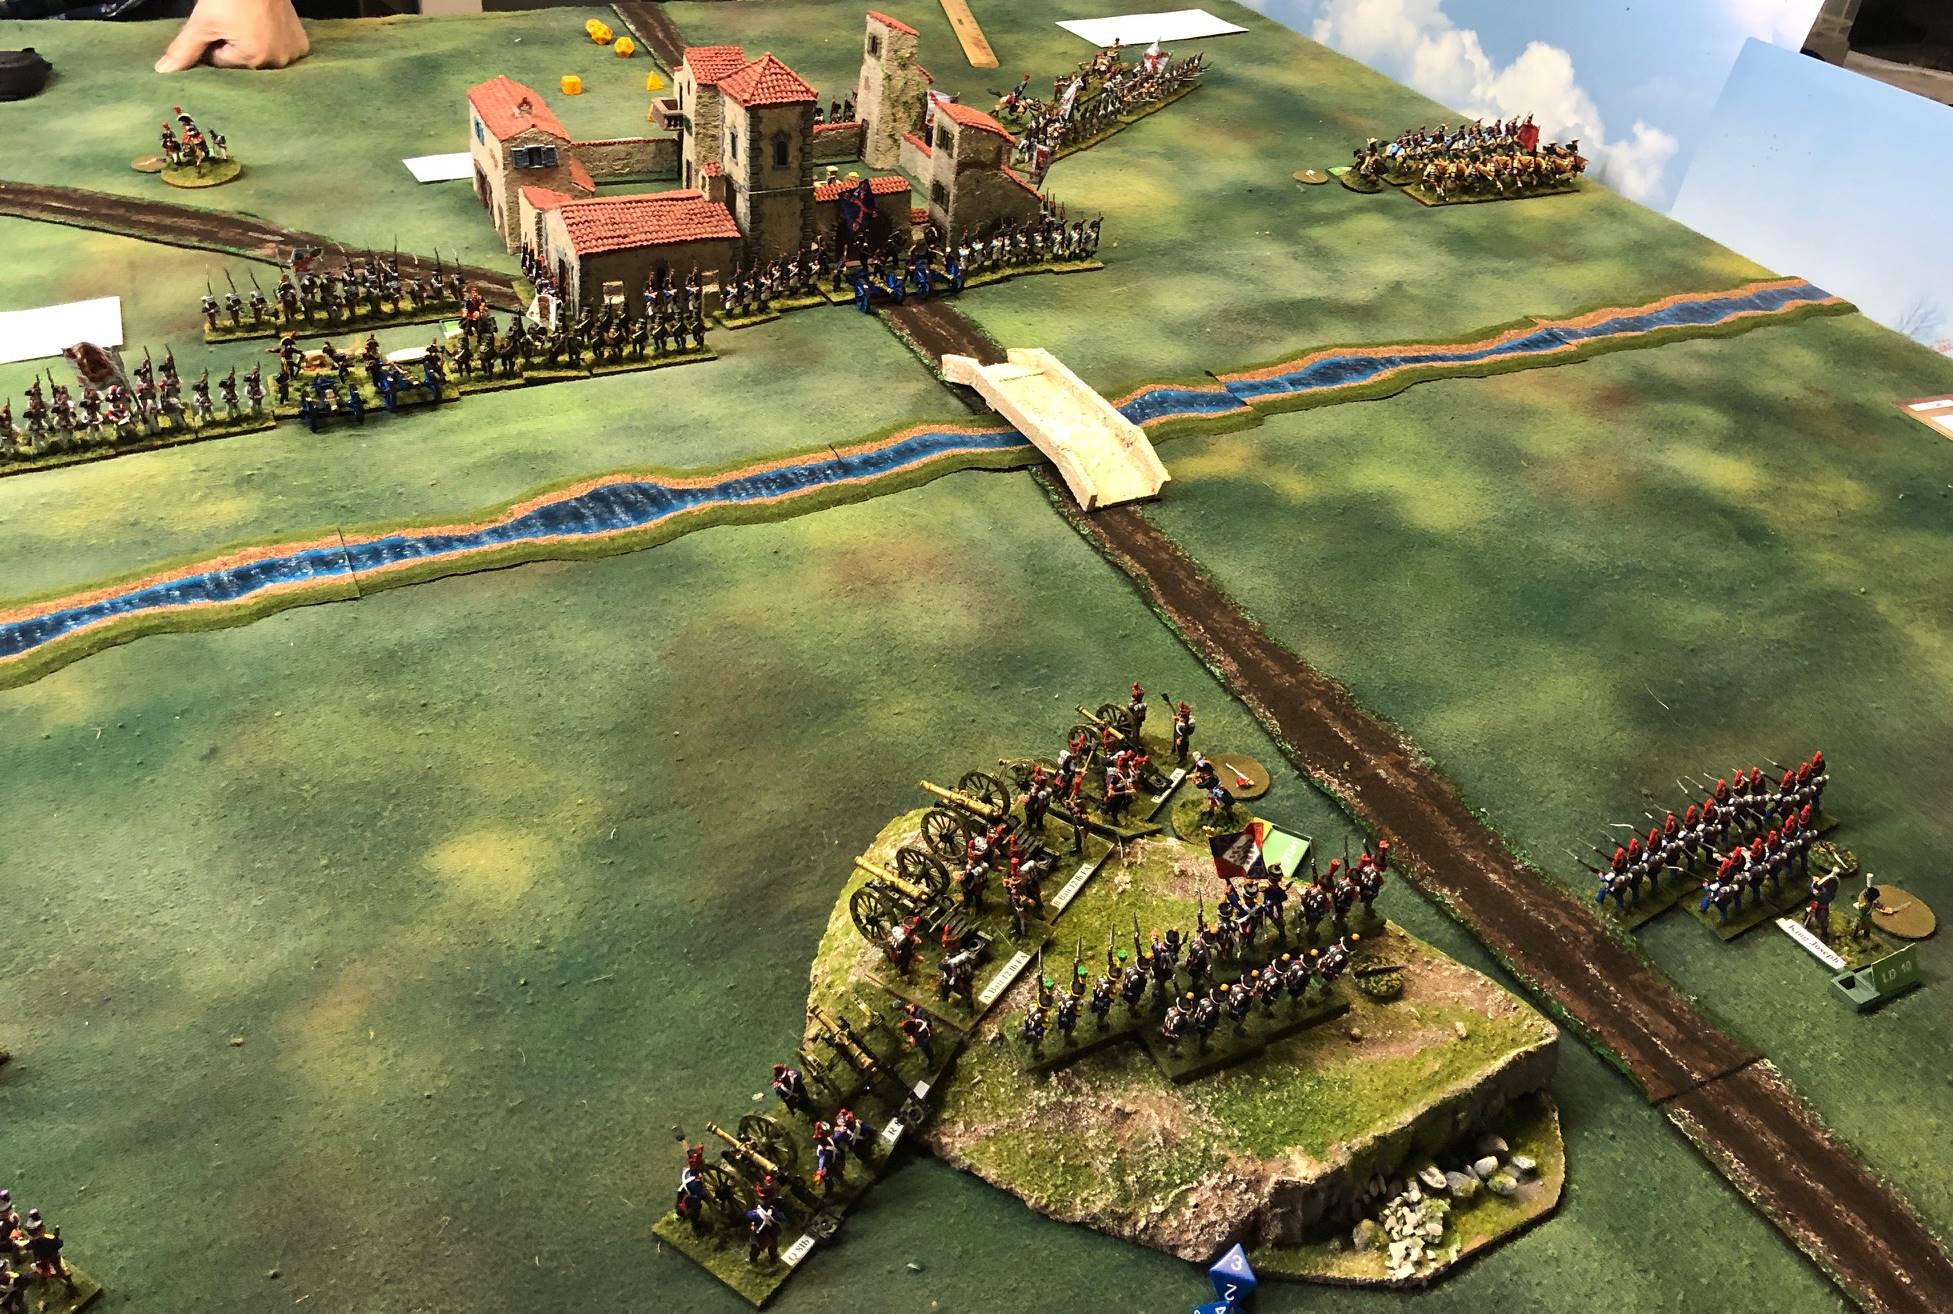
Senarmont's Grand Battery. The French right appears somewhat vulnerable, with very few troops in support, and no French cavalry to be found.
.
Rather than try to seize some advantage by charging first, the Spanish cavalry backpedals instead, probably wisely.
The Spanish left wing infantry and cavalry advance to the edge of the river. Senarmont reorients his guns in response.
As the Spanish cross the river, Senarmont reorients his guns again, and the scant supporting infantry, including king Joseph's Royal Guard, form protective squares.
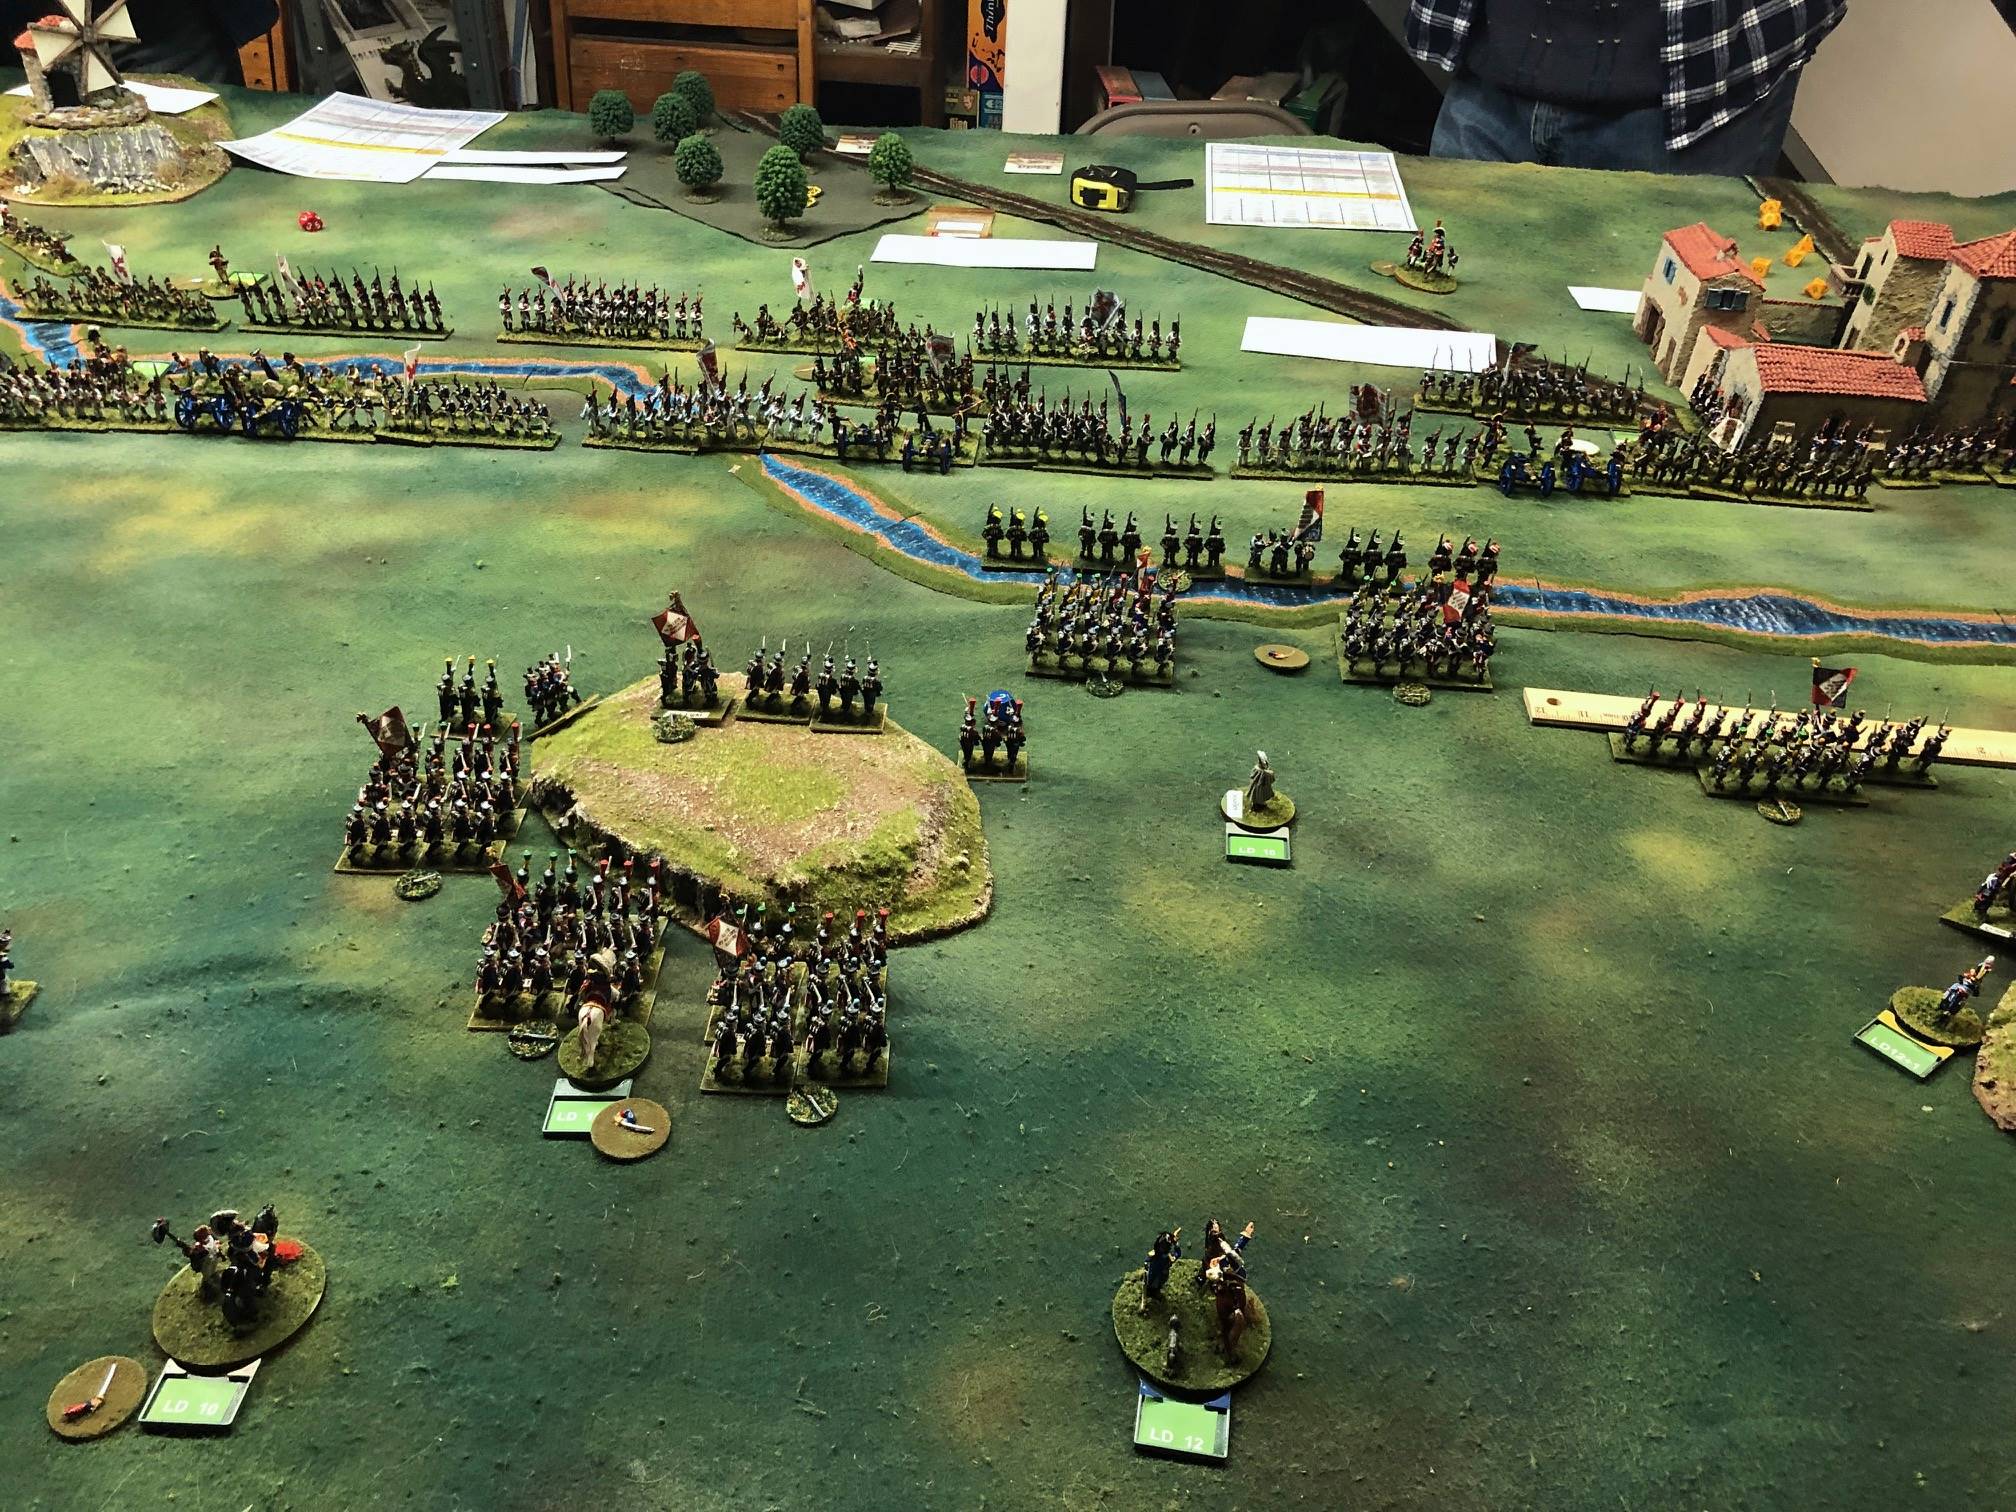
Overview of the center; the LD12 French command group has rolled a "1" for movement twice in a row!
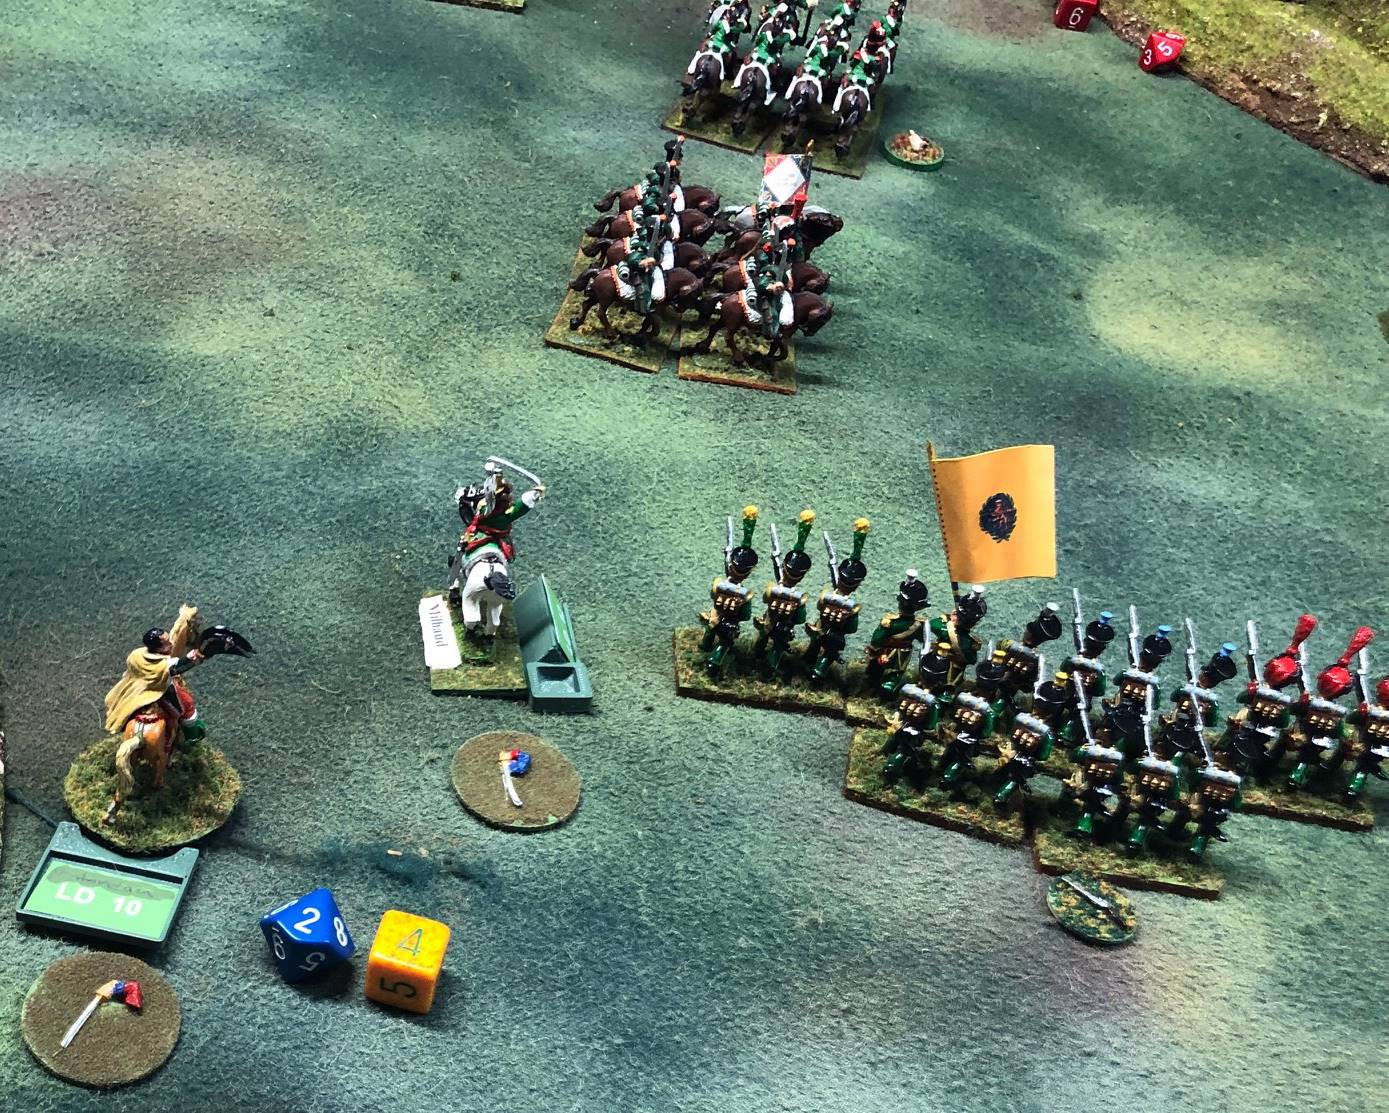
Developments on the French left; the outclassed and poorly led Spanish cavalry is being pushed back, but the Spanish infantry seems made of sterner stuff!
Piecemeal advance by the French in the center; they may be biting off a bit more than they can chew here, eh?
Situation on the French right; Senarmont's vaunted grand battery has underperformed thus far!
The French cavalry continues to press and push back the Spanish horsemen, albeit not without some reverses! Note the Hessian unit (my older figures, in Shakos for Spanish service), routing towards the table edge; they never did rally and continued running all the way back to Madrid!
Developments on the French left center and left, cavalry charge have handled a couple of infantry units roughly! The "French" infantry seems incapable of accomplishing much, however!
French advance in the right center; the Spanish are giving better than they got, routing 2 French infantry units!
Combat around Ocana; Senarmont's battery has started to find the range and is doing dammage to the Spanish far Left.
Infantry firepower; General Leval is hit!
The Spanish cavalry is progressively melting away, but their infantry continue to perform quite well! Some even venture to take the fight to the battered enemy infantry!
Overview of the Center; the French line is looking pretty fragile!
Senarmont's guns inflict light damage on the opposing Spanish cavalry, driving them back across the river.
Around this time (12:30 with a 9 AM start), Jared had to leave, so command of all of the French forces fell to me. Also around this time, the French ran out of Morale points... just after turning an ARMY MORALE card.
Overview of the Spanish Center and right; the Spanish have about 10 Morale Points remaining.
The French infantry comes in for more pounding by Spanish infantry and artillery, and the French start paying the Spanish Morale Points!
Only 2 units of Spanish Cavalry remain on the Spanish Right, and they are backed up to the edge of the table. The Hussars face off against a plucky Spanish "Guerilla" unit; we ruled that these very hastily raised troops could NOT form square. In the event, it never really mattered.
The battered French infantry decides that discretion is the better part of valor, and begin a strategic withdrawal in the center,,, not always voluntarily!
Near Ocana, frustrated with the poor performance of his guns to date, Senarmont executes one of his famed Artillery advances, closing the range to his targets! A second Spanish infantry unit is dispersed by artillery fire!
Around this time (2:00 PM), John and Thomas had to leave in order to join their families later for the New Year's Eve festivities. The next several photos are overviews of the battlefield at that point.
The French are prevailing on the flanks, thanks to their superior cavalry and artillery, but their infantry is having a pretty Bad Day!
Close up of the mess in the center from behind the Spanish lines.
The Spanish right is looking very precarious, however!
At this point, both sides had one card left to play, and the Spanish had 4 Morale points remaining, whereas the French still had zero; this had been greatly hampering their rallying attempts!
Complete Spanish units lost thus far (includes any that retreated off the table)
French units lost thus far. The following day, I finished the battle solo. That gave me the chance to tjke some explanatory photos to illustrate some points about game play.
The Spanish won the initiative for once, and turned their card a LULL.
As there was only one more card remaining, and that with the French, it didn't matter what the opposed roll was, but in the event the French card was a LULL as well, ending the turn. Well, as it turns out, we could have finished the turn together in about 60 seconds or less! :-)
Speaking of Decks (and Turns), that's the first major area where Battle Command differs from Field of Battle. The entire deck for each side now consists of only eight (sometimes nine) cards. There are 5 Action cards, namely ARTILLERY FIRE, INFANTRY FIRE, LEADERSHIP, MELEE, and MOVE,, 1 Modifier card, TACTICAL ASVANTAGE, and 2 or 3 Trigger cards, namely LULL, ARMY MORALE, and sometimes, a SPECIAL EV ENT (9th) card.
The possibilities for the Special Event card are almost unlimited, but the rules lists many possibilities. Special Events defined in the rules include (uncontrolled) Advance, (low on) Ammunition, Cowardly Retreat, Fanatic Action (often used for speedy Native advances in colonial era games), Frenzied Charge (likewise), Ragged Fire, Rash Advance, Reinforcements Arrive, Resolve (a sort of Morale test within a certain distance of the enemy determined by the enemy Defense Die type - I could see this being really useful for future Ancient, medieval, and/or Renaissance variants, or applied to, say the French Old Guard infantry), Sneaky Heathens (move for Natives, placed in the European's deck!), Sniper (target enemy leaders except the C-in-C; we used this card in a classic Piquet American Revolution game years ago), Timid Advance, and Wild Card. Although not included, weather eventas would be another obvious use - the snow at Friedland, the thunderstorm at Znaim, the ground drying out at Waterloo, etc.
It is interesting that Jared and I had had a discussion some time along these lines, i.e. breaking up the sequence deck into 3 sub decks to slightly lessen the potential asymmetry, should, say, all of a sides MOVE cards be at the bottom of a 20+ card deck. It certainly makes setting up the deck at the start of a game easy-peasy! Custom cards for Battlefield Command will be available (and you'll see below why you might want them), but really, you can do perfectly fine using the cards from any previous edition of Field of Battle. Color images are provided in the rules for printing your own cards, which would be easy enough as well!
Obviously, with a deck of only 8 cards, rolling the opposing C-in-C Leadership dice and applying the difference would be even more radical, so Battle Command (? BatCom for short) uses a new system. The enemy C-in-C's still roll their opposing Leadership dice and compare the results, but they are interpreted differently:
1) if the rolls are TIED, the decks are immediately shuffled, and any unused TACTICAL ADVANTAGE card is lost back into the deck; this happened twice in our game!
2) If the winning die roll is ODD, then both sides get one card; the winning side choses whether to act first or second.
3) if the winning die roll is EVEN, then both sides get two cards, with the winning side once again choosing whether to act first or second with both cards.
In the event at the start of the new turn, Marechal Soult won the Initiative roll, and his die roll was EVEN. That left Soult with some thinking to do! With just 8 cards in the deck, there was a 25% chance of turning an ARMY MORALE Card. With no Morale Points left, that would mean rolling his LD12 against an opposing D12, having to win to continue the fight, which Soult believed he was in a position to win if his army did not lose heart. On the other hand, giving the initiative to the enemy meant they might turn their ARMY Morale card before Soult had a chance to bring them to zero AMP, plus they'd have the opportunity to inflict more losses on his Army, regaining more AMP's themselves. In the end, it was really no decision at all. After all, the Emperor himself always asked of a general, "Is he lucky?"

The French turn their first card of the new turn. It is a LULL. This card is played and acted upon exactly as in Field of Battle. Merde! Better than ARMY MORALE, but now the Spanish have the opportunity to seize the initiative and play a card of their own before the French can act! Fortunately, Soult rolls a "6" on his D12. Aréizaga rolls a "6" as well on his paltry LD8. As he failed to beat Soult's roll, the card has no effect. The French have one card left to play.
Soult Turns his next card; INFANTRY FIRE. Now we come to the heart of what makes Battle Command different from Field of Battle. When an Action card is turned, both sides roll the Leadership Die of their C-in-C, in this case a D12 for Soult vs. a D8 for Aréizaga. The result is compared to a Matrix included on the QRS (and the BatCom specific cards):
A) If the side with the initiative rolls a ONE, then the card is applied to all commands in the Army, with no options, essentially as per standard Field of Battle.
B) If the side with the initiative loses or ties, but does not roll a one, then the entire army may act on the card as usual, OR just ONE command can chose the one listed alternative, which varies by card, and the rest of the army will do nothing.
C) If the side with the initiative wins the roll by 1 or two, they will again have the primary action shown on the card, plus the same alternate action as the above. Win by 3 to 5, and their will be two available secondary actions. Should the side with the initiative win by 6 or more, then there will be three secondary actions available.
Finally, in case C) only, if the winning die roll is ODD, the side must chose the primary or one of the available secondary actions, and apply it to ALL of the commands in the Army. If, on the other hand, the winning roll is EVEN, then each command in the army may choose and act upon any of the available actions, and each command can choose their own option. Obviously, if you have ever played Field of Battle, the option of such a choice can be huge! However, each command can still only perform ONE of the available actions per card regardless.
In this case, Soult can choose to either apply INFANTRY FIRE to all of his commands, removing "smoke" from any of his units that have "fired" and are waiting to "reload", or apply the listed secondary action, which in this case is LEADERSHIP. Soult has quite a few infantry units which can reload, but his infantry commands are battered with routing units at risk of leaving the table soon, so he chooses LEADERSHIP and applies it to one of his infantry commands. He fails to accomplish much of anything with the additional DOWN 1 to rallying attempts for being at zero Morale Points (Soult very probably the wrong choice!)
The initiative passes to Aréizaga. he turns his first card (of 2), and turns his own LULL card! Soult seizes the initiative with his roll of 11 vs 2 for Aréizaga. "Via al Diablo!", he curses .
Soult, having seized the initiative, turns a card, "Artillery Firepower (not shown). He rolls a "1" on his LD, and thus can only apply that card to his entire army. Only Senarmont's Grand battery has artillery units anyway. With his guns fully loaded, Soult takes a chance and orders Senarmont to Fire, reload, and fire with all batteries, as he desperately needs to reduce the Spanish Army Morale to zero ASAP before he or they turn the ARMY MORALE card.
For 6 shots, the results are somewhat less than hoped for; still, one each Spanish infantry and cavalry units are forced back in Disorder, and the Spanish surrender 2 Morale chips, leaving them with just 2 left.
Situation on the Spanish Left after the receive the French artillery Fire. The flipped marker by the general is reminder to check for Leader survival whenever the ARMY MORALE card is turned by the Spanish. The initiative returns to the Spanish.
With a tied die roll, Aréizaga can chose to act upon ARTILLERY FIRE with his entire army, or the listed secondary action, in this case INFANTRY FIRE, with just one command.
Although he has quite a few "unloaded' infantry, he has 4 unloaded batteries, and thus Aréizaga chooses to reload (and then fire) all four batteries, rather than simply reloading the infantry of just one command.
Only one Spanish battery manages to score a hit, forcing back a French infantry unit with 1 UI loss; the Spanish regain 1 Morale Point, and now have three.
The French infantry unit is now severely battered with 3 UI lost, and their commander will need to test for survival when the next ARMY MORALE card is turned.
That ends the initiative, and Soult and Aréizaga dice off; in the event Soult wins again, and also rolls even, so both sides will get 2 cards to play. The odds that one of them will be an ARMY MORALE card for either side are now even higher. "L'audace, toujours l'auadace" advises the Emperor. Soult will act first.
Soult turns a MELEE card, and wins the roll off by 3 and EVEN. This roll needs a name, and I suppose "Matrix roll" would be sensible, but we decided to name it the "spectrum" roll, by which you see what the spectrum of actions available to the commander will be. It also refers to the colors associated with the various actions (Red - Melee, Orange - Infantry Fire, Yellow - Artillery Fire, Green - Leadership, Blue - Move). In this case, in addition to the primary MELEE option, Soult has MOVE and ARTILLERY FIRE as available secondary options. Because he rolled EVEN, he can apply his choice individually for each Command Group! Things are looking up for the Marechal!
For Senarmont's Grand battery, he chooses ARTILLERY FIRE (Duh!). Firing together, the three batteries only manage a single hit, forcing the Spanish Cavalry further back. The Spanish are down to 2 Morale Points, however.
Here we come to a small change from Field of Battle. Routed units, after their initial move, just move one standard move segment for their type each time. However, any time that MOVE is an available option, regardless of whether any command uses it or not, ALL routers on that side must move.
This routed unit had already halted at the table edge, and has not been rallied, so it screams "Sauve qui peut!" and runs off the table. There are no additional Morale Point losses to the French for doing so, however.
Unable to use MELEE or ARTILLERY FIRE, MOVE is applied to this Rheinbund Division. That is done just as in FoB, so this roll means the command has 1 MOVE segment (8"), with "fancy business", i.e., one such segment can be used to change facing or formation.
The Light Cavalry Division acts on a double MOVE, but does not roll even, and thus cannot initiate Melee.
The Heavy cavalry Division acts on a triple MOVE, but again fails to roll EVEN, and thus cannot initiate any Melees.
Situation after those Moves.
French Infantry Division rolls a Triple Magic Move...
and uses it to pull back. Soult feels the battle will be won this day by his Cavalry and Artillery.
Overview of the center from the Spanish side afterwards.
Soult turns his second card, and it is Leadership. He does very well on the Spectrum Roll; winning by 7 and EVEN; this means that each Command Group can use its choice of Leadership, or one of three secondary actions - MELEE, MOVE, or ARTILLERY FIRE. Soult chortles with glee at the possibilities!

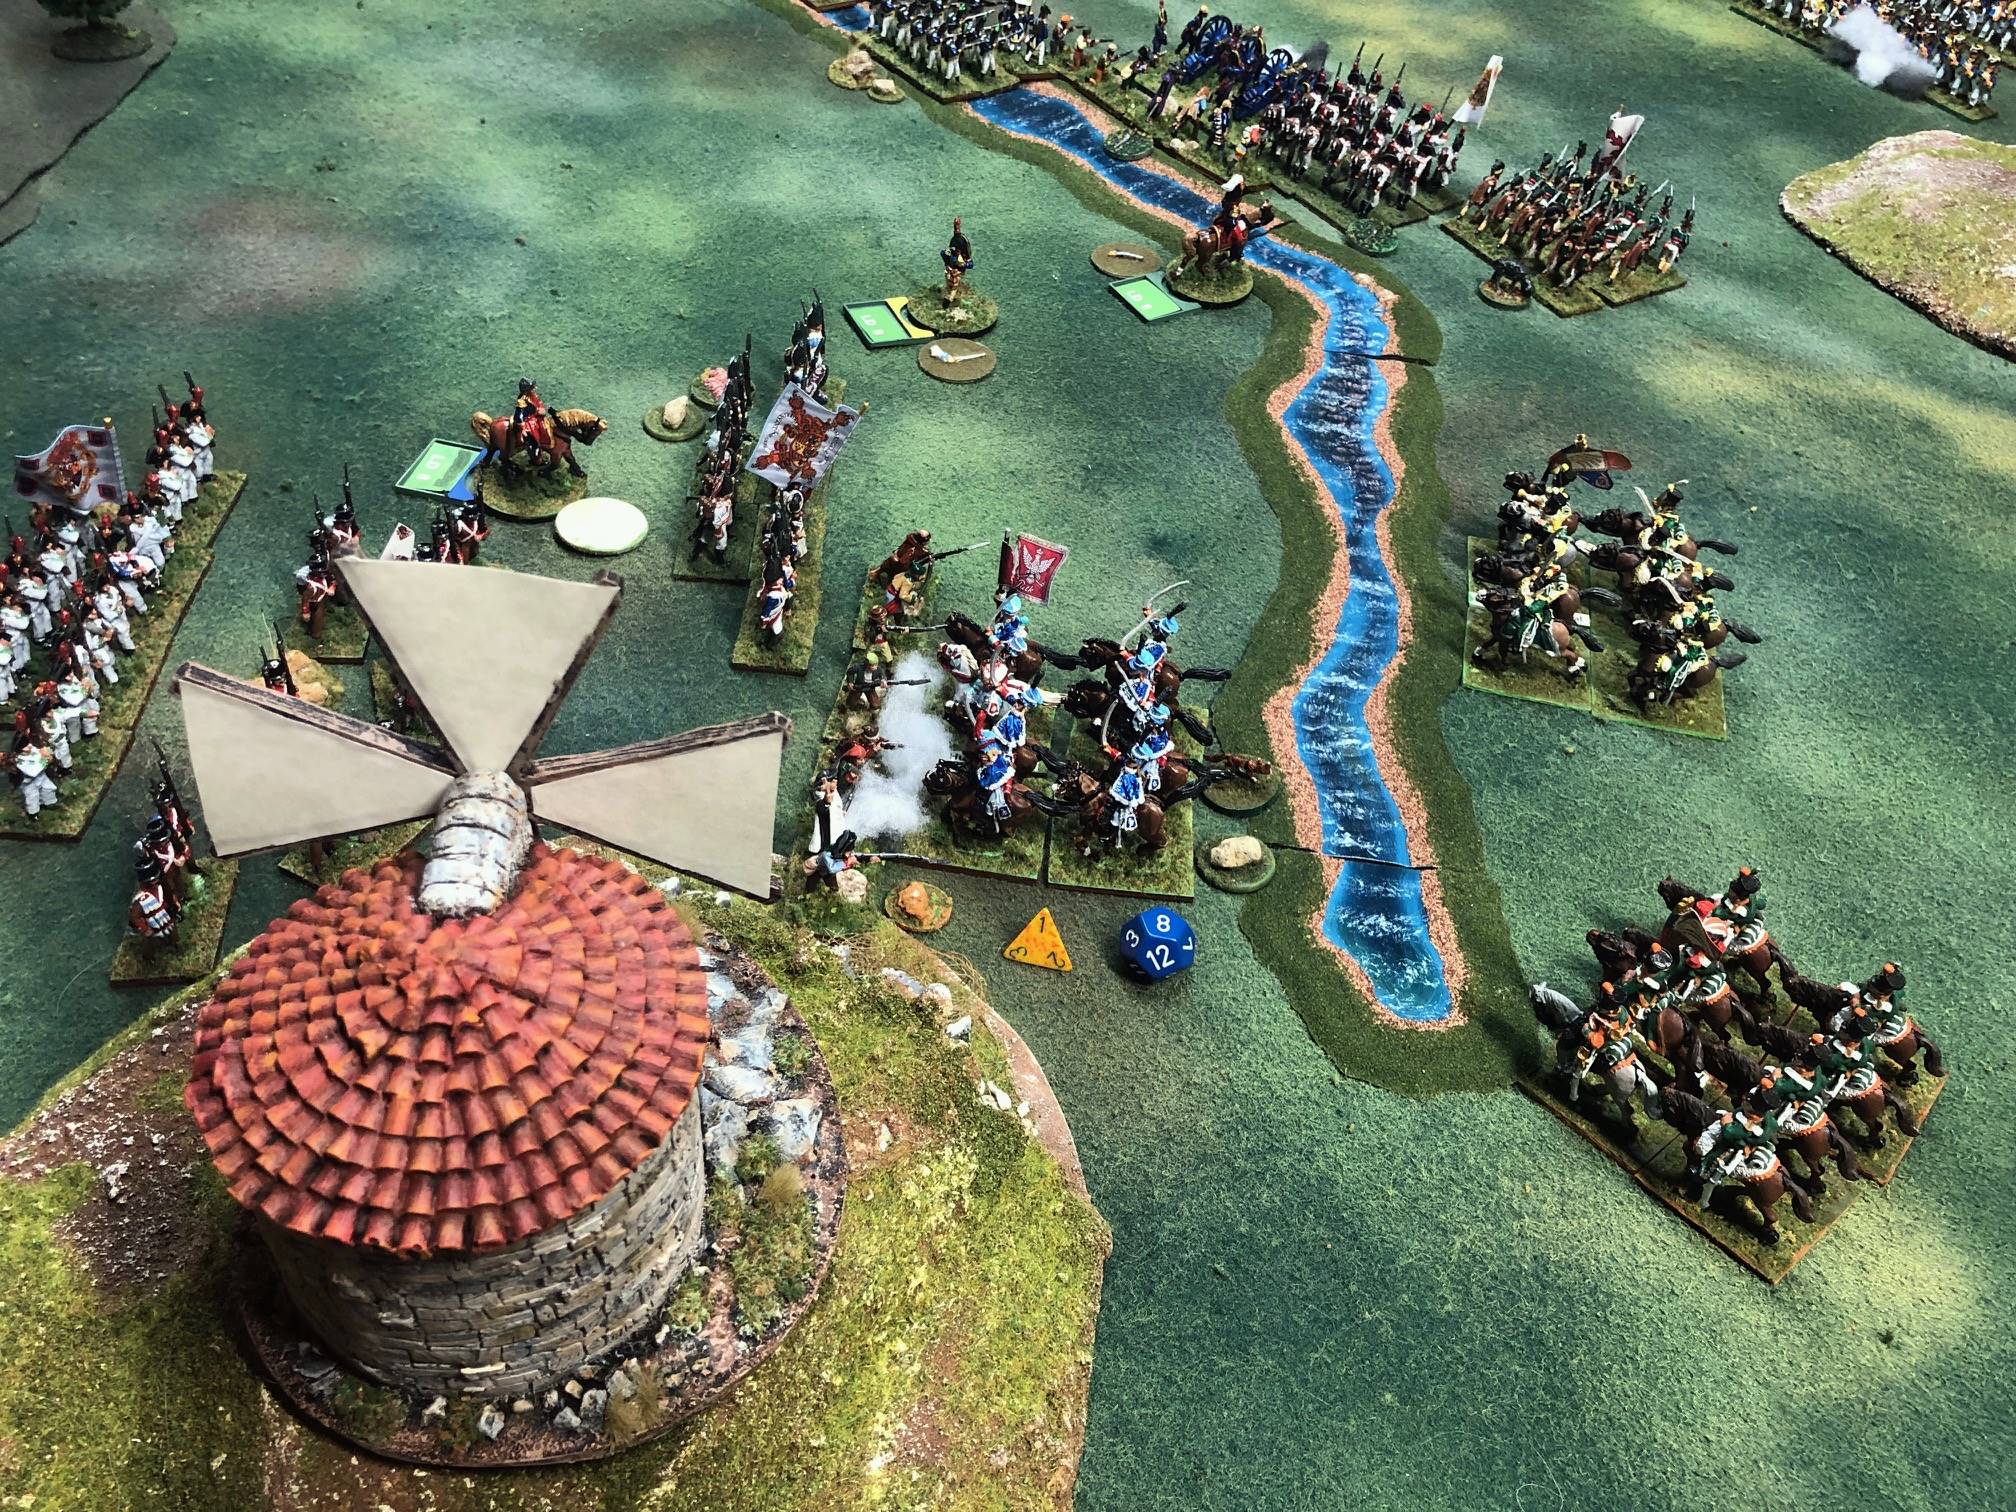
The Heavy Cavalry Division obviously chooses MELEE. with one Dragoon unit already in contact and set for a highly advantageous melee, and the other just a few yards away from a flank attack! The flank attack is worked out first. The Spanish have a chance rolling a D10, but cannot inflict any damage in the first round due to being attacked in flank. The Dragoons roll a D12+3, and don't even need the plus, rolling a 12, while the Spaniards roll a "3". The difference of 9 causes 3 UI loss to the Spaniards, which is all the unit can take, and it is eliminated. Better still, the Spanish are now down to zero Morale Points, and have to pay the French one in addition! No longer at Zero MP'/s Soult breathes a sigh of relief. Having rolled EVEN, the Dragoons opt to advance to take the position previously occupied by the dispersed Spaniards.

Next the second Dragoon MELEE is carried out. With the Spaniards being both disordered and down 2 UI, they roll only a D4, as opposed to the French D12+2; only a miracle can save the Dragoons, and that doesn't happen, as they roll a 4 to the French total of 7; that inflicts 1 UI, and the Dragoons retreat off the table. Having rolled ODD, the Dragoons cannot follow up, but the French Morale raises to 2 points!
For the Light Cavalry Division, Soult considers choosing MOVE, but unless the LD wins and is even, the cavalry will not be able to melee. The somewhat battered hussars are already in contact with battered and very inferior Spanish Guerilla (local militia), so MELEE is is. The tired Hussars still roll an 8on their D12, whilst the Spanish roll a 1 on their D4! The Spanish are routed back 7" and lose 2 UI; rolling EVEN, the Hussars advance to take the position formerly held by the infantry. The Frtench are now up to 4 Morale Points!
Situation on the Spanish right after the three cavalry charges - not looking very good, although a unit of Spanish Grenadiers is nearby the Hussars, they are not in good shape either.
Senarmont's guns of course choose ARTILLERY FIRE, scoring 2 more hits on the Spanish Maria Luisa Hussars (the famed, "Run Away Marys!"), routing them with an EVEN roll, and one hit on the Spanish 12 lber battery, also Disordering it. French Morale Points are now up to 7!
With MOVE as an option, these Routers will have to retreat off the board. Senarmont chooses LEADERSHIP for this Division, but the rally attempt fails (now no longer with the penalty for zero Army Morale Points), and they scurry off the field.
Soult uses LEADERSHIP for the other infantry commands as well, and a number of hits and disorders are rallied off this time. Looking better and better!
Situation on the Spanish left at the end of the French initiative; Aréizaga will now get to act on two cards.
He turns ARMY MORALE and groans. He manages to pass the Army Morale test, rolling a best possible 8 against a 3 on the opposing D12. He considers fighting on, but with his right flank in shambles, and 6 French cavalry units waiting to exploit that fact, Aréizaga decides that enough is enough. He has given the French a pretty bloody nose, and it is more important to preserve the Army for another day thtn to fight on at long odds; he concedes the battle and orders a retreat. the French have achieved an impressive come from behind win, thanks mostly to their superior Leadership, fine cavalry, and Senarmont's Grand battery.
As the final action of the game. General Zayas is struck by a spent cannon ball.


.jpg)


What a fantastic looking game, Peter....I will be using the images of your Spanish buildings and windmill for inspiration in creating my 20mm terrain, so thanks for that!
ReplyDeleteThe game seemed quite a struggle for the attacking infantry and perhaps in retrospect the Spaniards were too good, given they outnumbered the "French" quite significantly? Of course, no one wants to play a totally one sided game, so it was reasonable to give the defenders a chance.
Considering the degree to which the French infantry was outnumbered and the Morale Point advantage they had as a result, the game could have gone either way. I initially gave the French 30 morale points, but as we played it seemed that would be too many, so i cut it down to the standard 25. At this point, much of the original Spanish Royal army was intact, and most of the French and allied troops in Spain honestly were second rate. I did rate the Spanish Cavalry fairly poorly, which definitely showed, and rated the French Artillery as better, unit per unit. Their big advantage was better Leadership, and with these new rules, that really matters!
DeleteThe buildings are by Hovels, and they are gems!
Well, I don't want to come across as disappointed, but I really thought the Spanish had it there for a while. A lovely game Peter.
ReplyDeleteThey came very close, and it could easily have gone the other way!
DeleteInteresting AAR with definitely absolutely NOT FOB4 :-)
ReplyDeleteNot much change to core rules (a few less UP2 in firing/melee) with another option for optional Pursuit. I like new Evade process.
BUT the command system is very different with only the 8 (9) cards a max of 2 Initiative and the secondary actions leading to a rather different set of changing decisions. Hope to give it a proper run out soon.
I agree with your observations, Garry. The sequence decks size and composition, and especially the Actions Matrix are the key changes. There are others as well, but those two are the big ones.
DeleteI think it is a definite step forward in many ways. I presume Brent will be using the same skeleton for other eras in the future. There is certainly no reason that can't work!
Ancients, Renaissance and WW2 mentioned for system.
Deletesounds right!
DeletePeter, as always a good example of how the game mechanics work. The table is very impressive and it is a joy to see your Spanish faction out and played.
ReplyDeleteHopefully the write up of the solo play part of the battle conveys the gist of the rules, especially for those who are already familiar with Field of Battle.
DeleteI love my Spanish army! It probably gets a bit too raw of a deal, due to the British in particular downplaying its role and performance. It had its problems, for sure, Leadership being a big one, but without it, neither the Guerillas nor the British could have prevailed in the Peninsula long term.
Wonderful looking game. Interesting to read about how the cards are being used.
ReplyDeleteThanks, Peter. It was a very fun game as well!
DeleteI am using the cards from Field of Battle, which work perfectly fine, but the dedicated cards for BatCom have the Matrix for that action printed right on them.
Excellent report, Peter. Thank you.
ReplyDeleteI immediately ordered the rules and cards. Bat Com, love it
Glad you liked it, and hope you enjoy Bat Com (much more interesting sounding than "BC", eh?)
DeleteCan't be beat.
ReplyDeleteI would agree, but preaching to the choir, of course!
DeleteGreat looking game. Thanks.
ReplyDeleteHappy you enjoyed it!
Delete